Hillerberg ANJAN 2 Tent
Test & feedback of the HILLEBERG ANJAN 2 tent
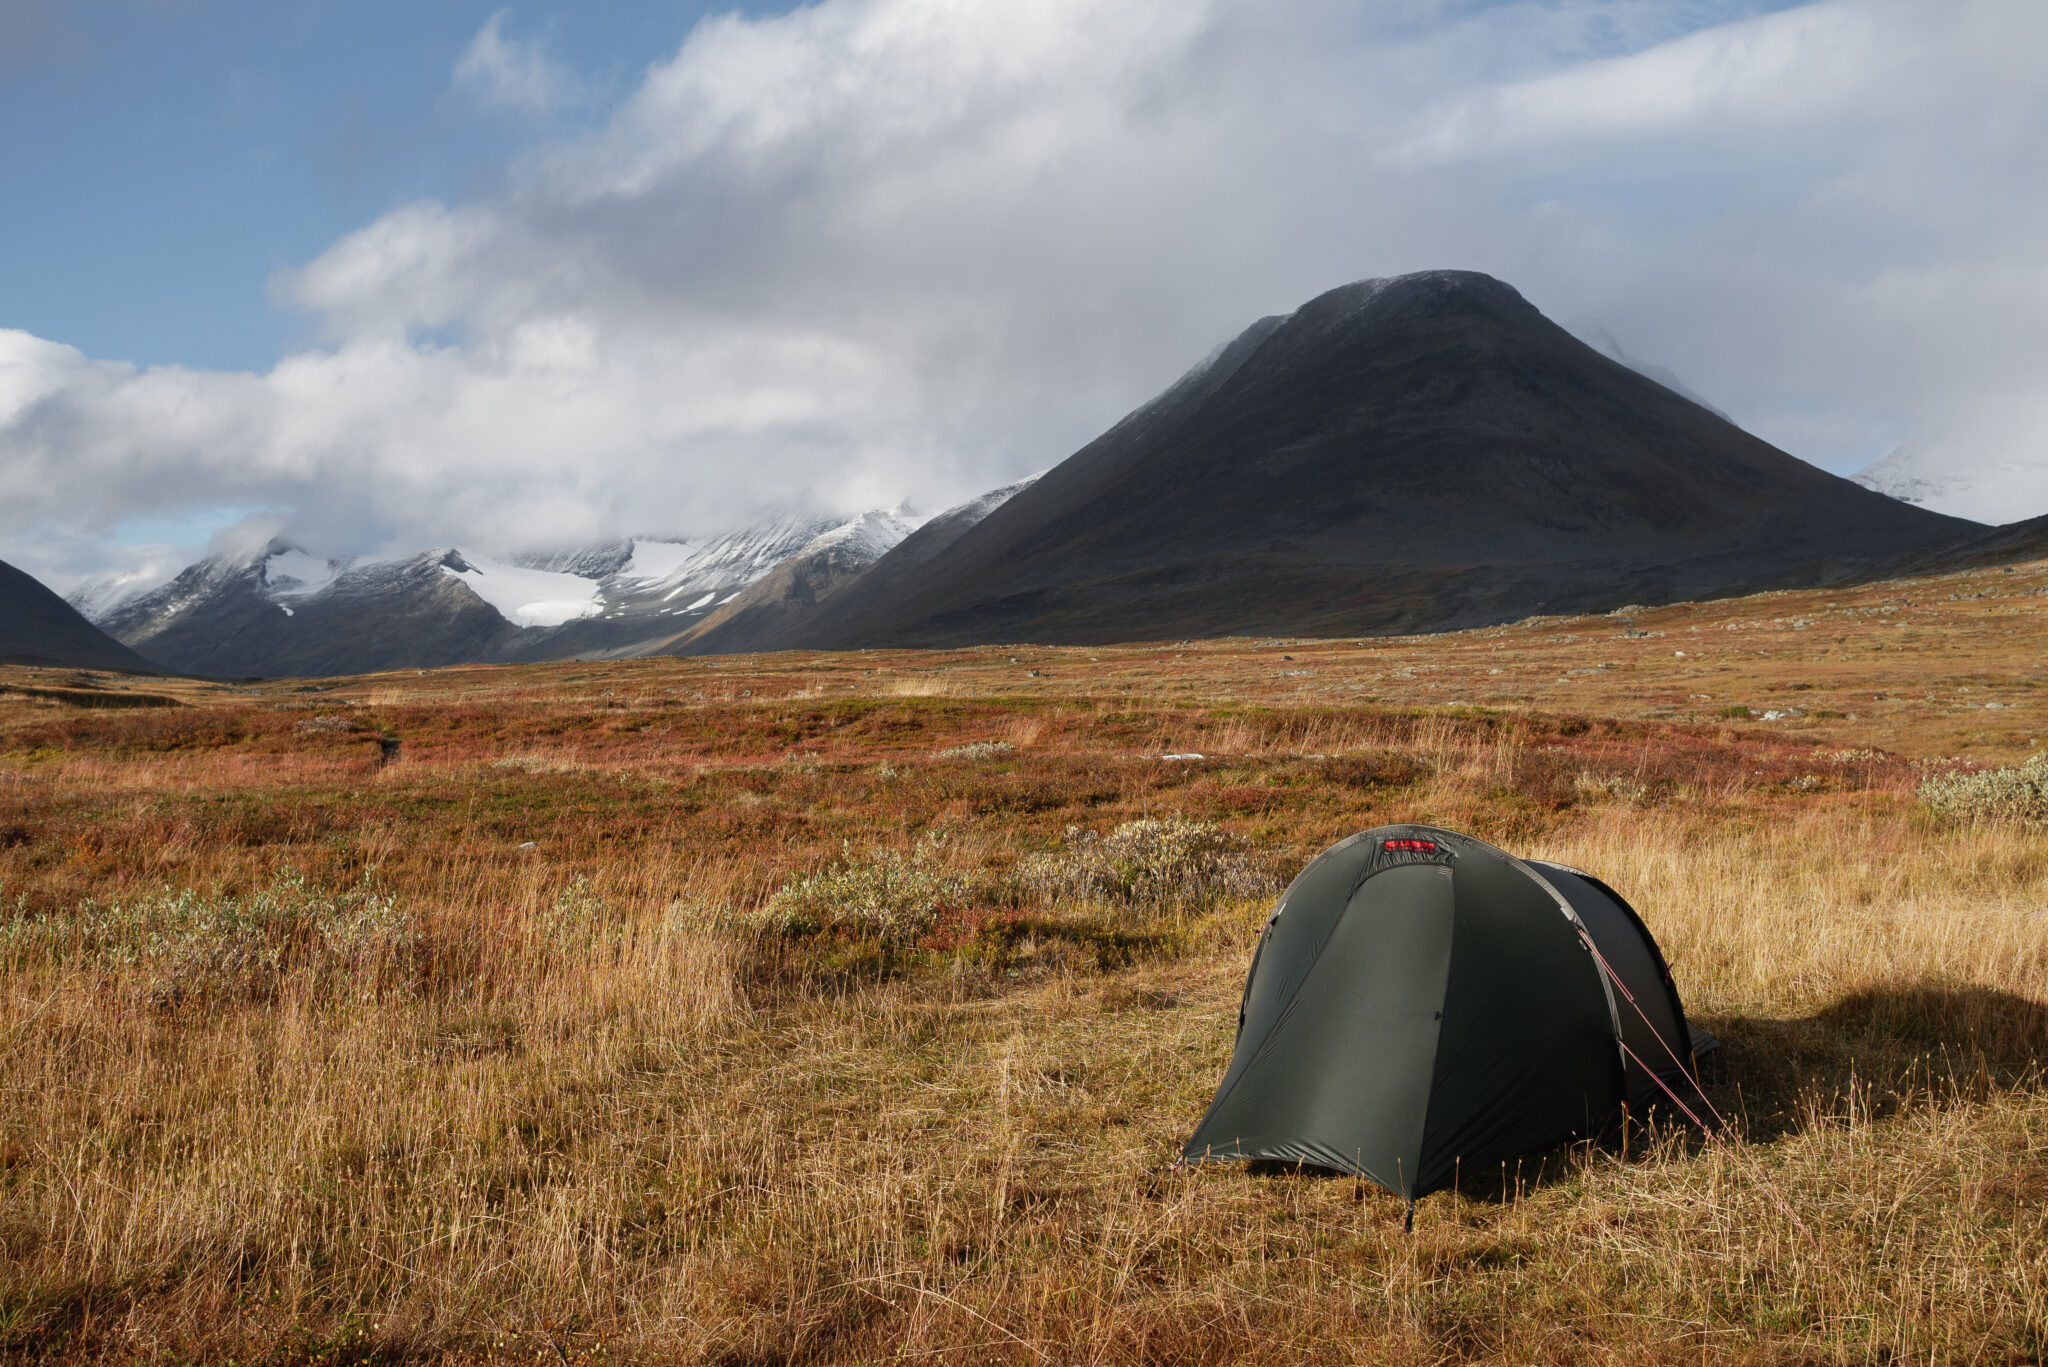
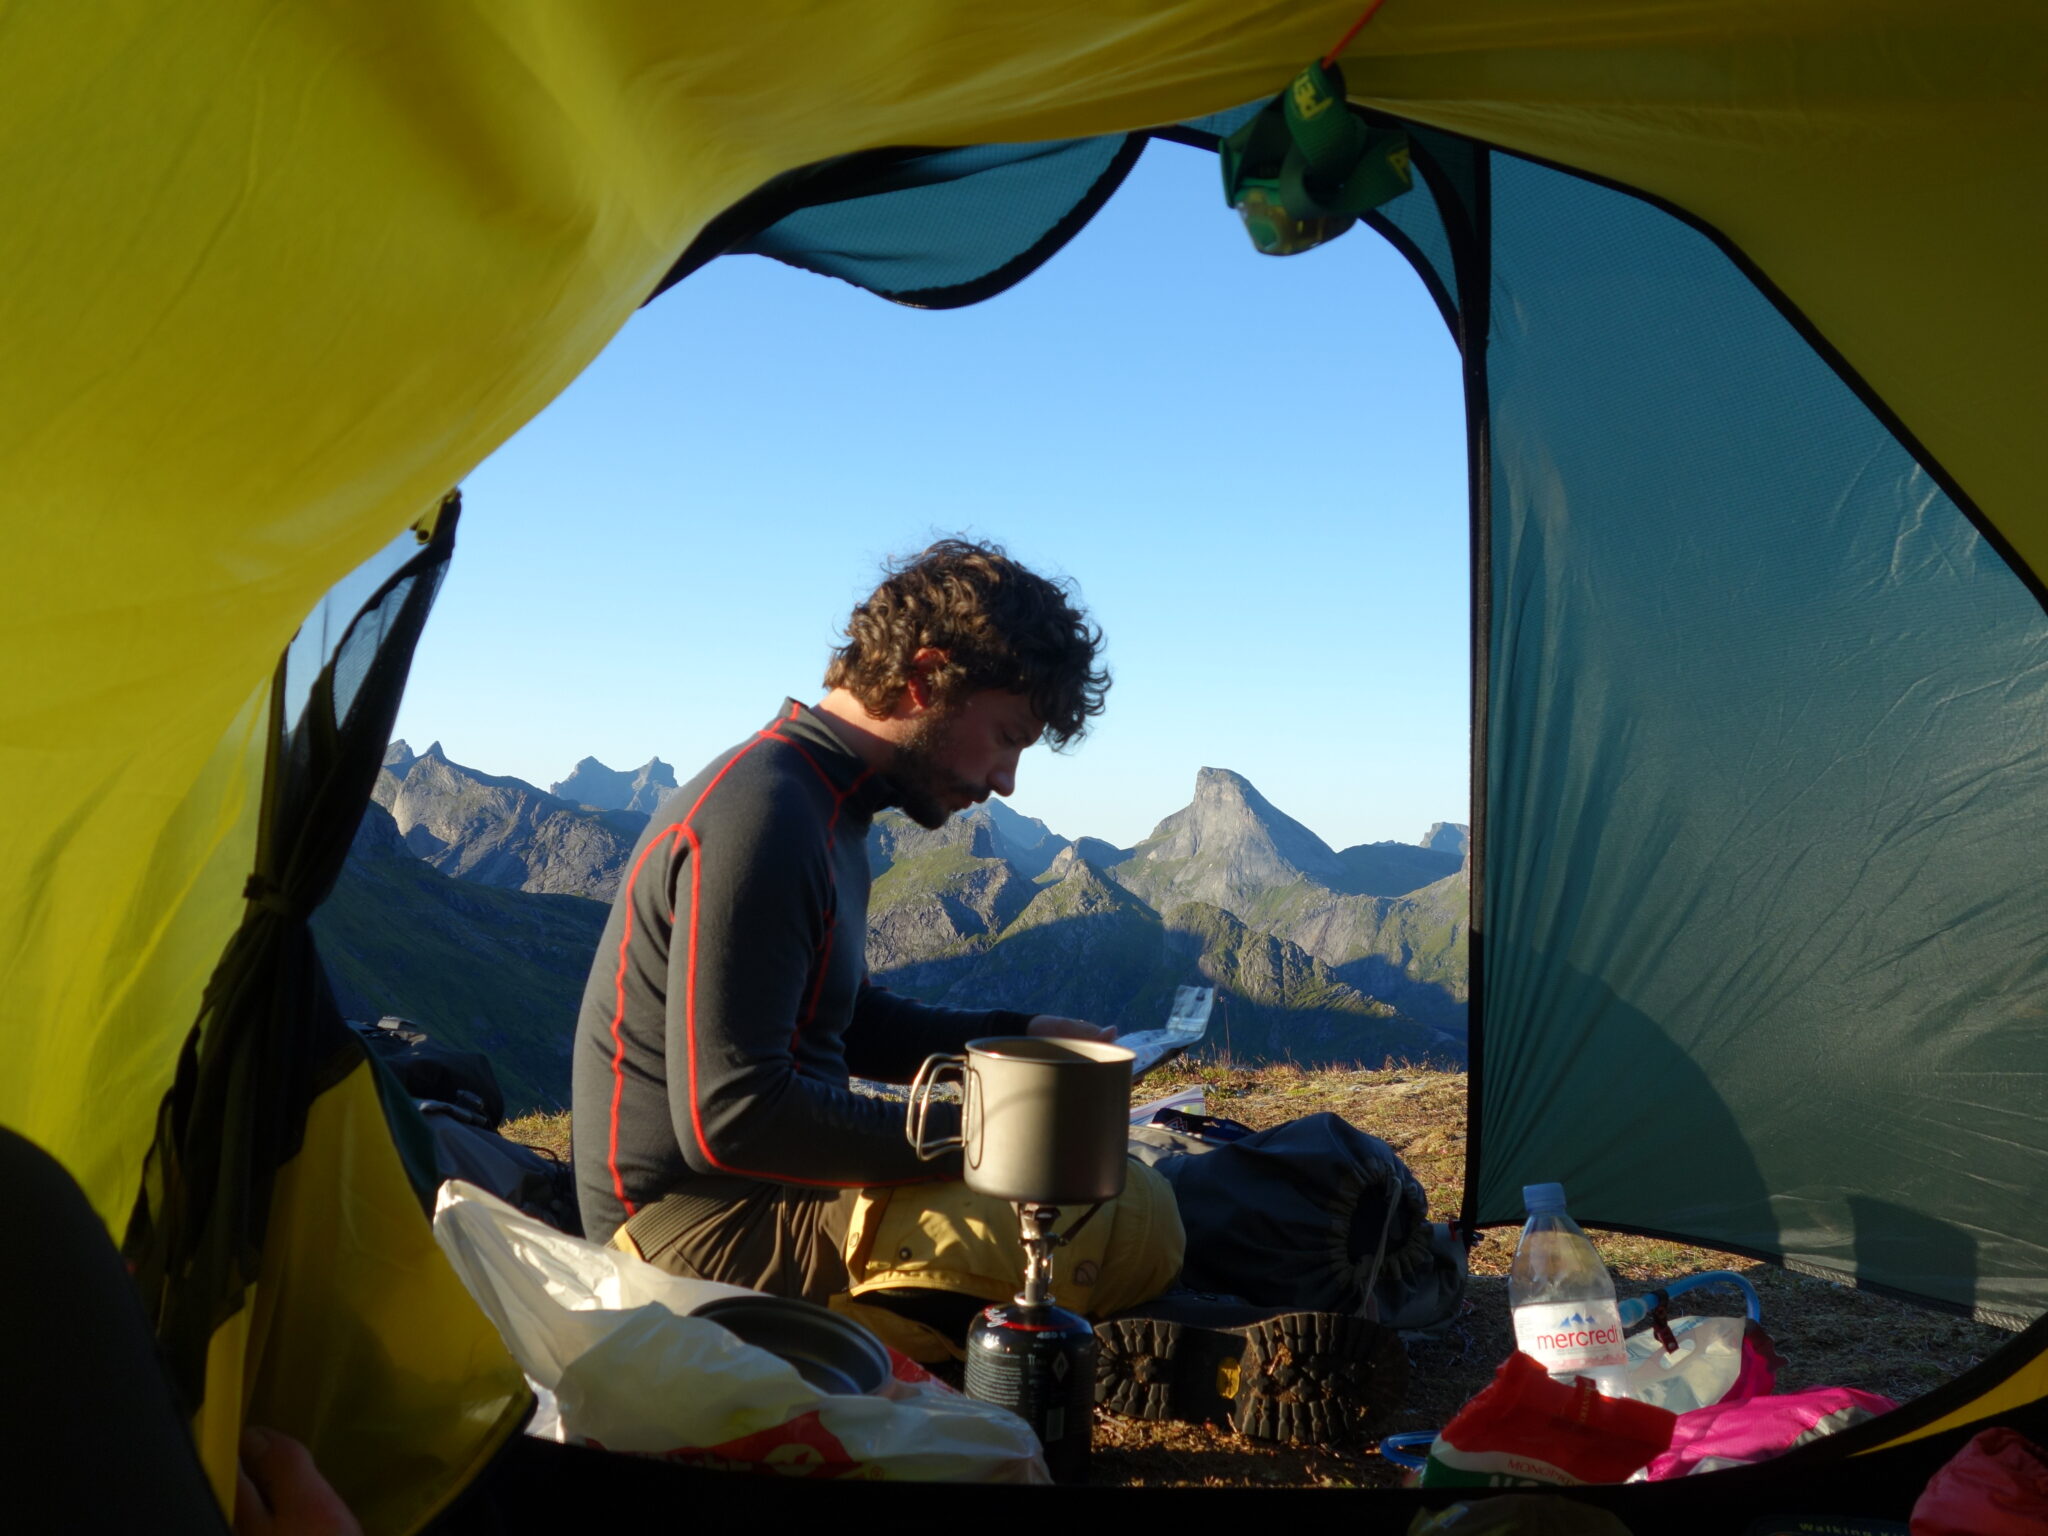
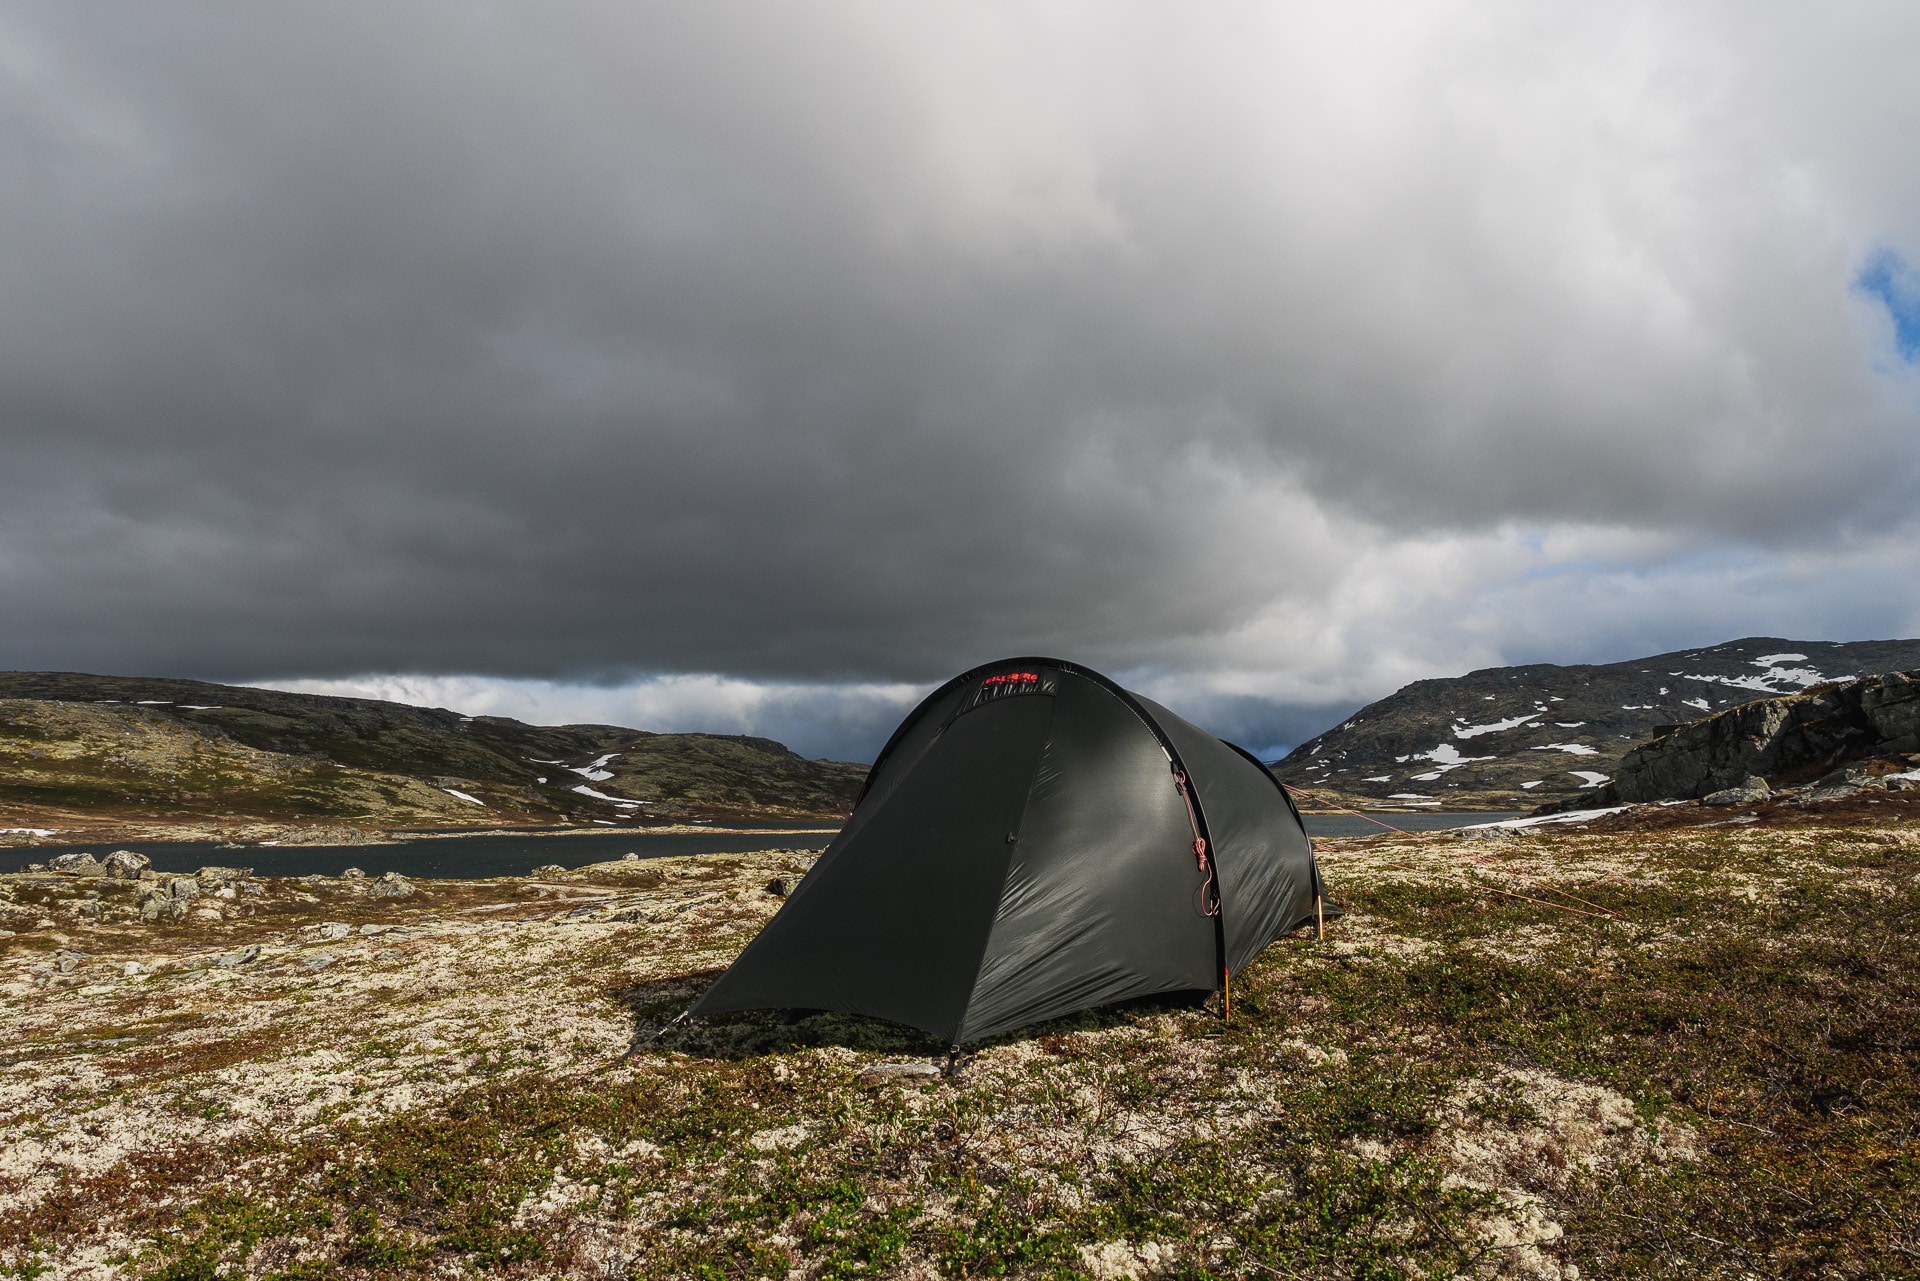
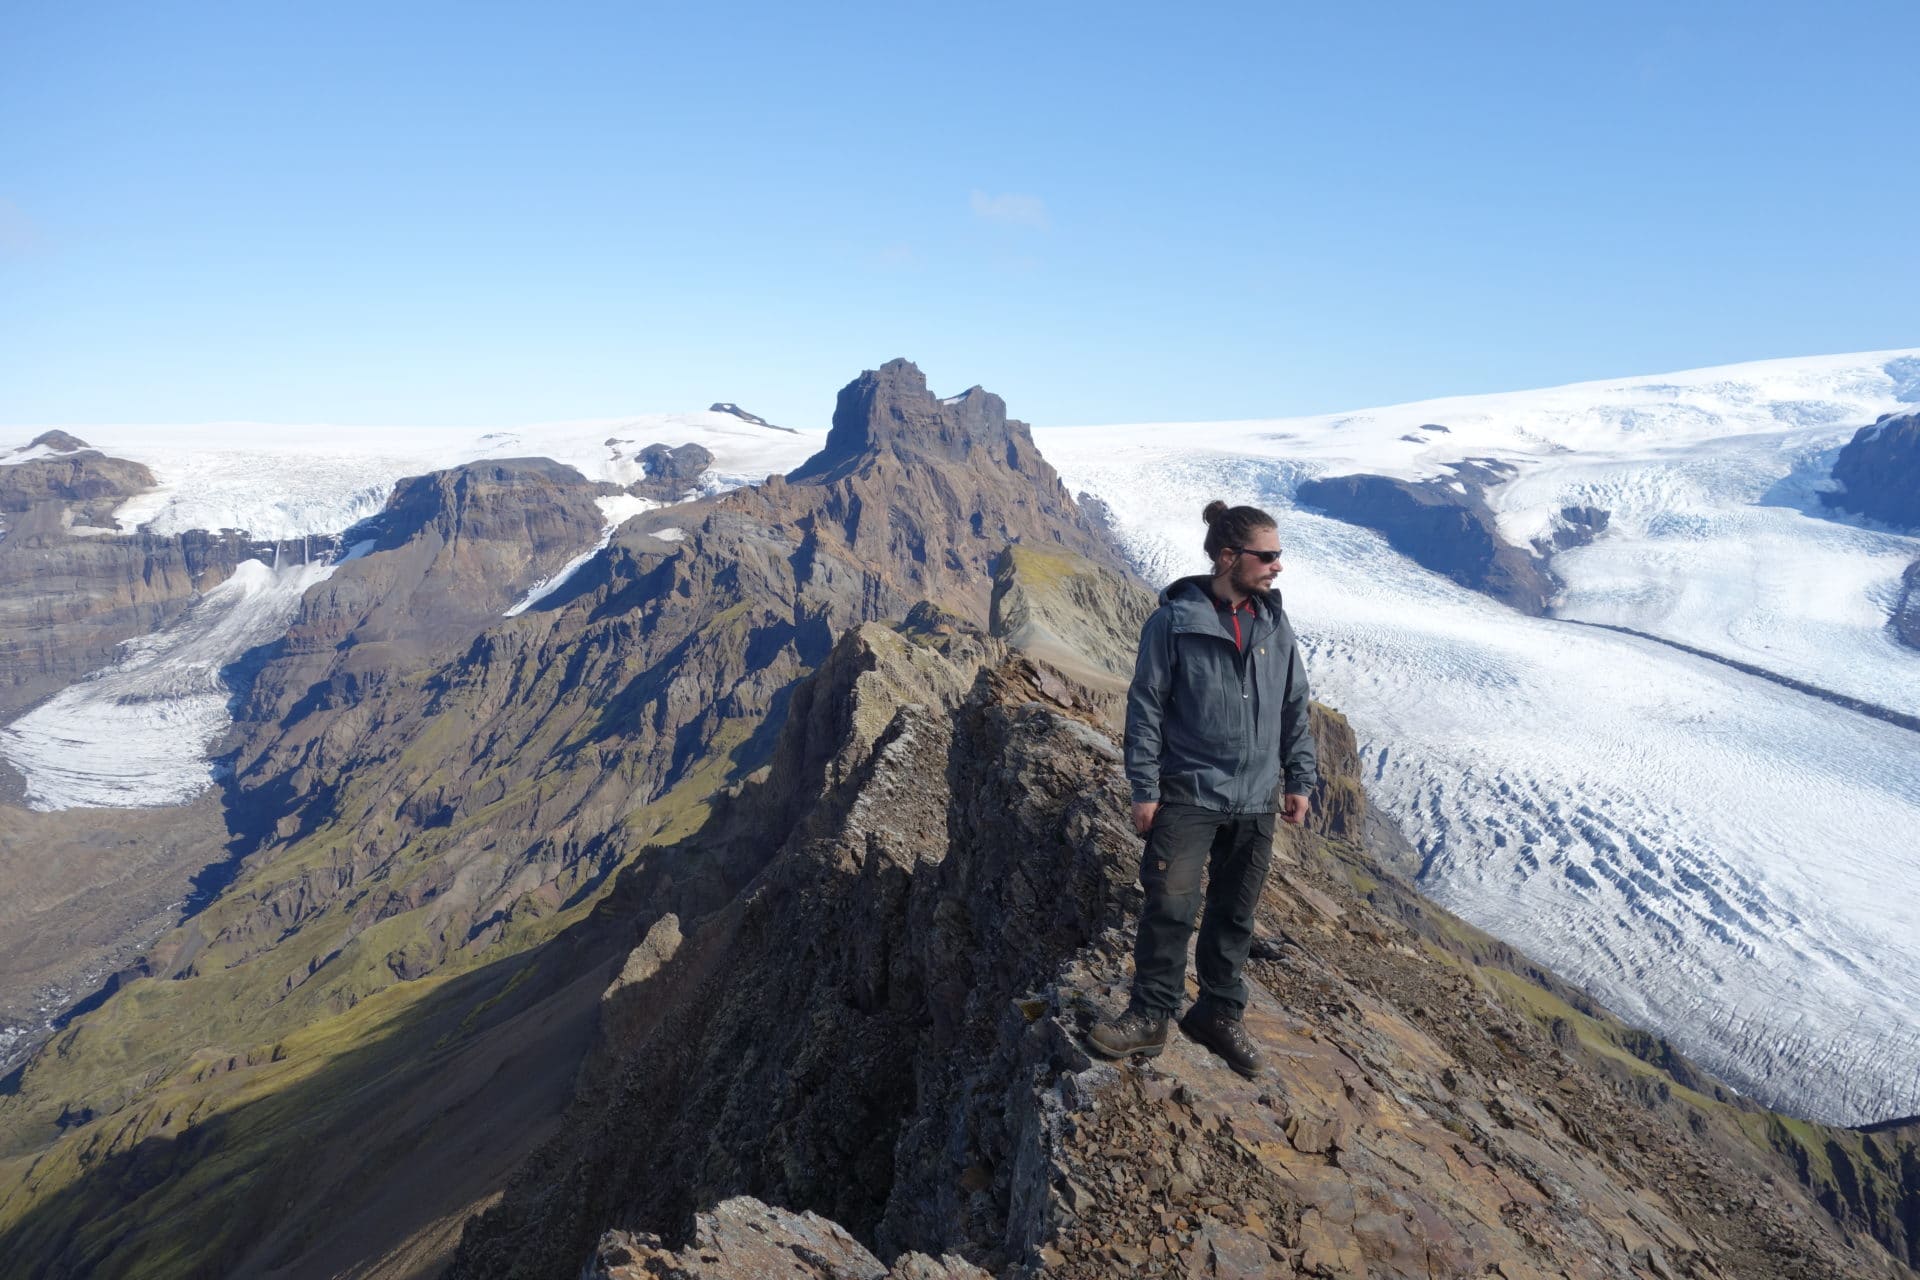
The Anjan 2 tent from Hilleberg is a tunnel type tent intended for 3 season use. Hilleberg is renowned for the quality and solidity of its tents, which will be confirmed when using this model. But this comes at a price and not the least …
Test conditions
In total those are about 50 nights that we spent in the tent in the Scandinavian countries, in Iceland, in the mountains, … It will have seen all the weather: big sun, light rain, downpours, wind to decorate muskoxen …
List of main outings:
- Lofoten Islands
- Kungsleden
- Pyrenees
- Crossing the Vercors
- GR738 – Crossing of Belledonne
- Sarek
- Dovrefjell
- Iceland – Laugavegur
We were often two in the tent and with bags varying between 55 and 80L. We will come back to the habitability and comfort below.

General informations
- Nb of people: 2
- Seasonality: 3 seasons (but quality 4 seasons)
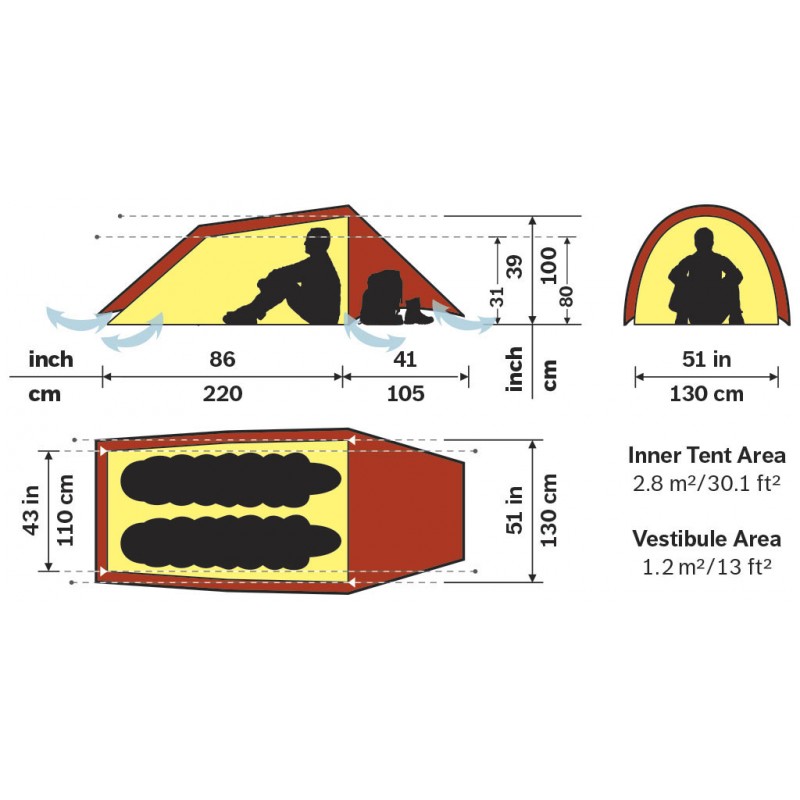
- Total length: 3.25m
- Interior length: 2.20m
- Apse length: 1.05m
- Total width (without shroud): ~ 1.40m
- Max living width: 1,30m
- Living width at feet: 1.10m
- Max living height: 1.00m
- Total floor area: 4m²
- Living area: 2.8m²
- Apse area: 1.2m²
- Weight: 1.80kg
- Tissue :
- Exterior: Kerlon 1000
- Interior: 10D ripstop nylon
- Floor mat: 50D ripstop nylon
- Impermeability:
- Roof: 5000mm
- Floor mat: 120000mm
- Fixing points: 12 (8 at the tent and 4 guy lines)
- Available colors: Green (tested model), red, sand
- Sale Price: € 825
(Manufacturer information)
Assembly and disassembly
Hilleberg tents are particularly well thought out at this level and it is a pleasure to put up and take down the tent.
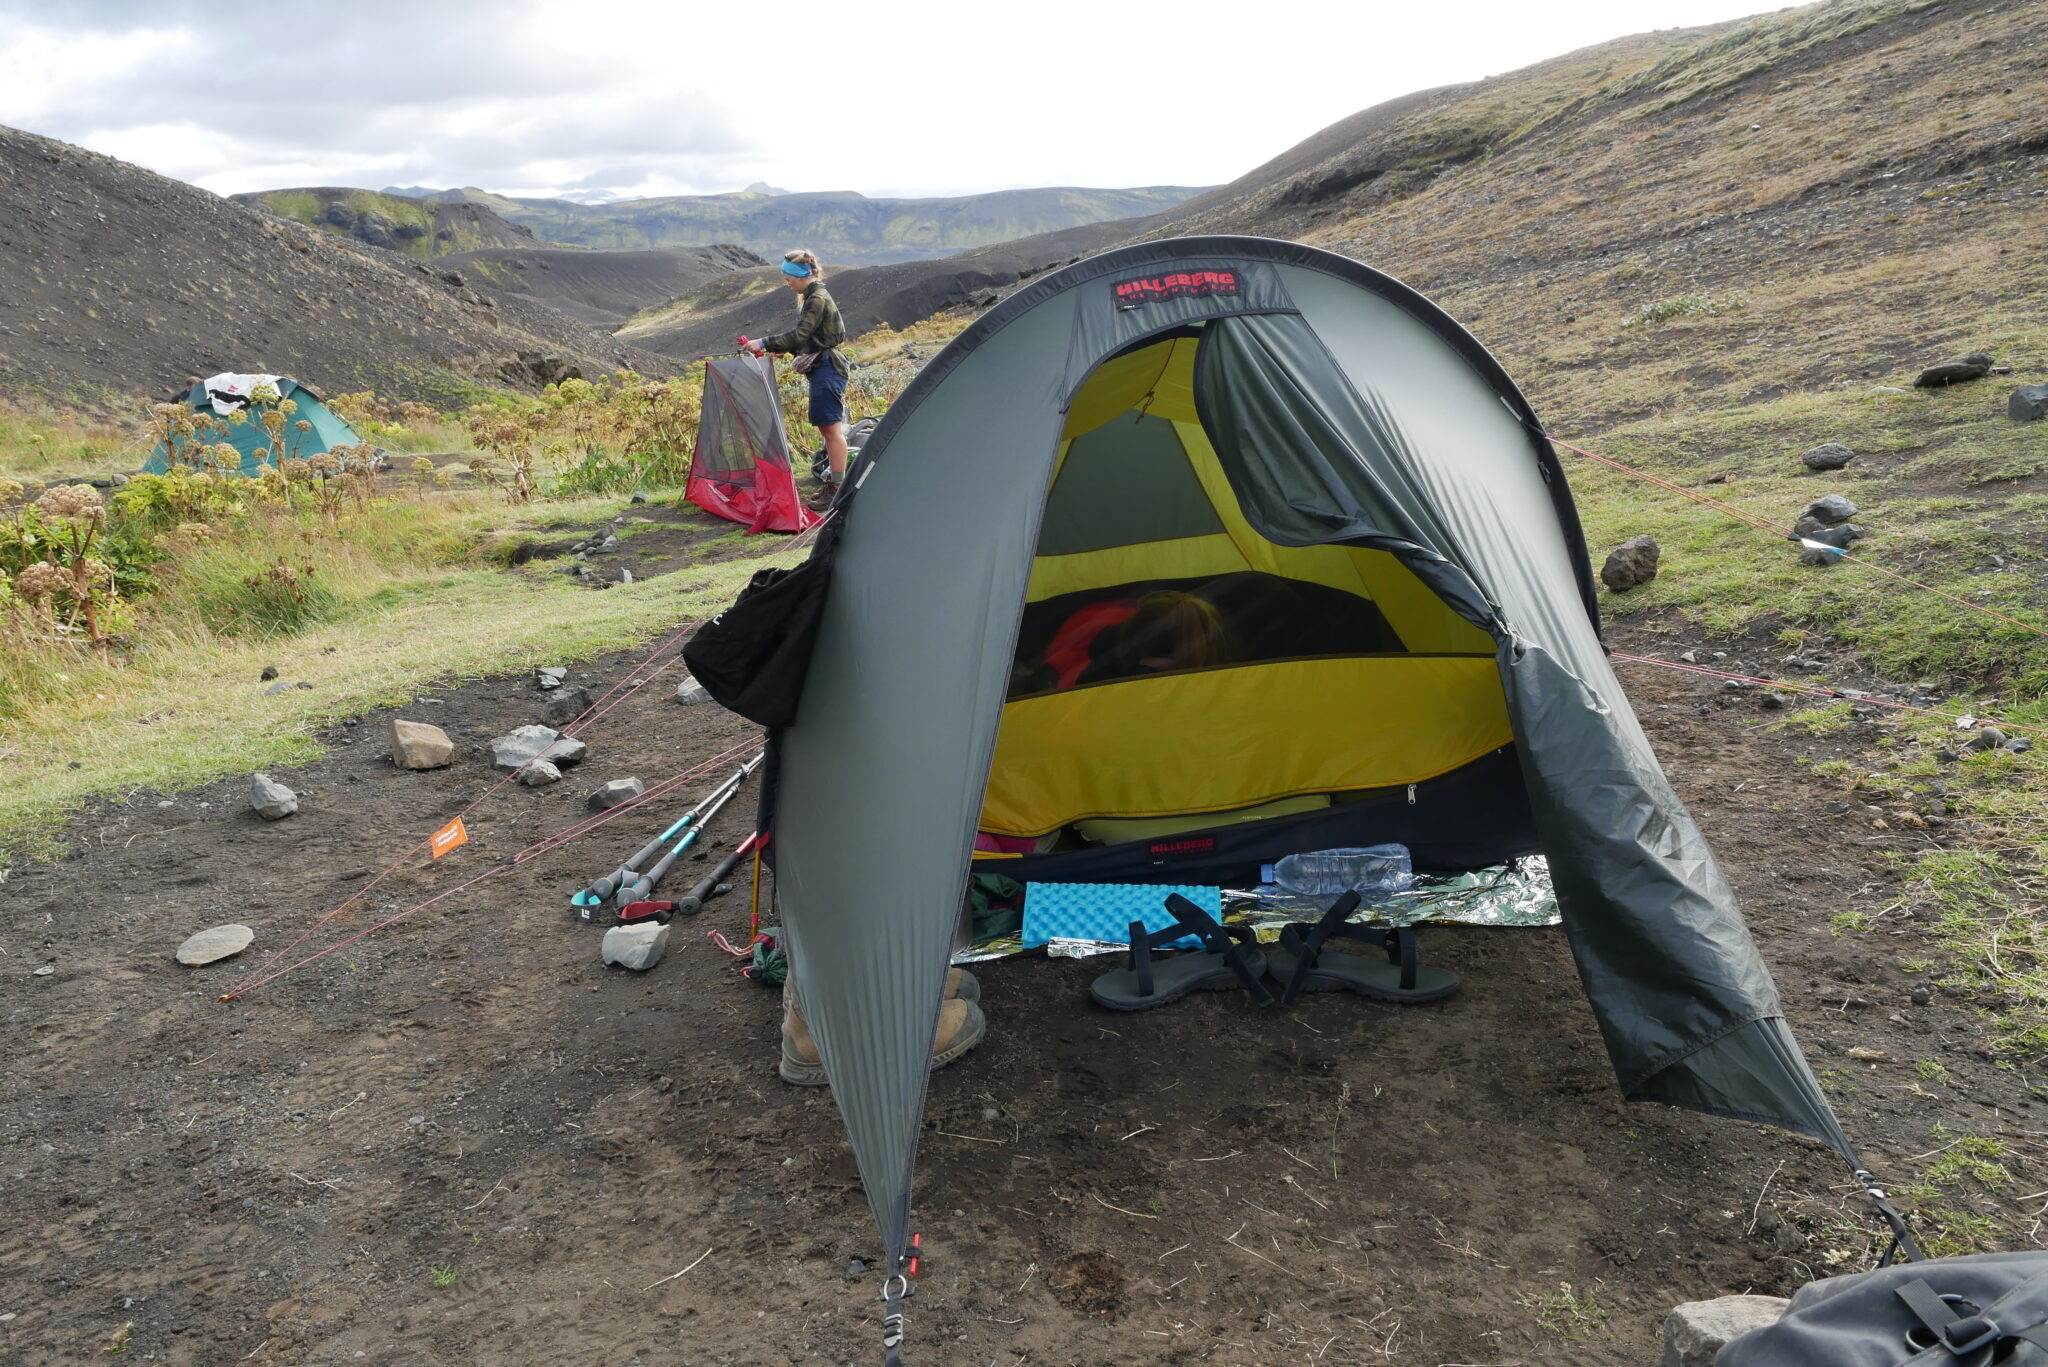
For the assembly, it is enough to take out the tent, put two stakes at one end, thread the two poles and tension the whole before putting back two other stakes. In easy conditions, the operation will take 5 minutes, in difficult conditions, a little more time but this can be done quickly even on its own. Once these four stakes are installed the tent stands upright but we can add another 9 others, the tent is then completely concrete!
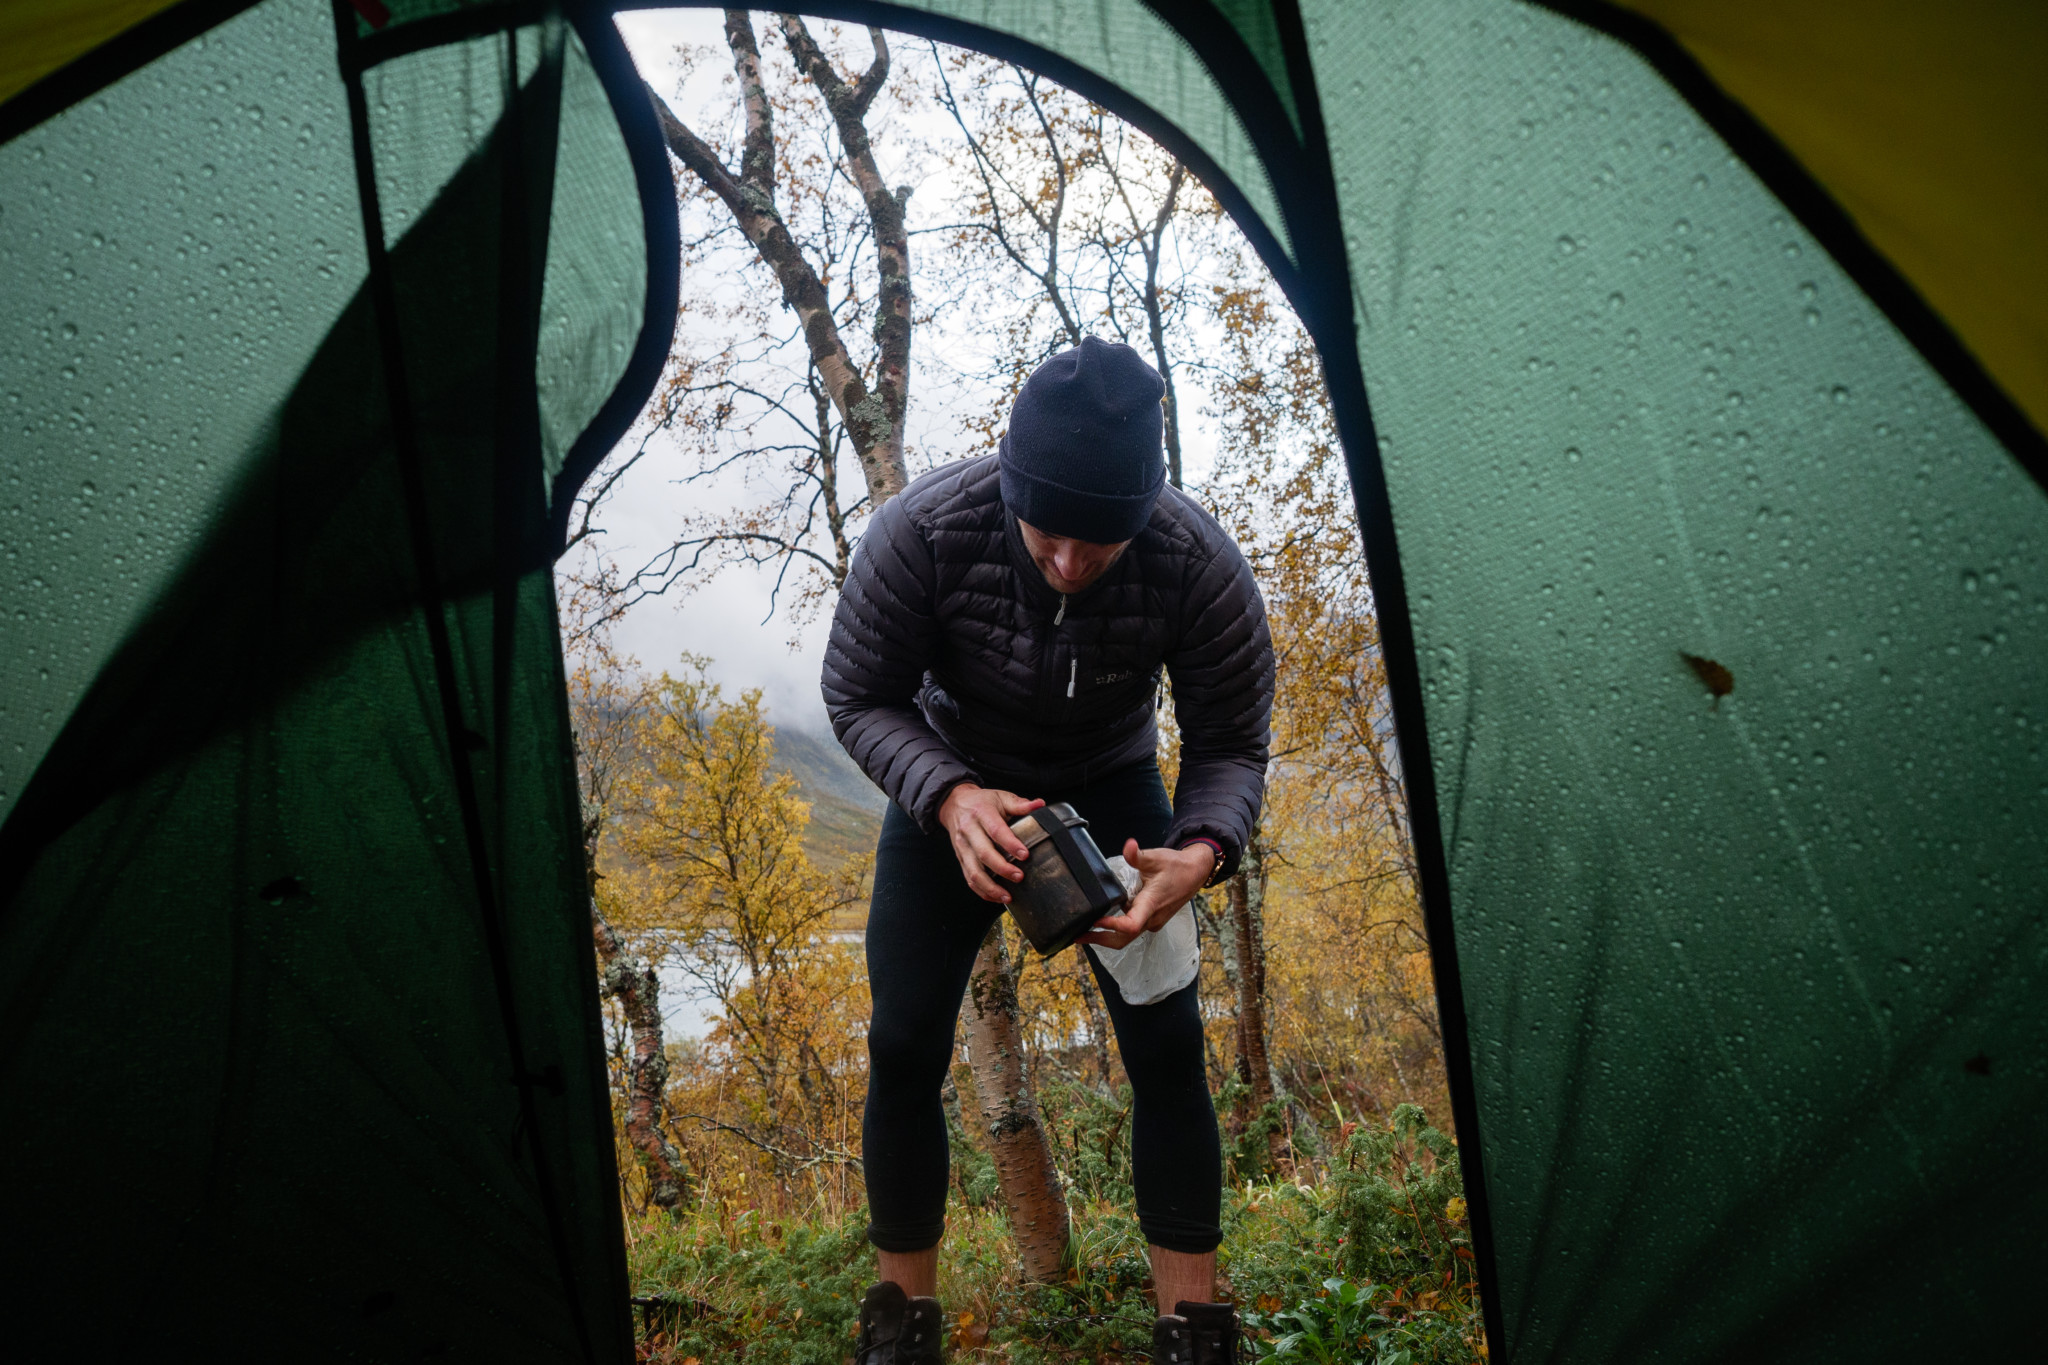
Big advantage of the Anjan 2: it mounts with the double canvas already in place. It is a big time saver and especially the inner canvas is protected from the rain.
Significant disadvantage but inherent in the “tunnel” type of the Anjan: it is not self-supporting. You will therefore need to be able to fix it to the ground.
For disassembly it is the exact reverse operation and it does not take more time. The bag provided to transport the Anjan has the good taste of being a size perfectly suited to easy storage, so there is no hassle in storing the tent.
The tent is also supplied with a repair pole section in the event of breakage, which can be very practical.
Once folded the tent occupies a cylinder of about 50cm in height for a (malleable) diameter of 20cm which allows it to fit in a backpack or store it outside of it that does not interfere .
- Take the tent out of its transport bag (in case of wind beware of the latter)
- Unroll the tent with the side opposite the door in the direction of the wind (if the latter is very strong and you are alone, do not hesitate to attach the tent to your bag for example)
- Plant the stakes in the two eyelets on the windward side.
- Insert the hoops: the large one is marked with a red mark on the hoop and the canvas
- Insert them into the provided eyelets
- Fix the stakes at the door by stretching the canvas in the axis of the first stakes attached (the front and rear stakes must be parallel).
- Stretch the canvas with the straps around the edge of the tent
- Fix the tensioners and stretch them: the longer they are "horizontal" the better it will hold in the wind. Do not tension them too much (they must not distort the tent)
- There you are!
DISASSEMBLY:
- For disassembly, simply repeat the same operations backwards.
- I advise you to "fold" the tensioners well so that they do not get tangled during storage / transport
- Relax the canvas too
- For the final folding:
- Fold the door towards the "center" to form a rectangle
- Fold the rectangle in 3 lengthwise, it should be wide like the folded arches
- Place the poles (in their bag with stakes) at the windward end and roll the canvas around.
- Put everything in the transport bag
NOTE: pitch the tent on a surface that is more rounded (convex) than hollow (concave). If only for the flow of rain but also to be able to stretch it well.
Installation option
The assembly presented is the basic one, but Anjan offers many alternatives!
- You can only mount the outer fabric using a cord to stretch the ends of the poles.
- You can mount the inner canvas alone if time permits (pass the hoops in the loops that normally connect the two fabrics.
- The rear side can be raised to improve ventilation
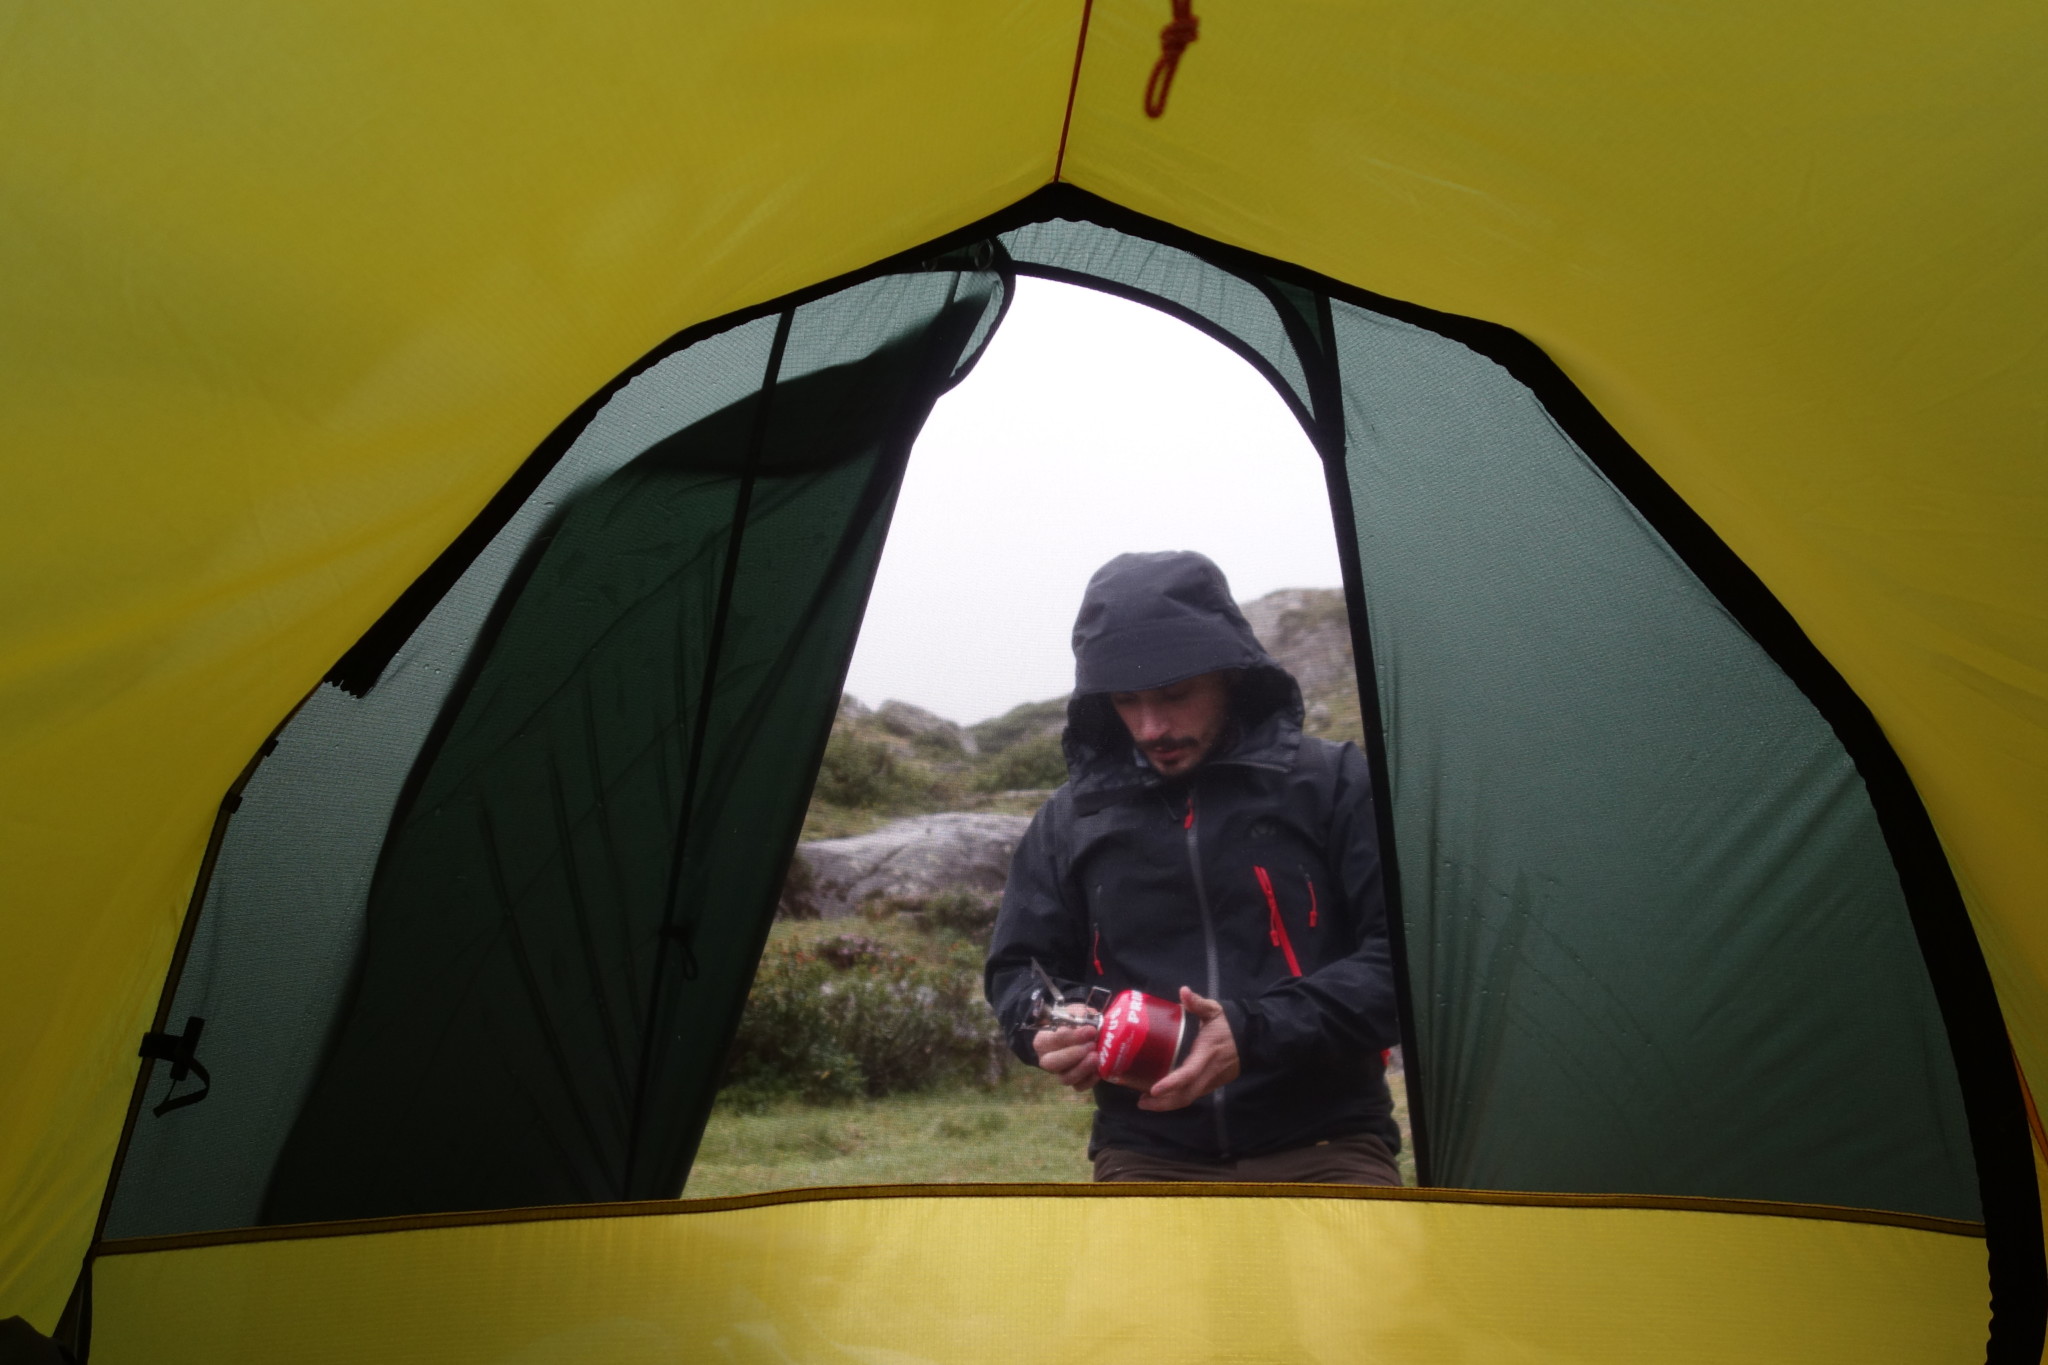
- The apse can be partially or fully folded to improve access and sight
These options are very practical in hot weather.
Weather resistance
Hilleberg is a Swedish brand, so they make tents that withstand the Swedish weather. Ie solid tents !!
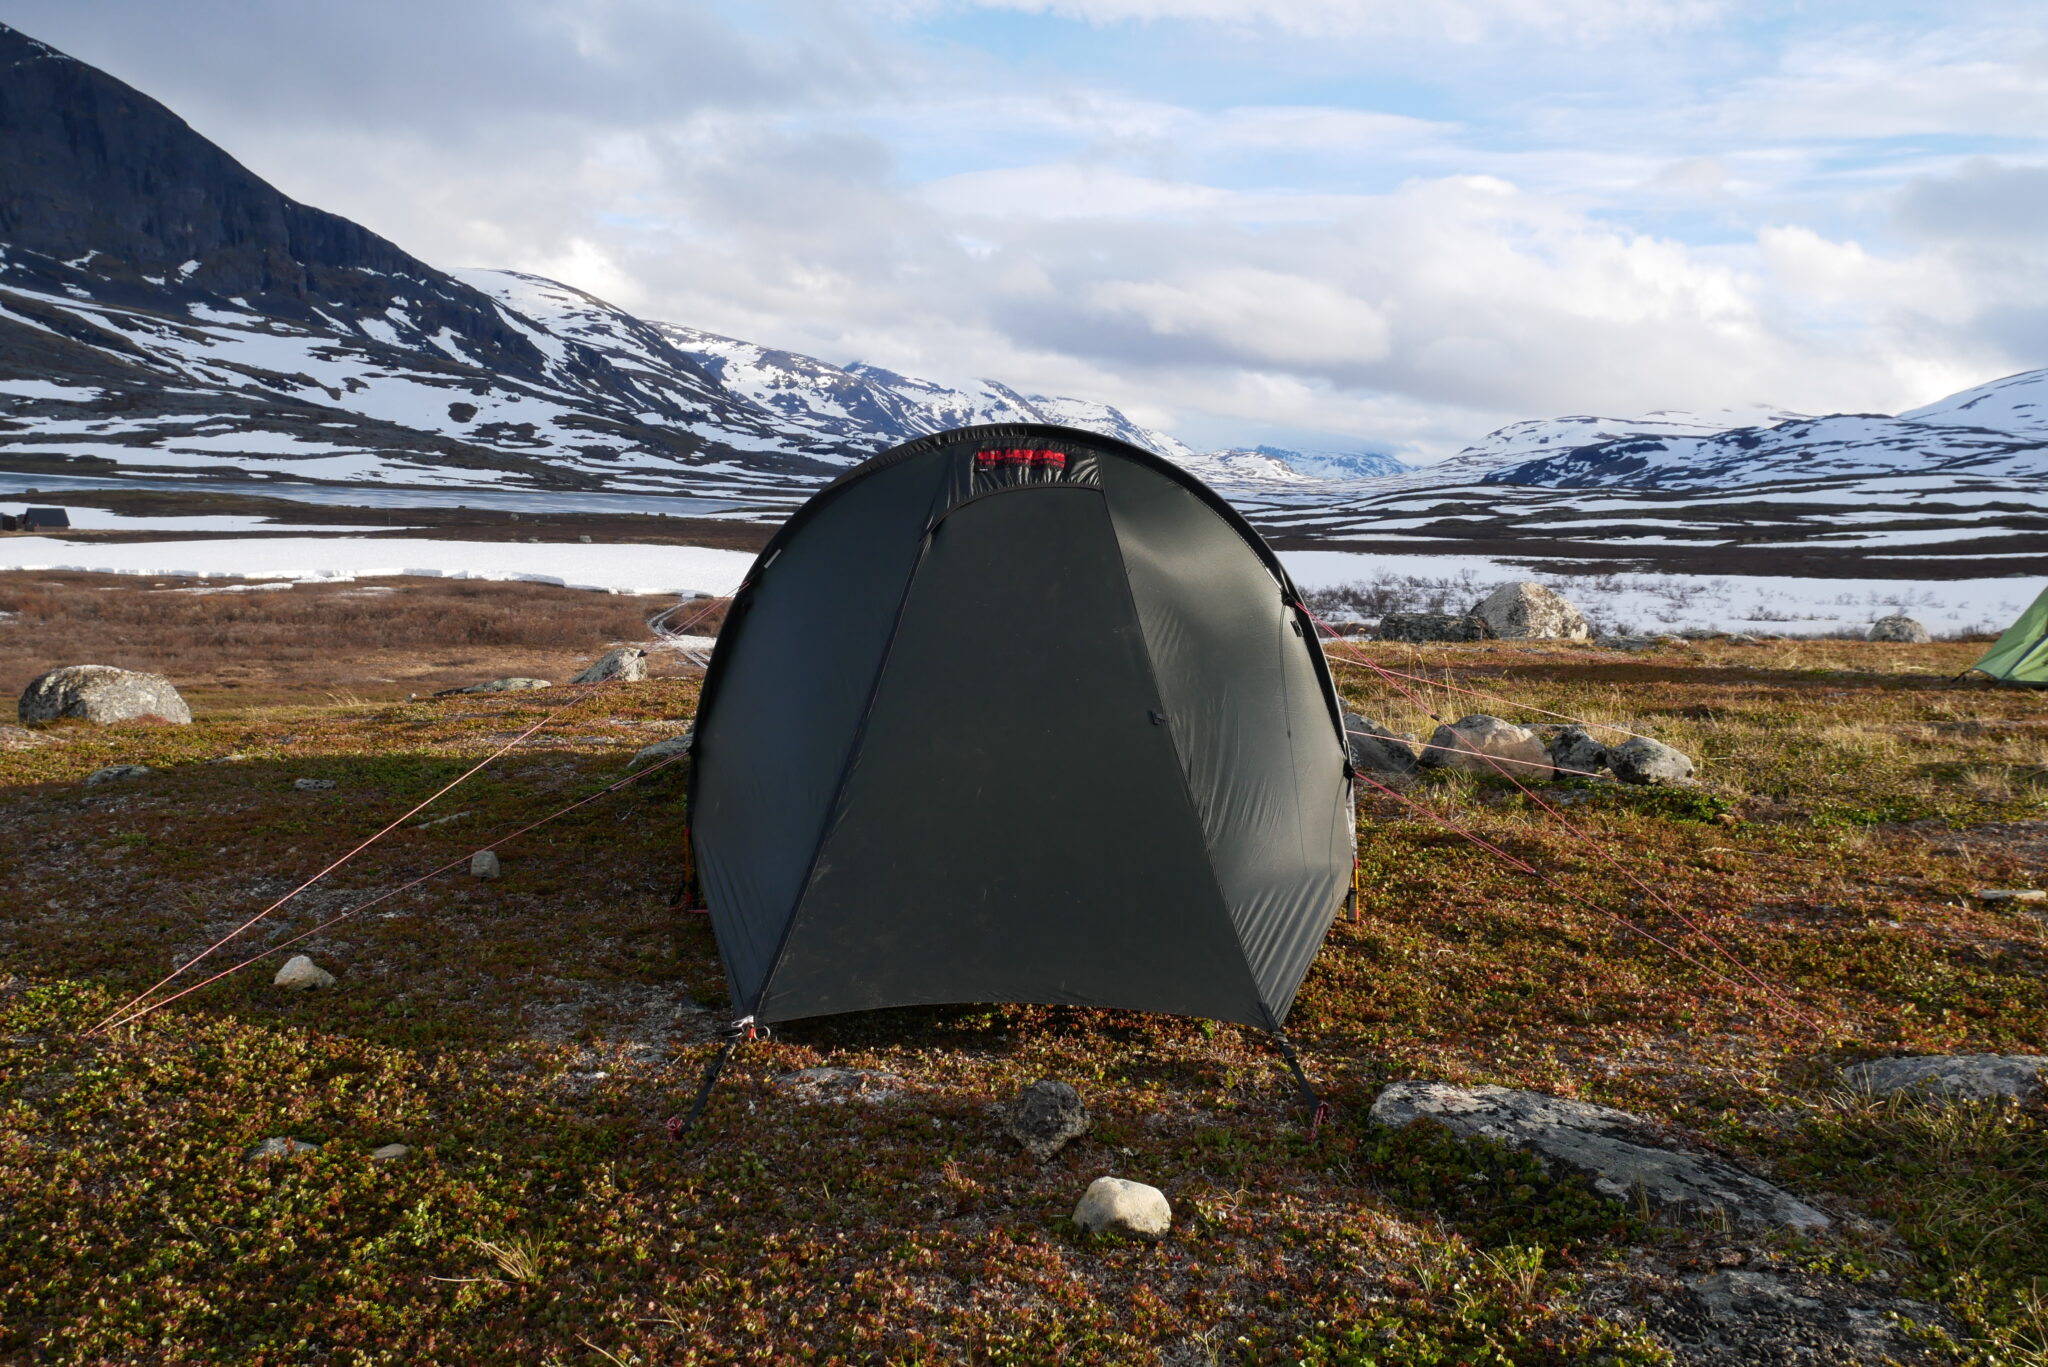
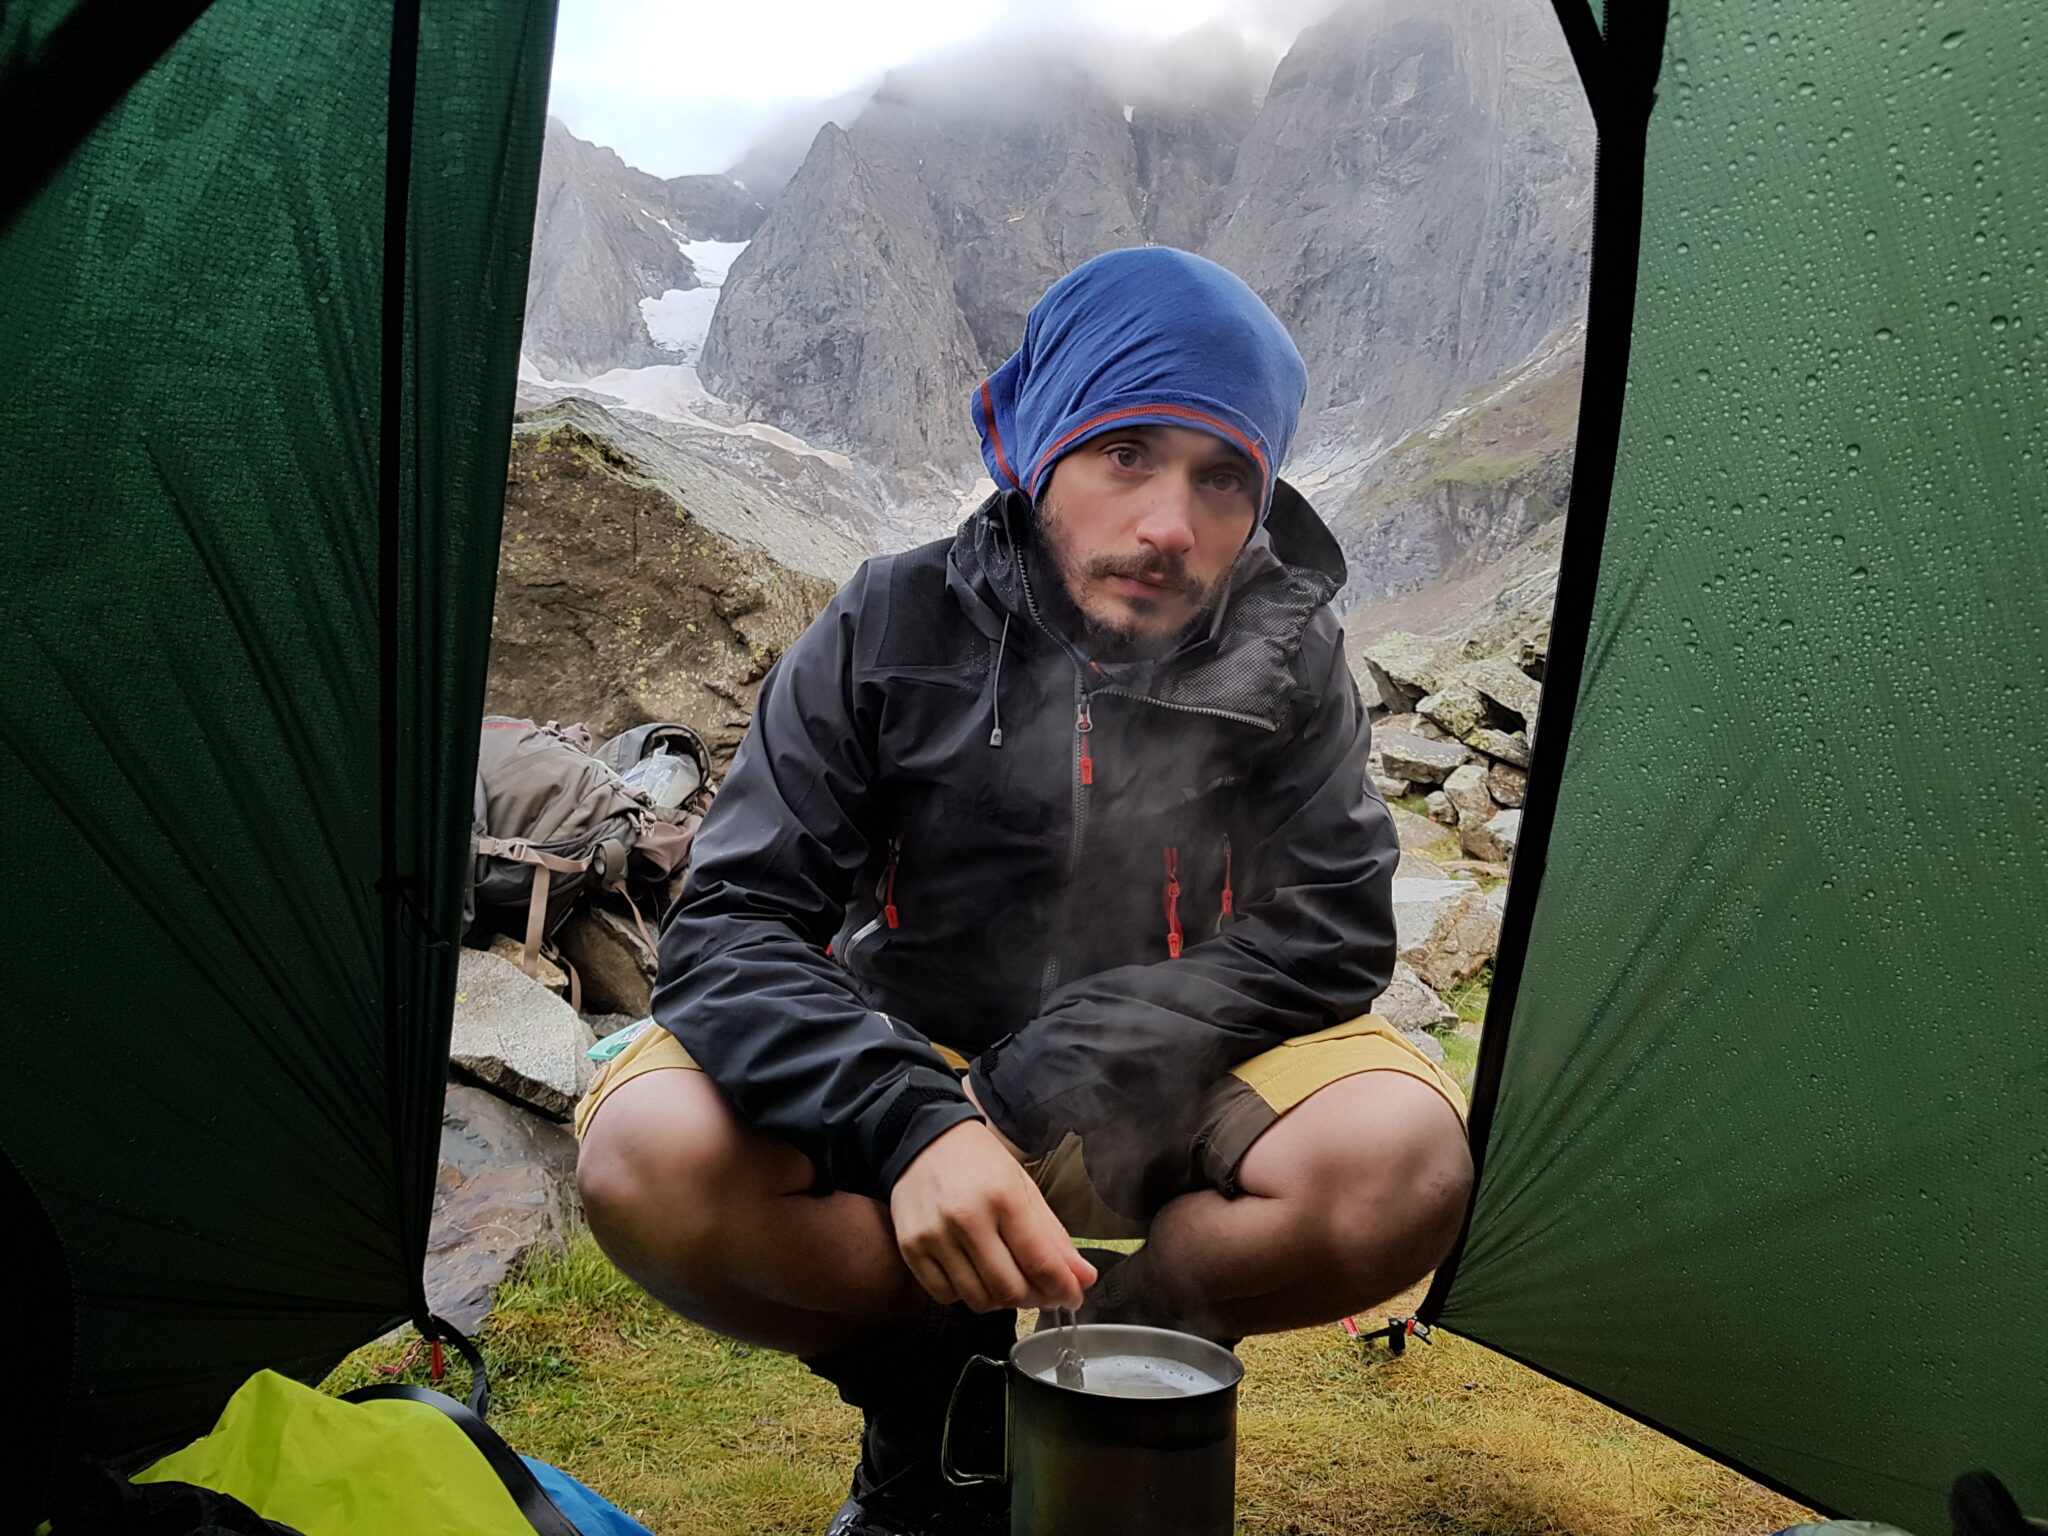
Faced with the rain there is nothing to complain about. I never leaked water from the tent or the apse. The cut of the canvas protects well even if there is wind. You just have to make sure that you don’t touch the outside fabric (the bags in the entrance or at the feet for example). Rain level no worries even in heavy rain that lasts a long time. The ground carpet also does its job very well as long as you don’t pitch the tent in a swamp and avoid heavy pressure on the carpet. You will therefore be dry with this tent.
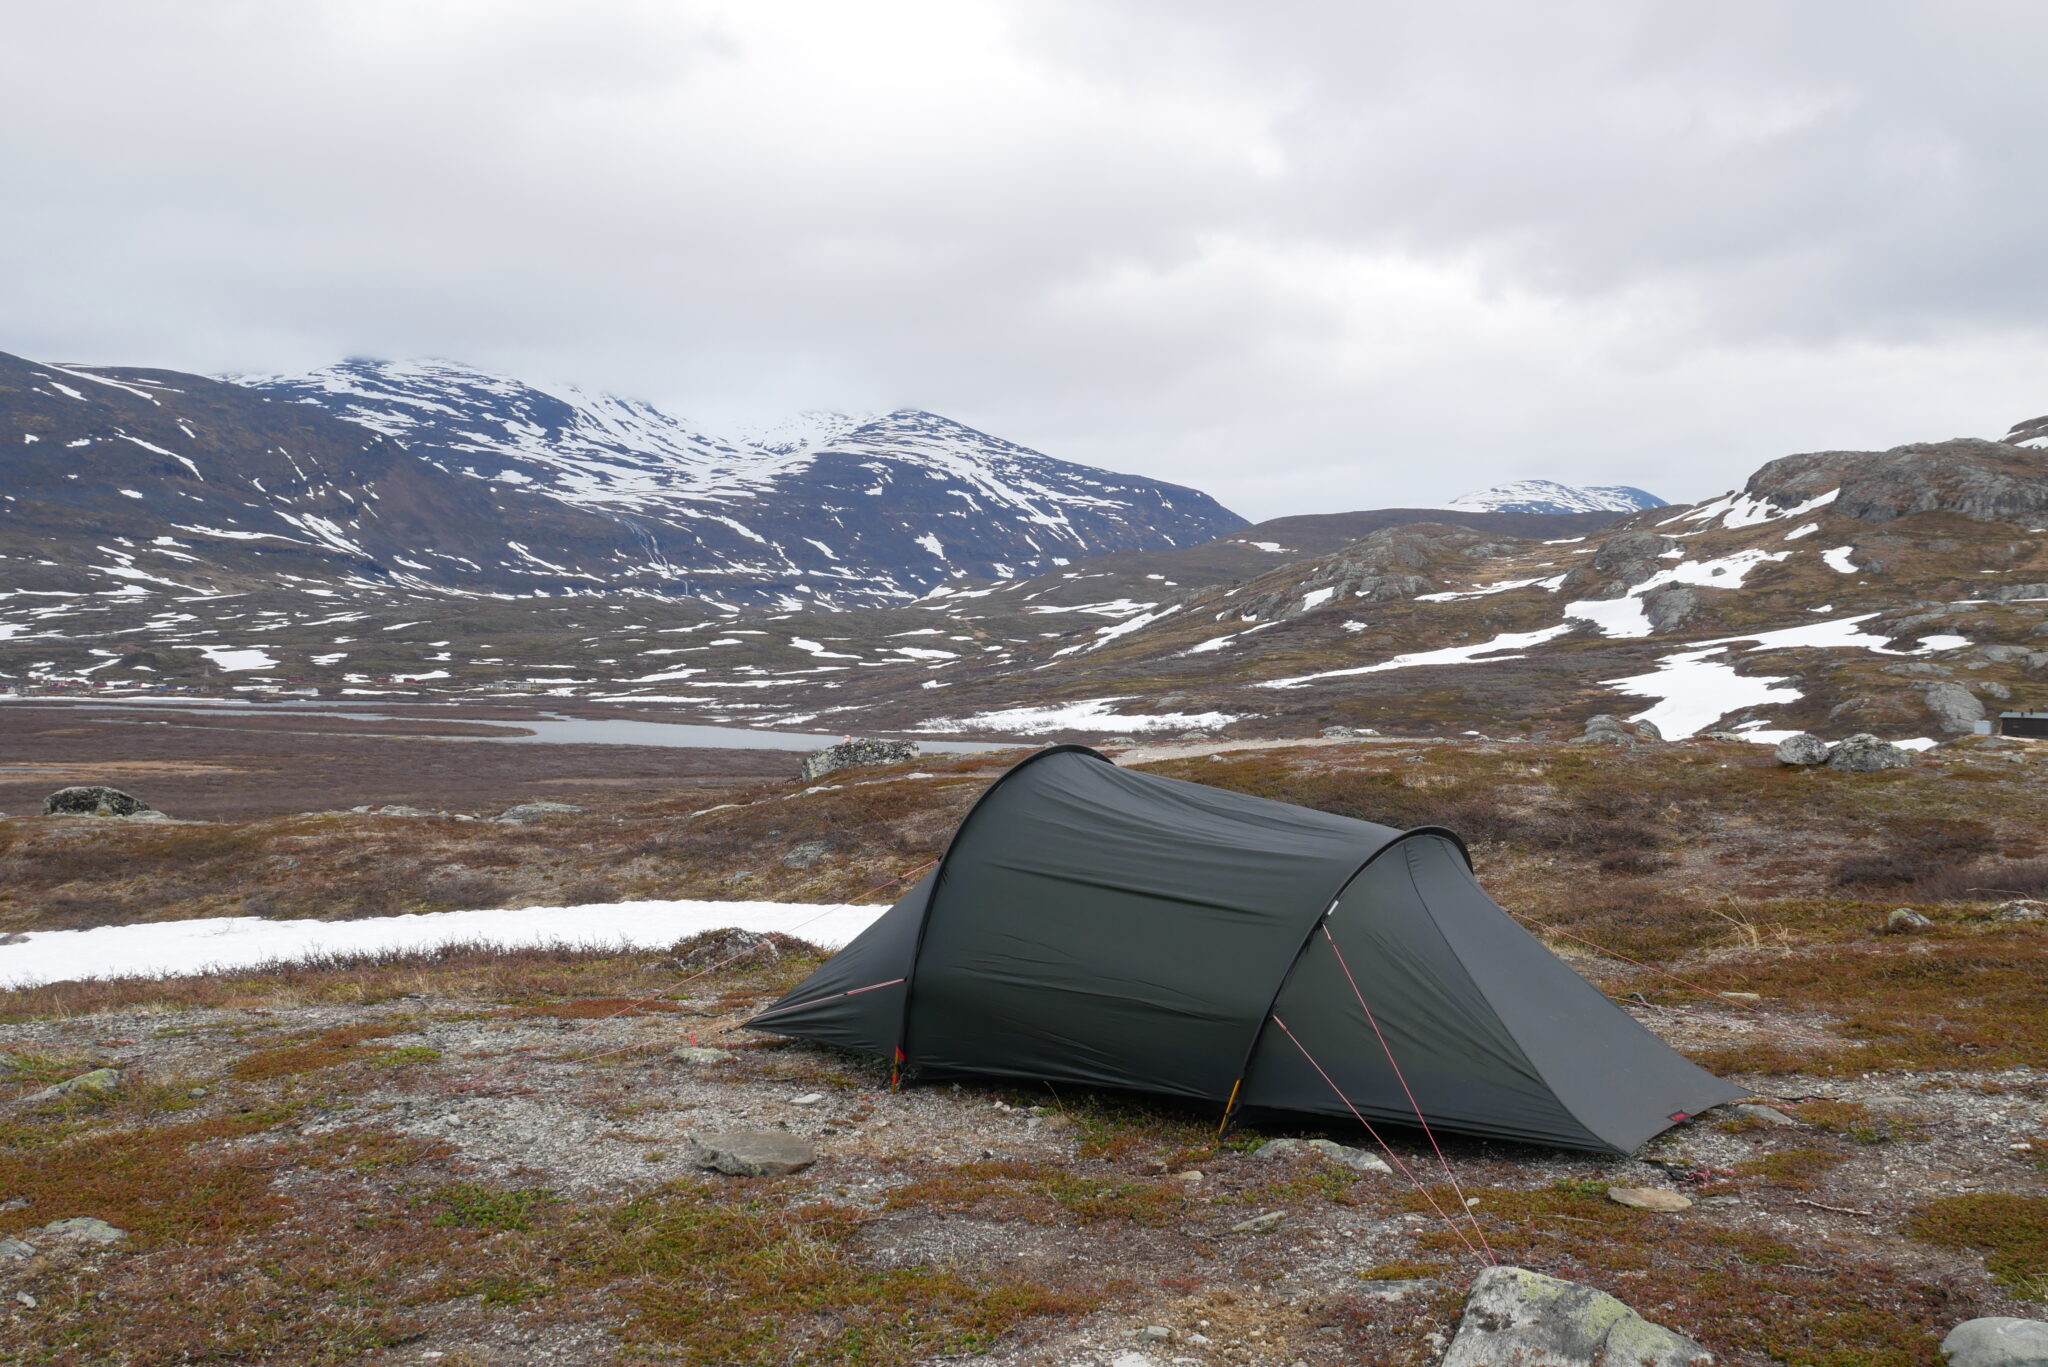
As for the wind, it’s solid too. There are 12 fixing points in all. Suffice to say that Eole will have to deploy a little energy to uproot the tent. Unlike other tents I have had in the past, it does not fold downwind. Indeed, the shrouds are placed so as to support the hoops well and the whole is very stable. So no worries about the wind resistance, which we could test several times … Only worries, the orientation of the tent in the wind. The latter is tunnel type, this means that it will not support the wind in the same way depending on its orientation: if the wind blows in the direction of the main axis of the tent then no worries, however if the wind breath through the canvas then has a tendency to snap which can be disturbing. The outside fabric will also tend to widen on one side and swell on the other which can be annoying in the interior space. It is therefore “enough” to set up the tent with the correct orientation, hoping that the wind will not turn! This inconvenience has never been a big concern but it must be kept in mind.
I did note, however, a slight tendency to condense in the outer fabric. To compensate for this, I open the top of the front door a little to make a little “draft”: the wind rushing between the fabrics thus ventilating a little better.
Resistance over time
The Hilleberg Anjan 2 is a solid tent. First of all thanks to the textiles chosen: kerlon 1000 is a very resistant material (abrasion, tearing) and which can be repaired quite easily. Similarly for the floor mat or the interior canvas, we can trust these fabrics.
The hoops are solid, no worries at this level. The tent is sold with a repair section in case (the critical moment to break the pole is during assembly / disassembly: we quickly walked on the pole). Likewise all accessories (zippers, rings, straps, …) are solid.
After 50 nights spent in it and as many erection / dismantling on all types of terrain, the tent today shows no clear sign of fatigue or wear. Not even a small hole in the floor mat.
This tent is solid. Just use it following the manufacturer’s recommendations and common sense and it will last over time.

Roominess and comfort
Important point: is it a comfortable tent? Well overall yes with some reservations …
As mentioned above, the tent is easy to pitch, with different configurations to adapt to the weather, so it’s a good point on this side.
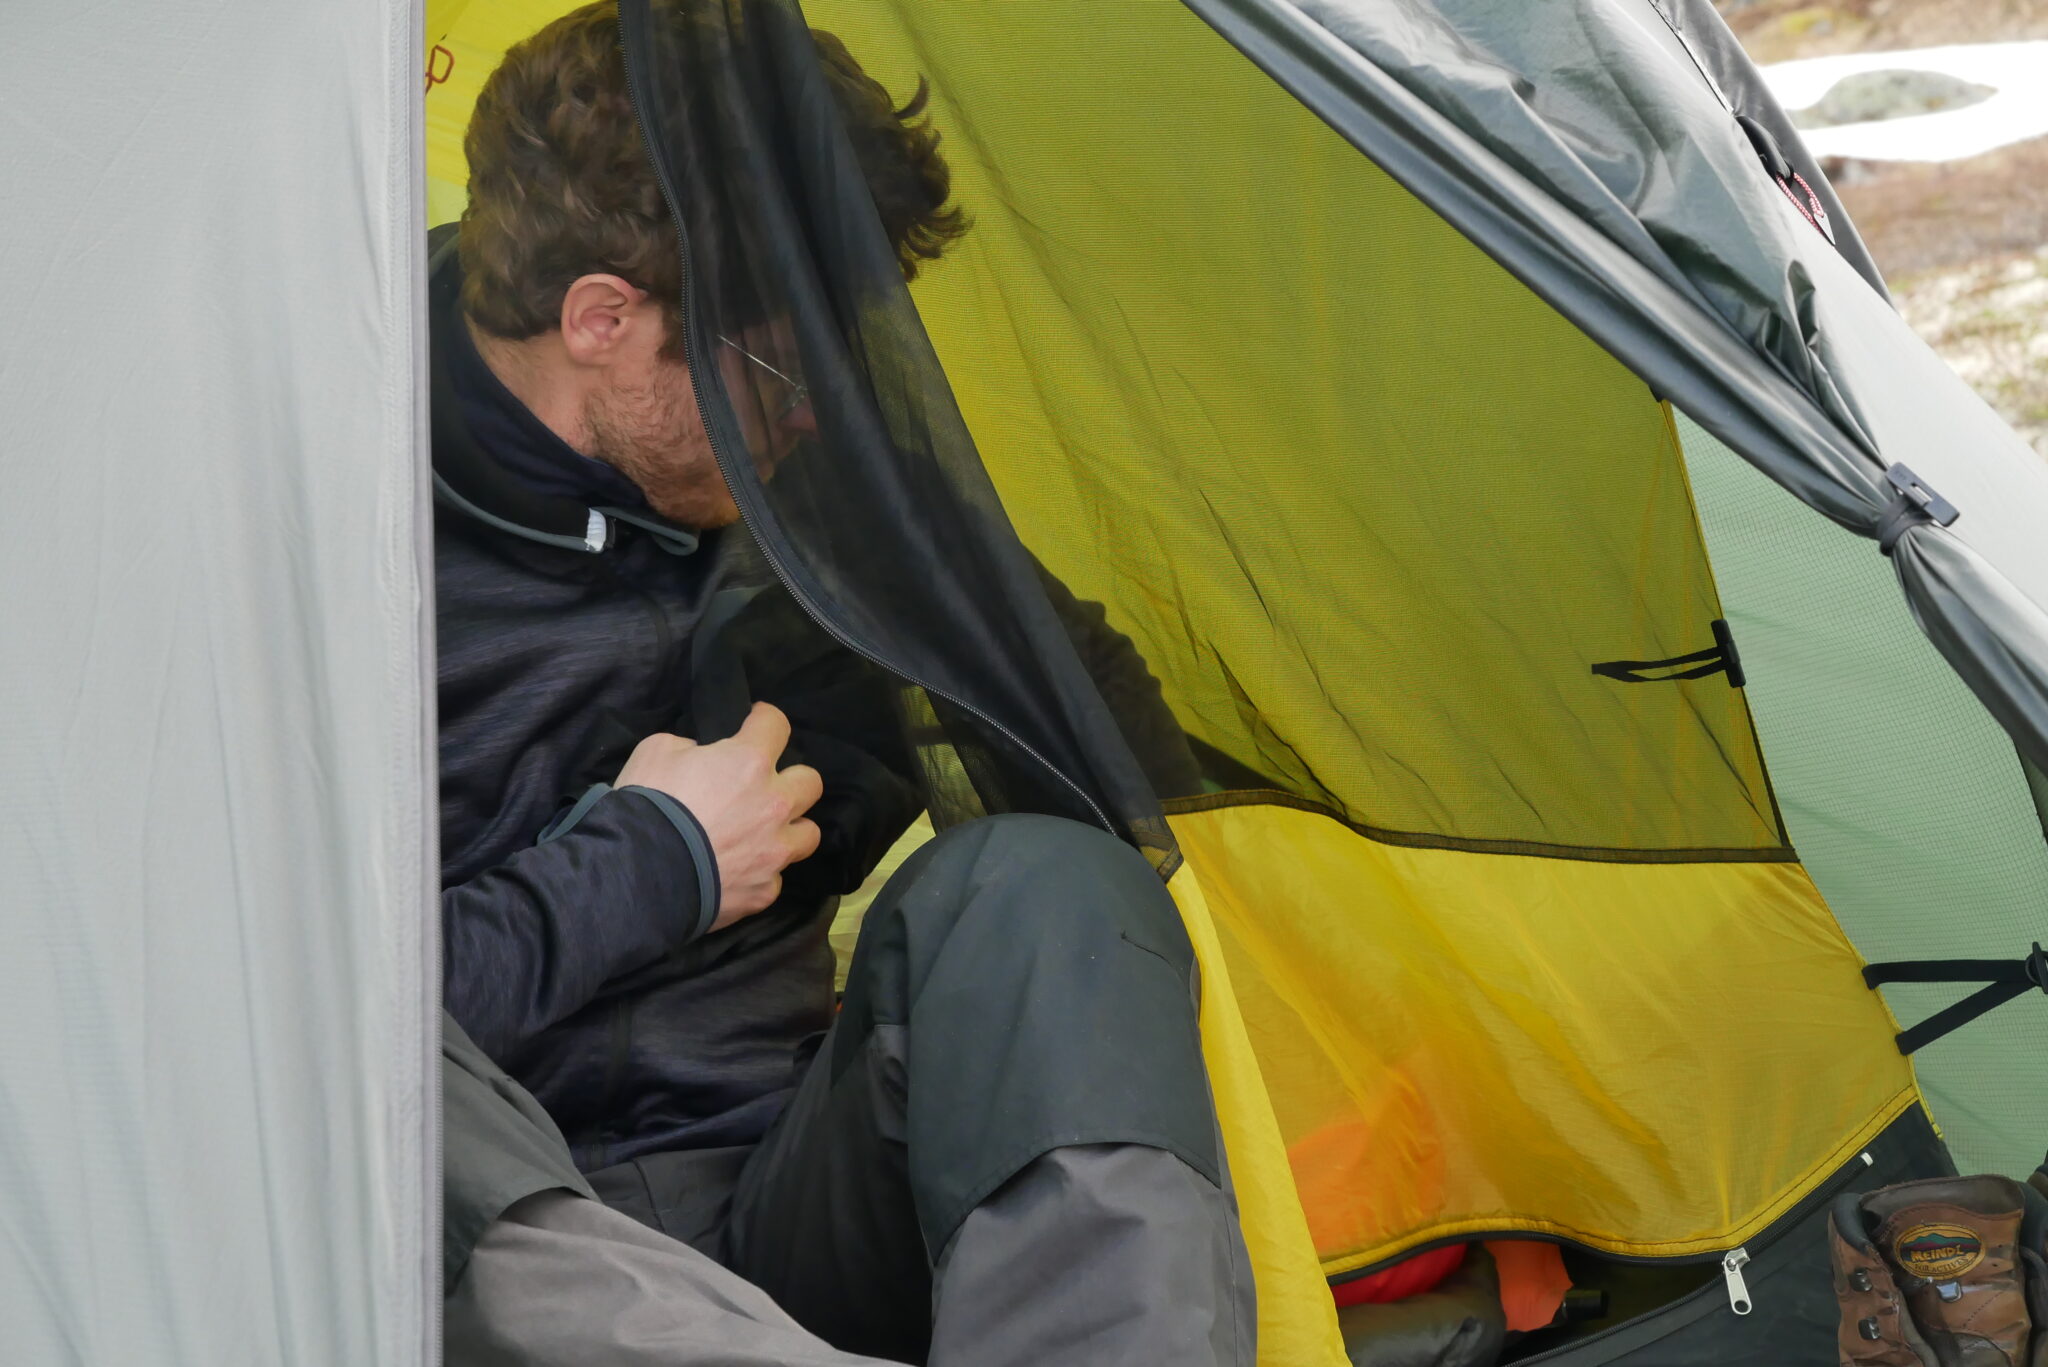
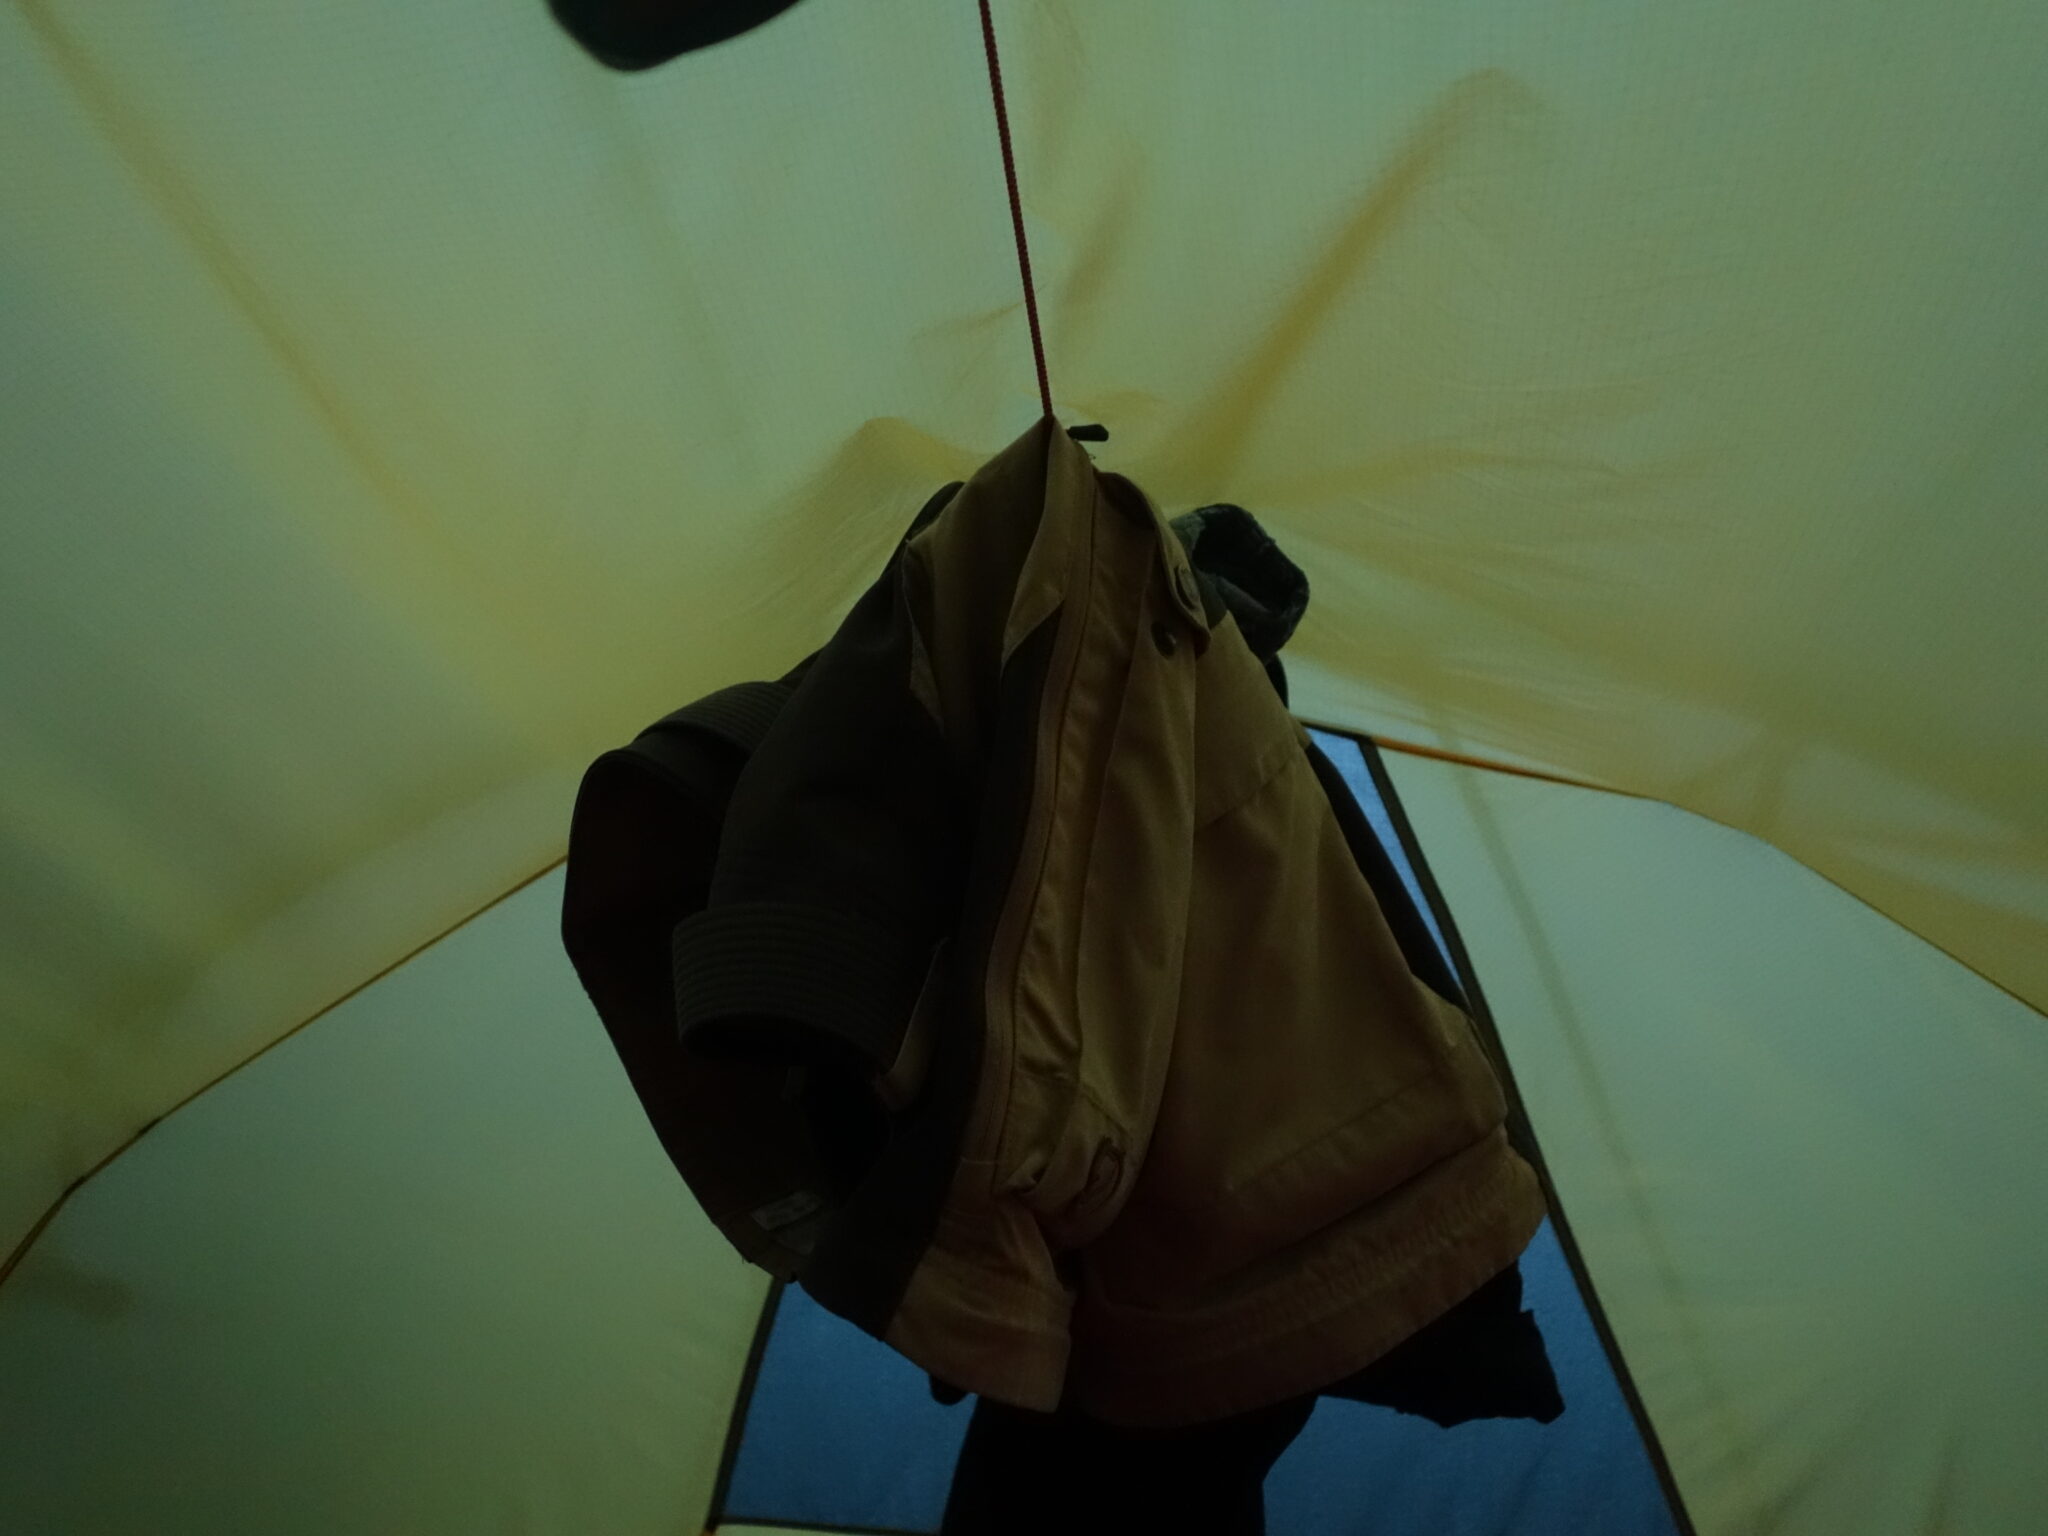
From an interior space point of view it’s good for two without being very luxury either … In terms of length it’s good for my seventy meter but a friend who is in 1.85 had a tendency to touch the backdrop which can cause moisture on the sleeping bag by capillarity. In width, it is not bad, enough to put two classic mattresses and still have 10cm of margin … We will find two pockets at the entrance door quite practical and good size. A short cord at the level of the interior canvas ceiling, very practical for hanging up your socks in the evening or hanging a small lamp. In terms of height, it is limited. We sit quite comfortably towards the front of the tent but impossible at the back, and again we must not be too tall. We will therefore rather lie inside, especially for two.
In the apse, I can easily store an 80L bag as well as a 60L bag with the shoes next to it. By cons in this configuration there is more room. It can be annoying to cook under the apse (those which is not recommended, however).
The front door is well done although it can sometimes be uncomfortable to close it if you are in your down. On the other hand the fact that there is only one door makes that one inevitably hinders the other a little to enter / leave …
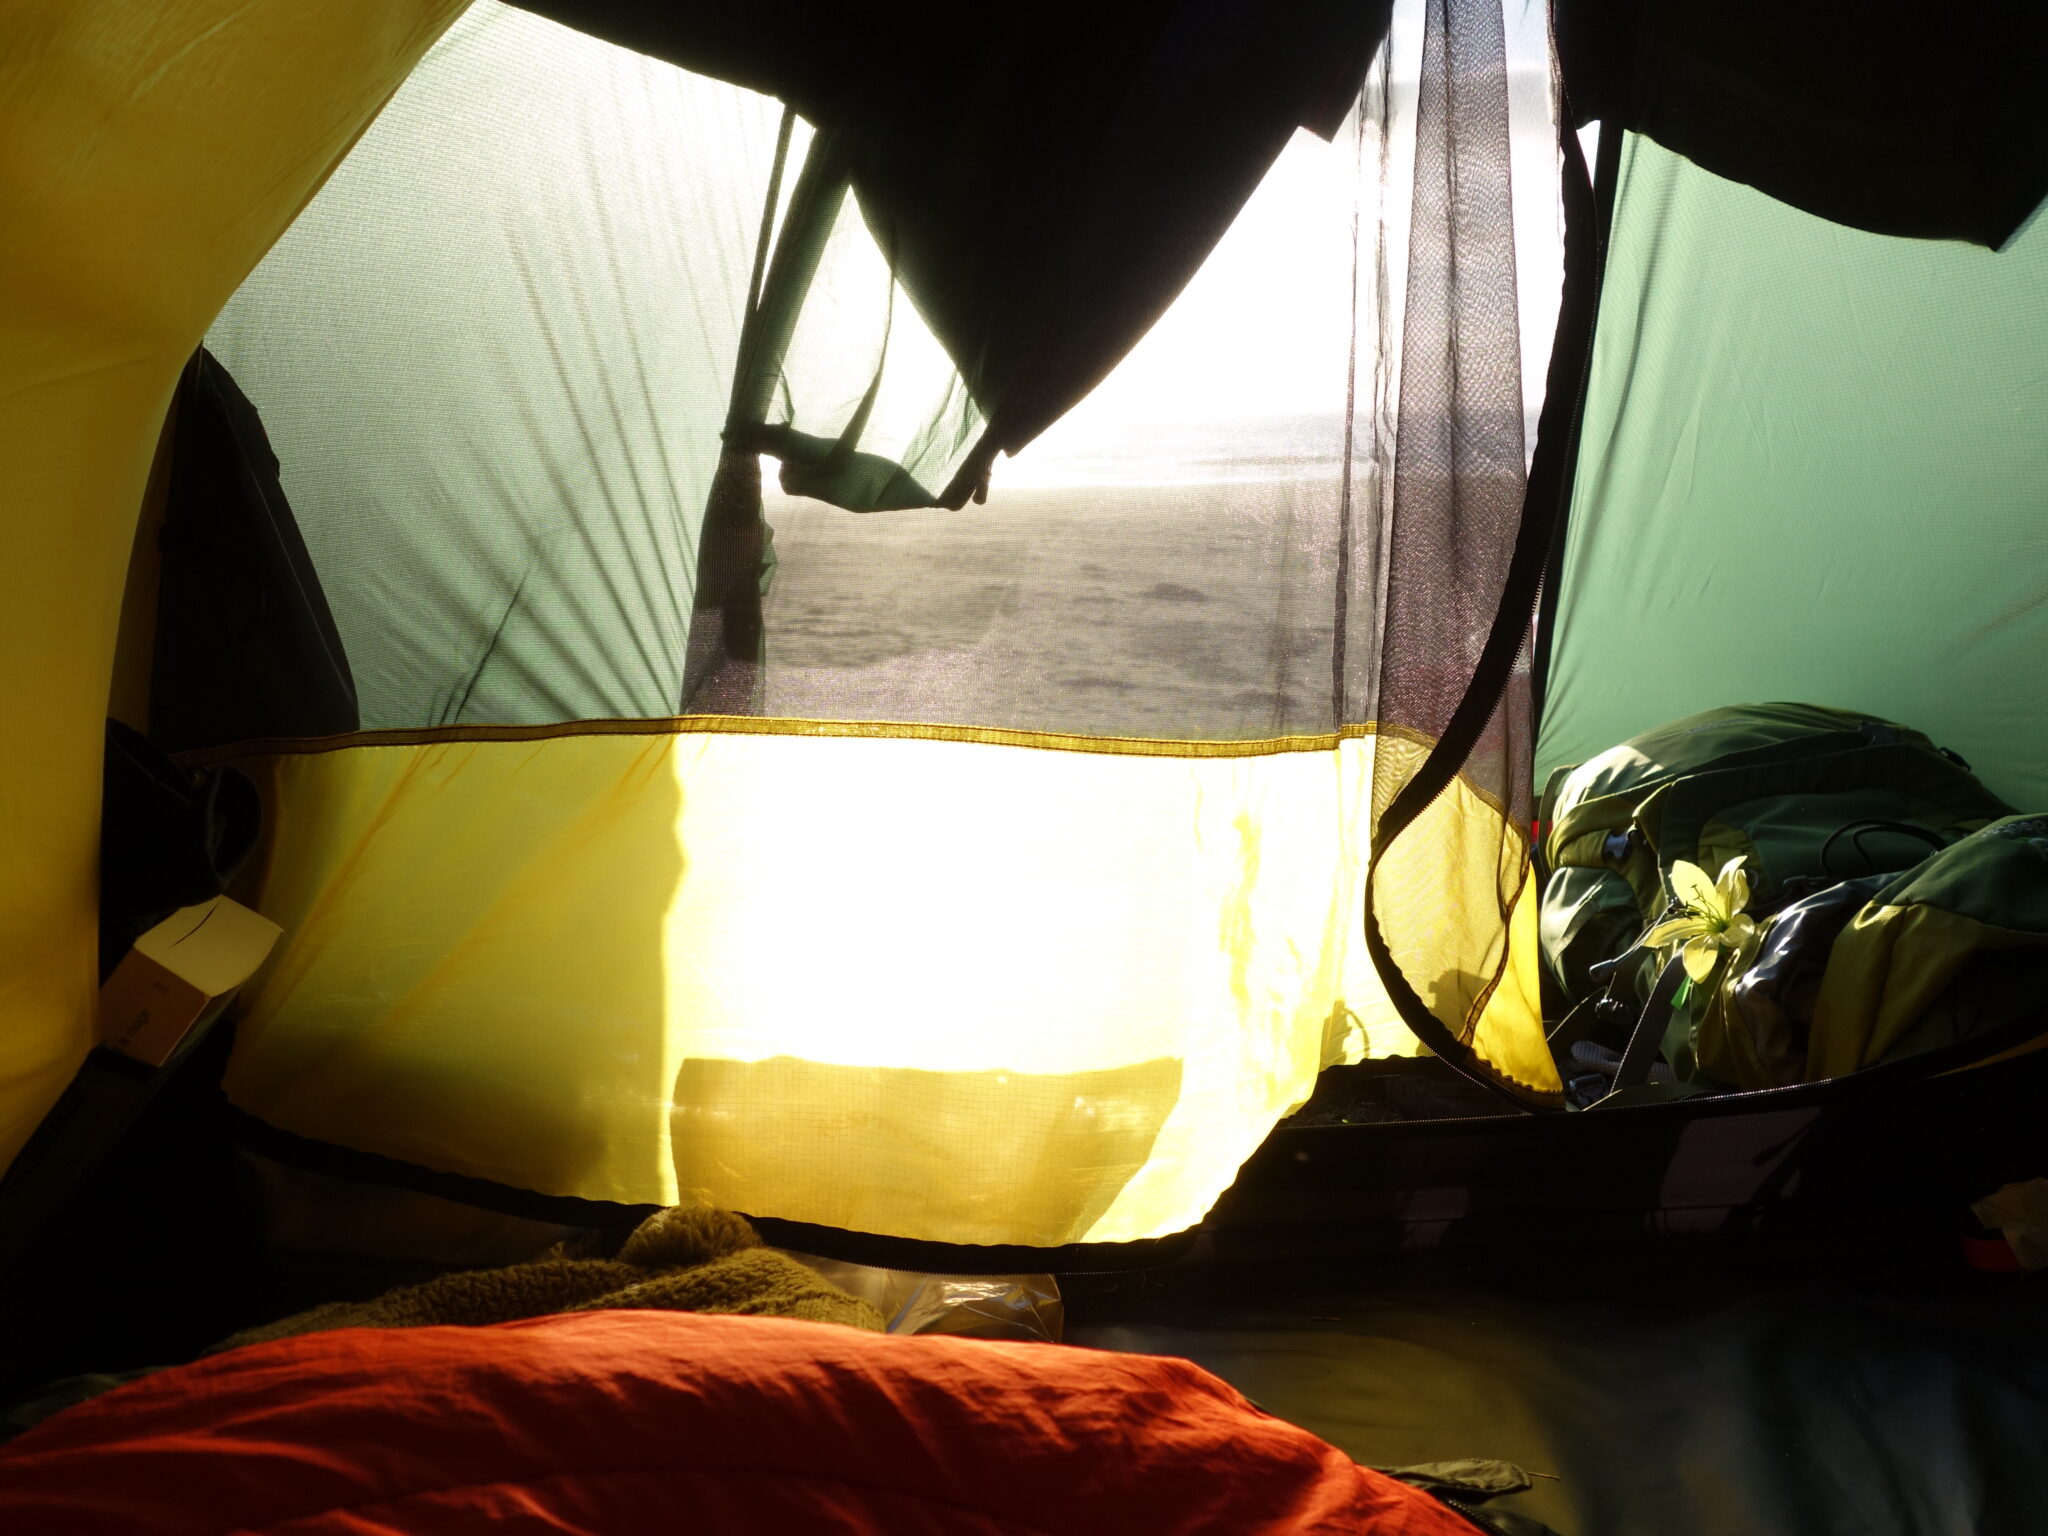
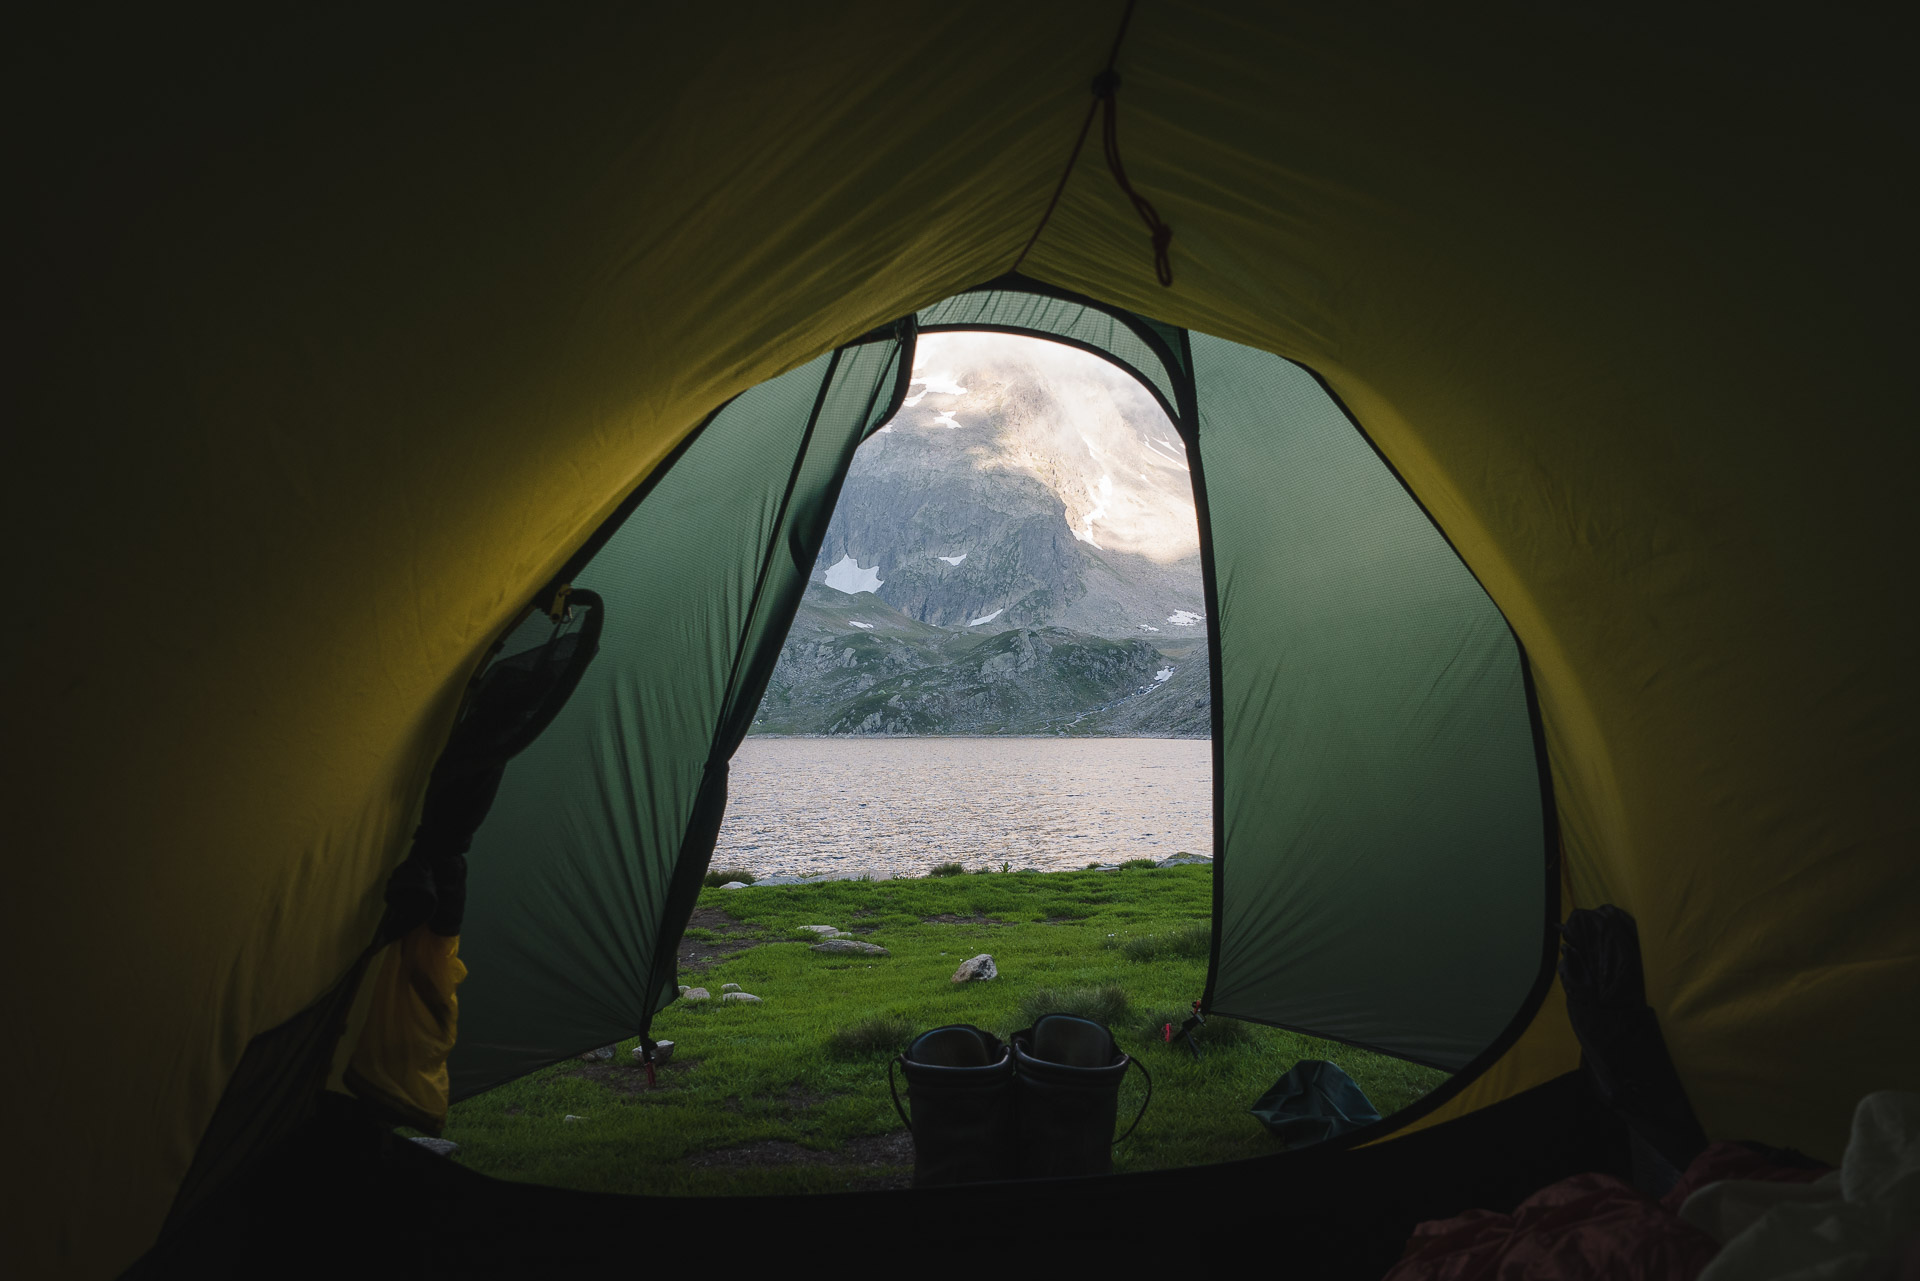
Very positive point: the color of the interior fabric. This one is yellow and thus allows to always have a bright interior. Even if it’s gray outside. I must admit that I was really surprised by this point. It is very effective and pleasant to use.
Conclusions
We are here in the presence of a very good tent but which pays … More than 800 € for a tent it is very expensive (I bought mine 630 € in 2017 but the prices increased then). But the idea with Anjan is to keep it for a long time. This can therefore be profitable in the long term … to be confirmed.
If not this point, the tent is of excellent quality and offers real comfort in the face of the elements. We feel safe which is essential in trekking when our only shelter is this little piece of canvas … I am not at all disappointed with this purchase and I always have the same pleasure in spending nights at the bottom of the pampas in my little anjan 2.
We like :
- Resistance to the elements
- Finishing
- Robustness over time
We dislike :
- Living length
- The price
- The interior height
Fjällräven VIDDA PRO jacket
Fjallraven VIDDA PRO outdoor jacket - Test
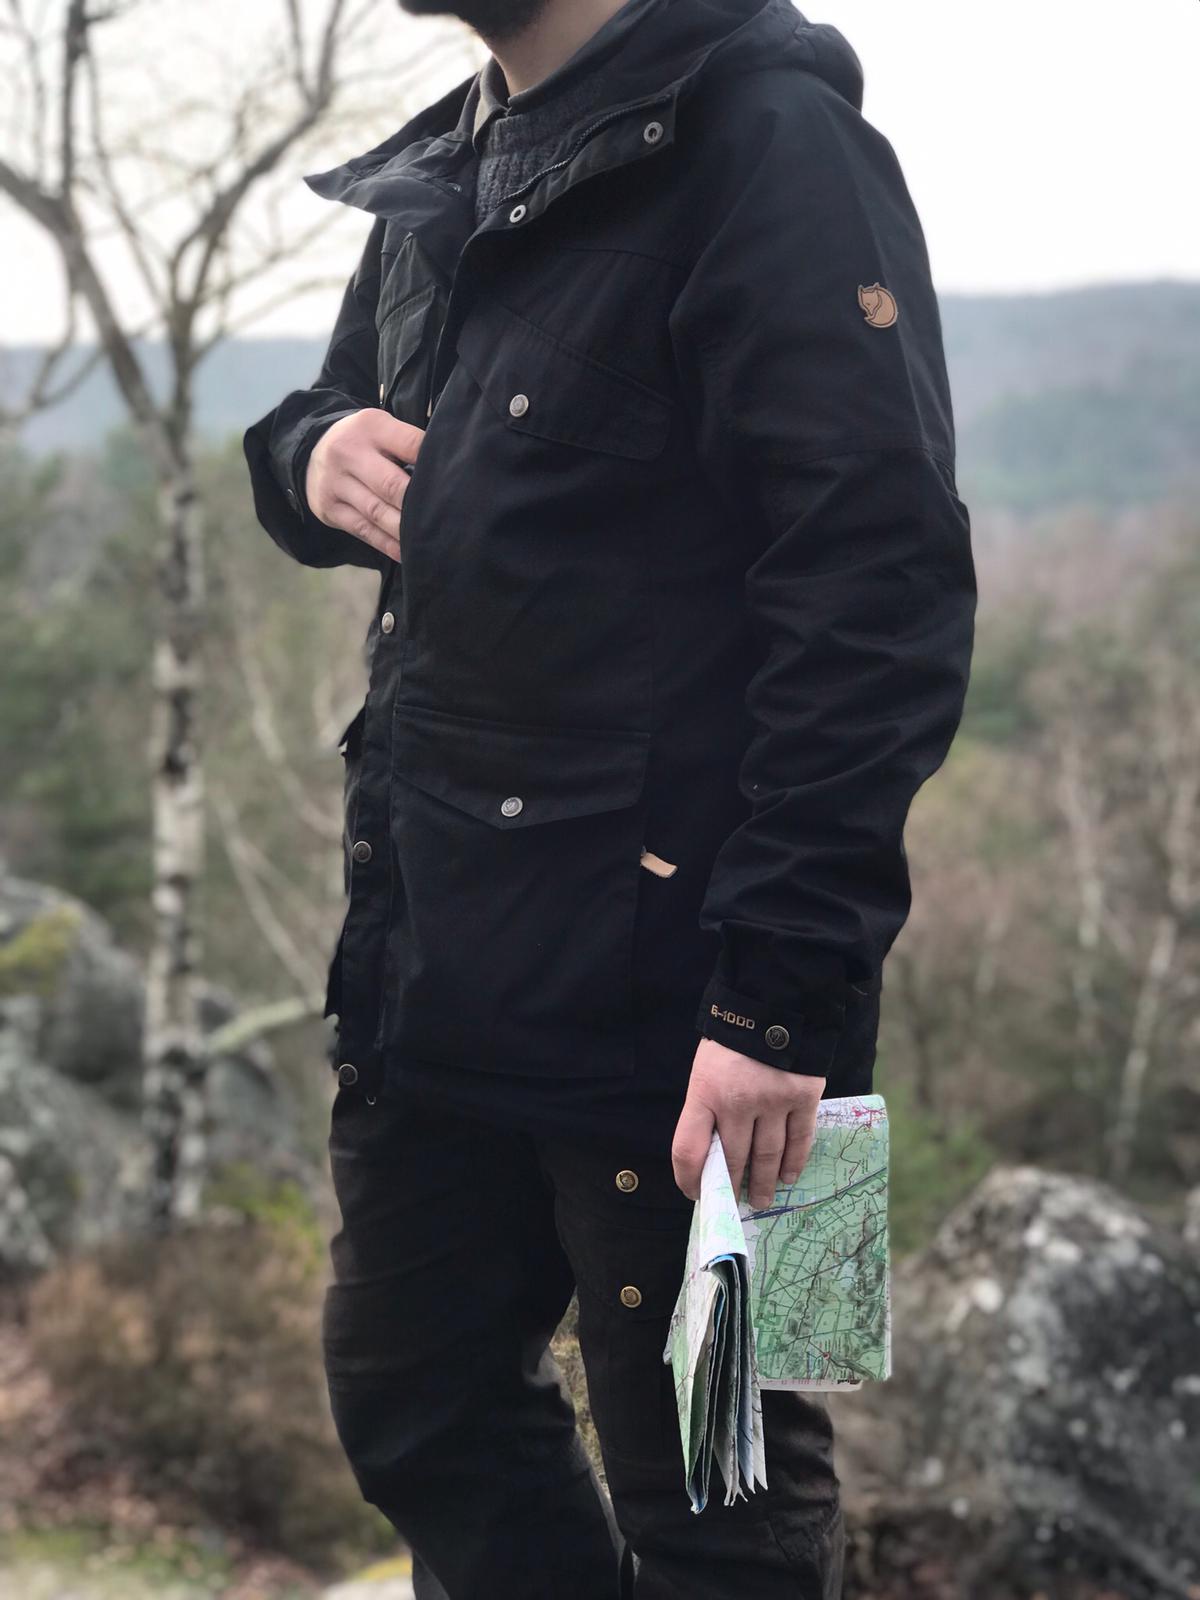
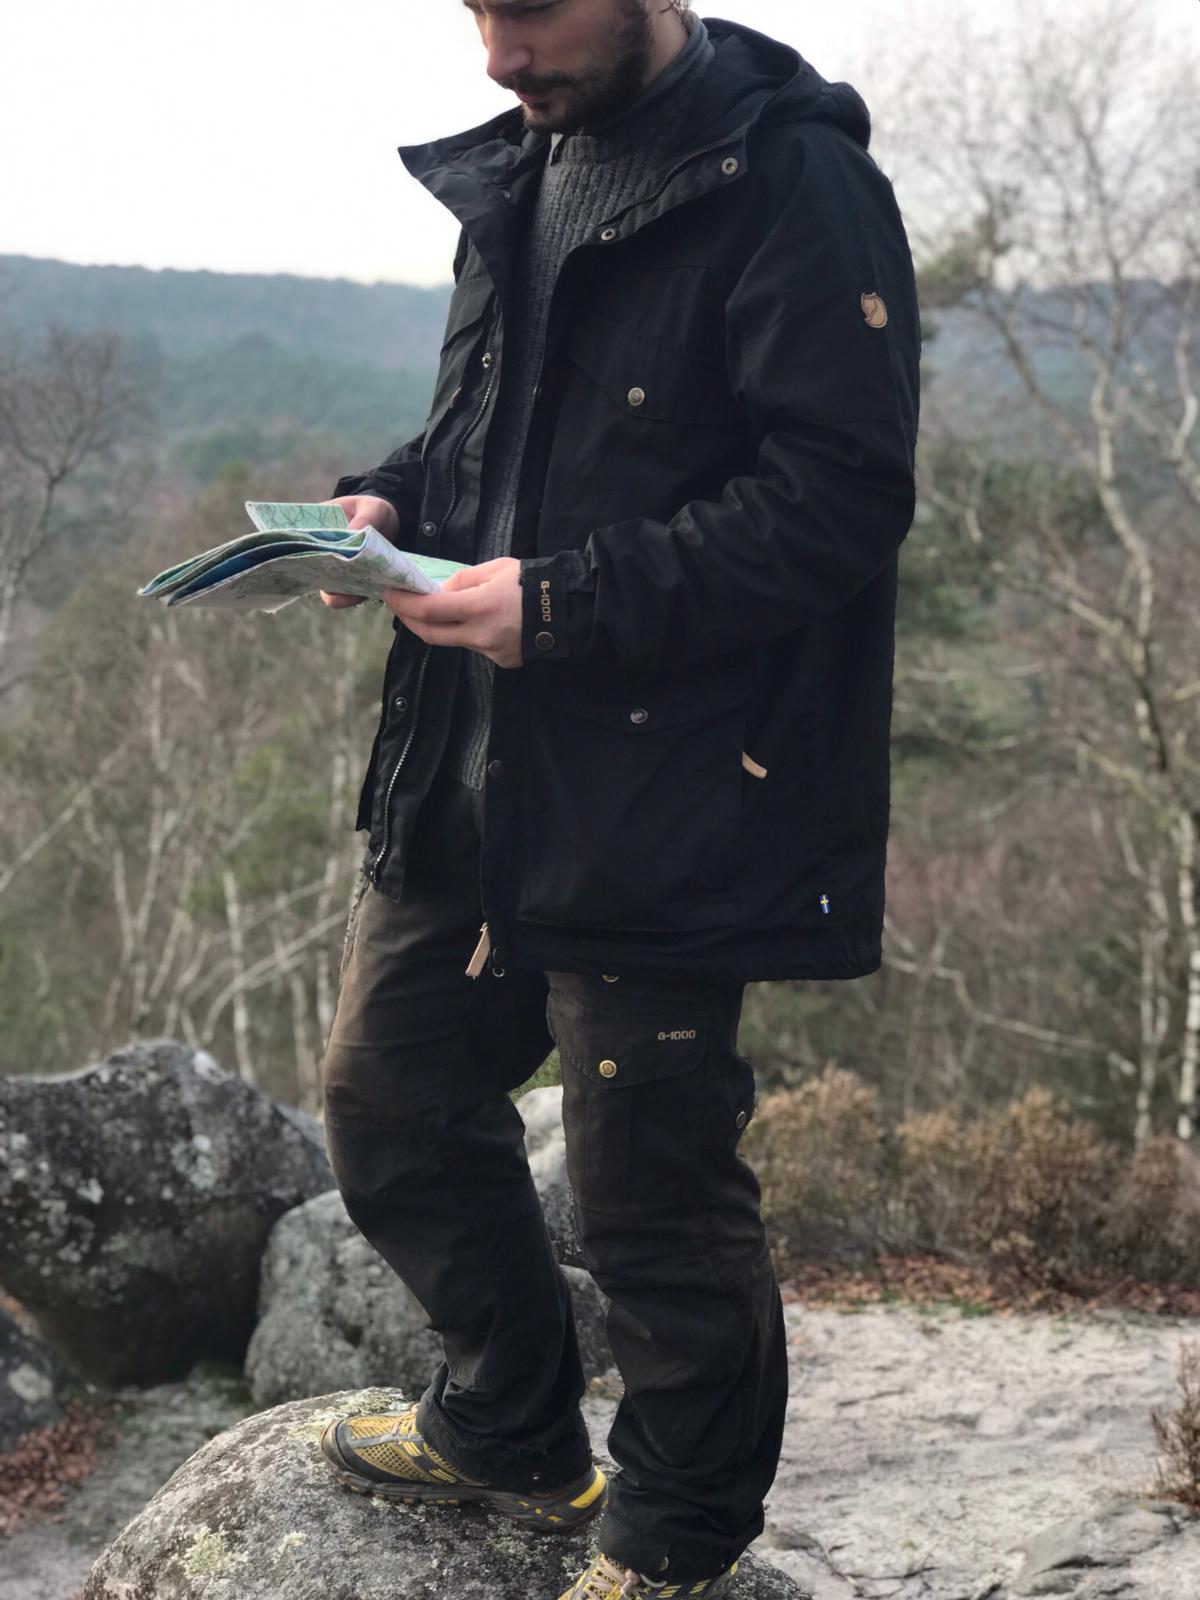
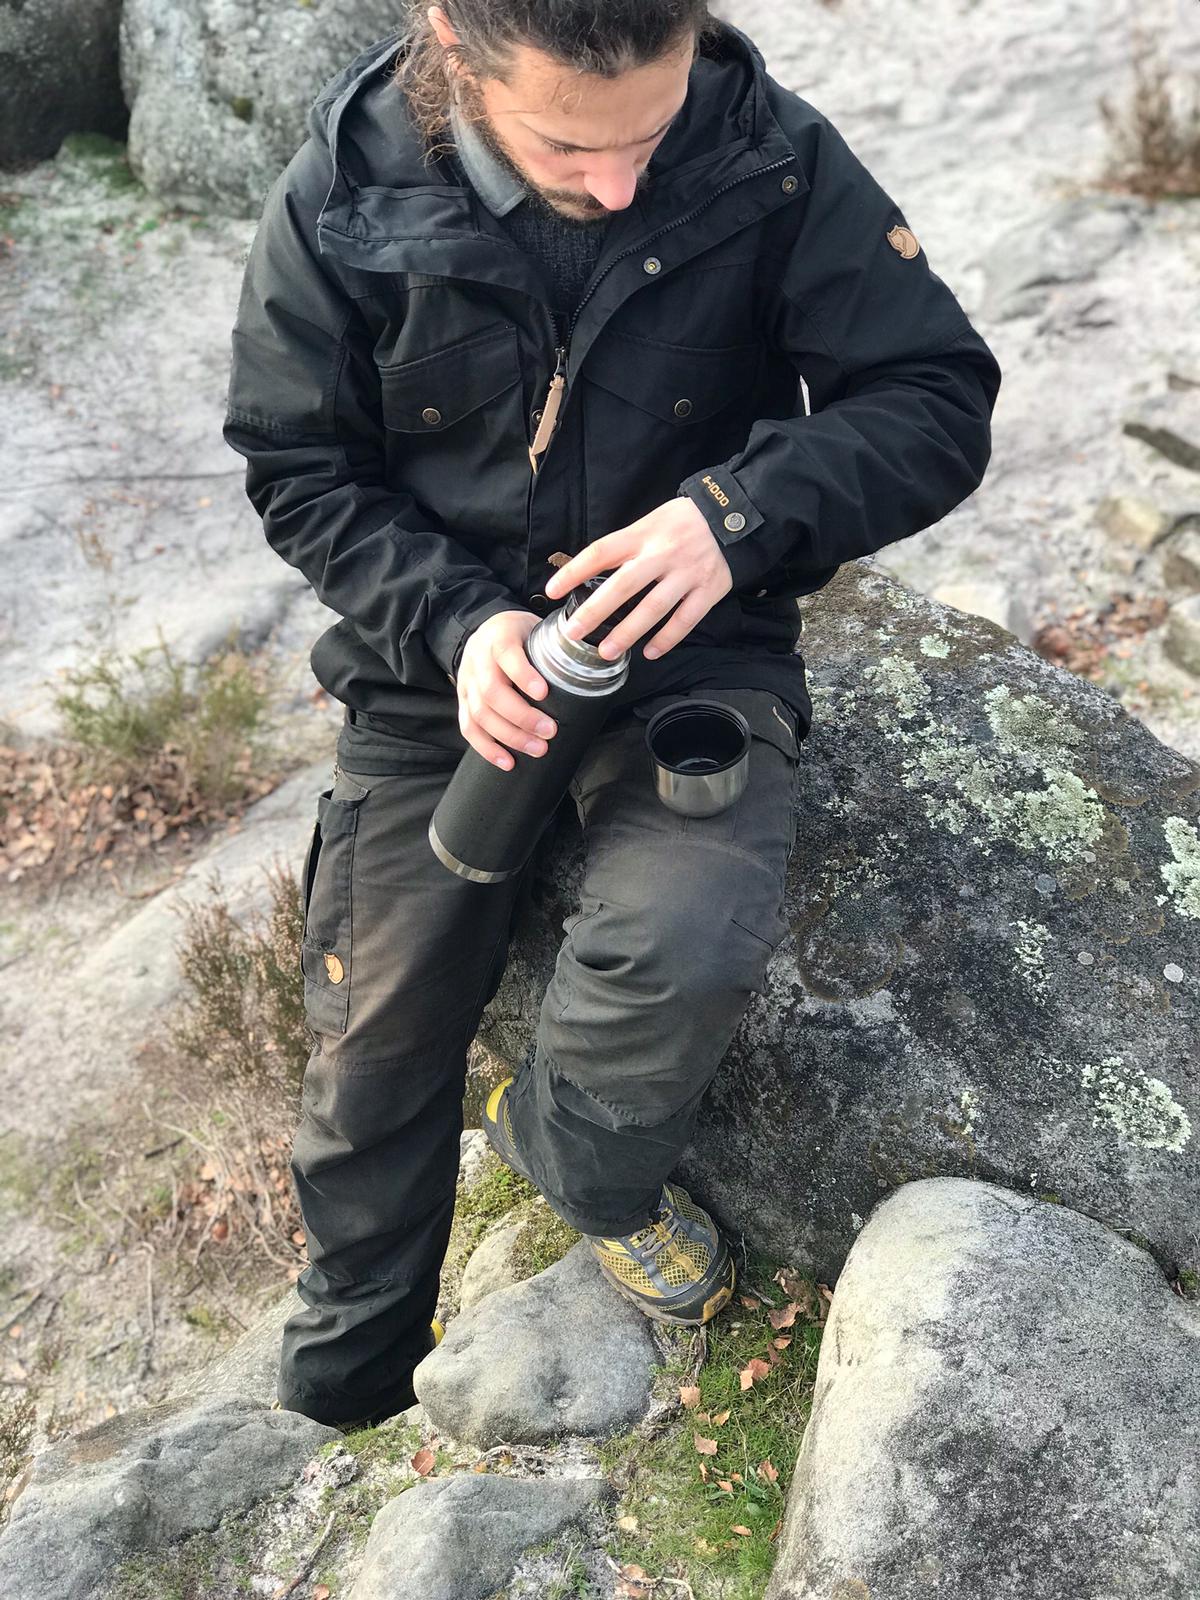
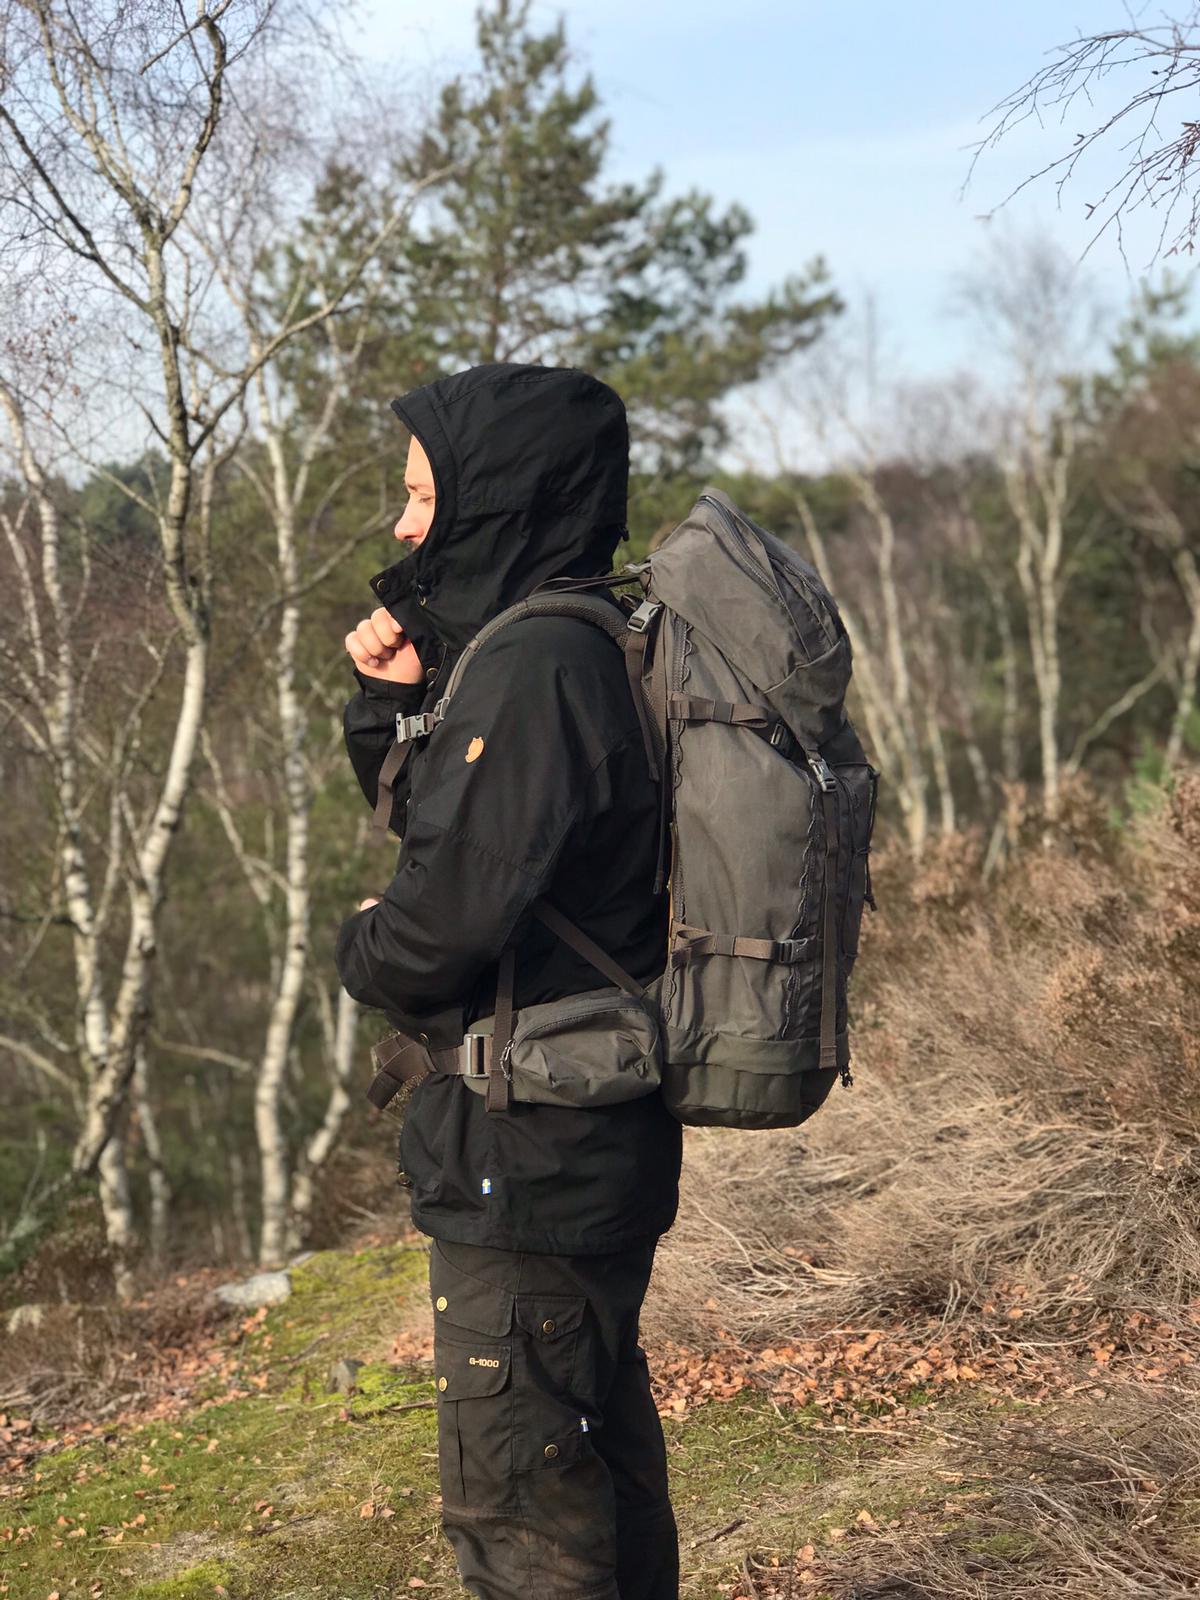
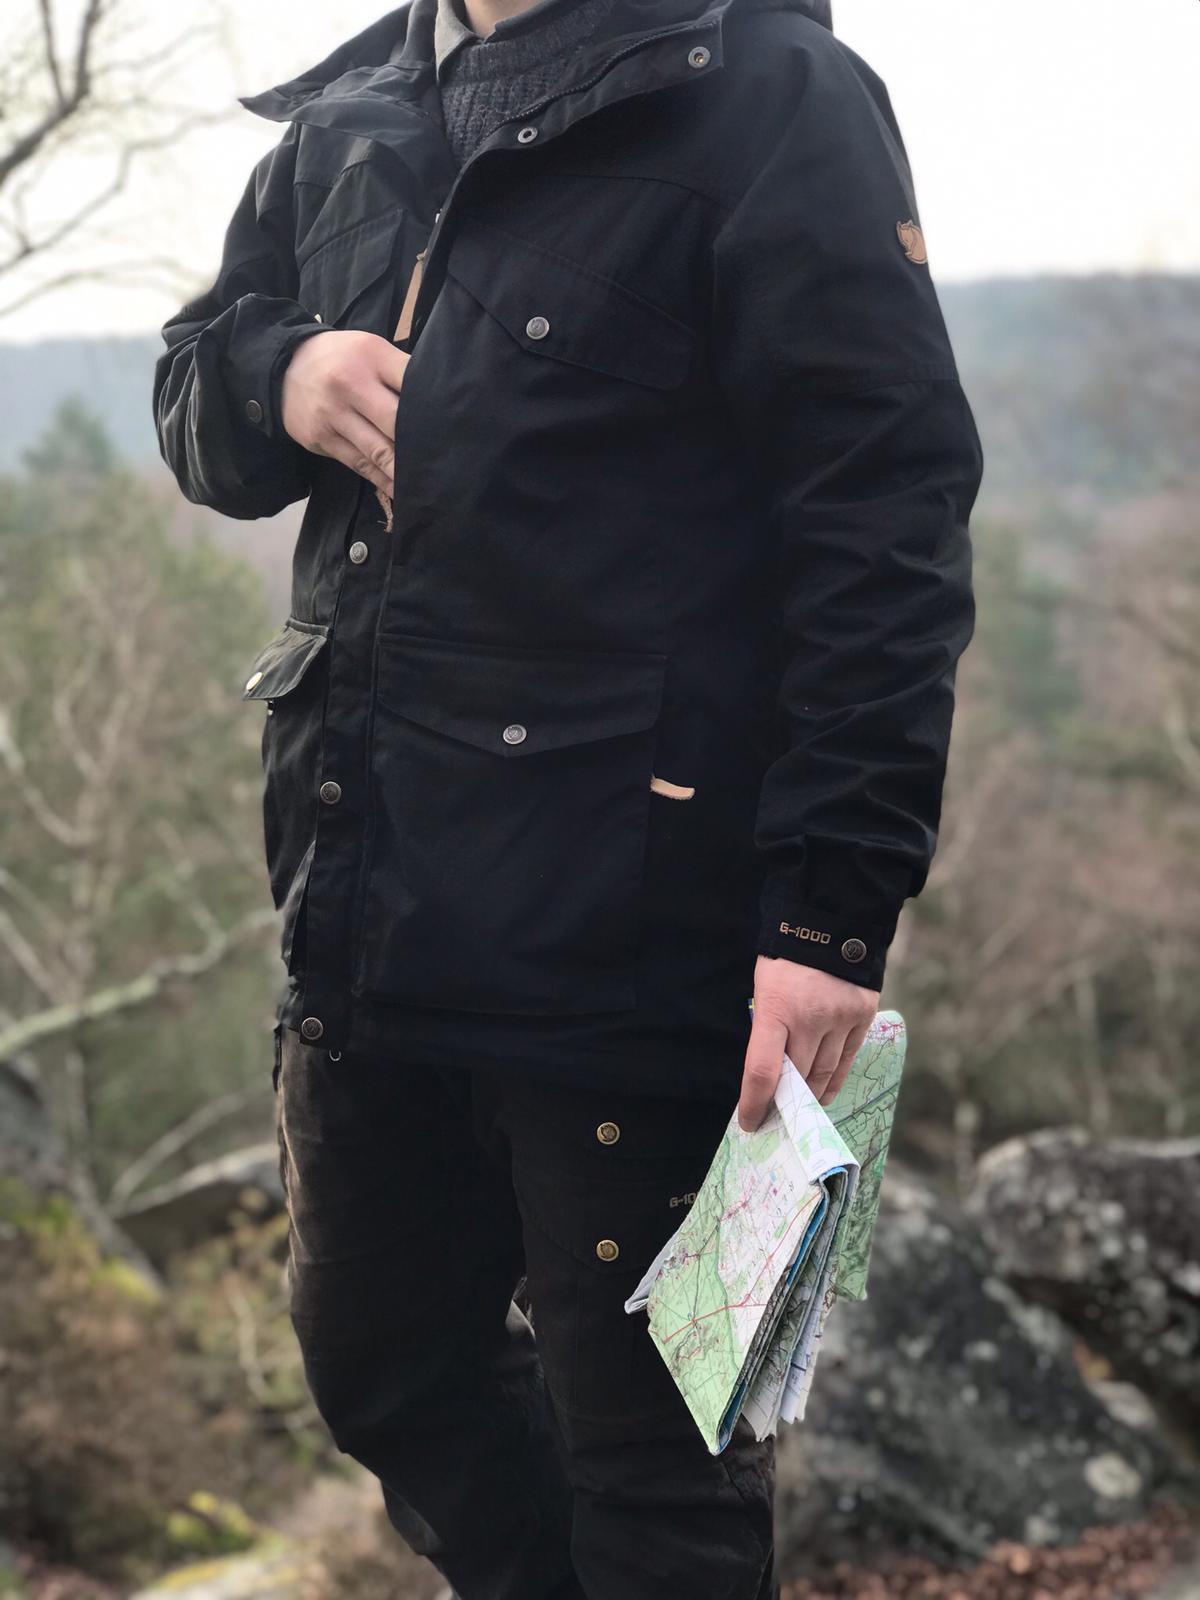
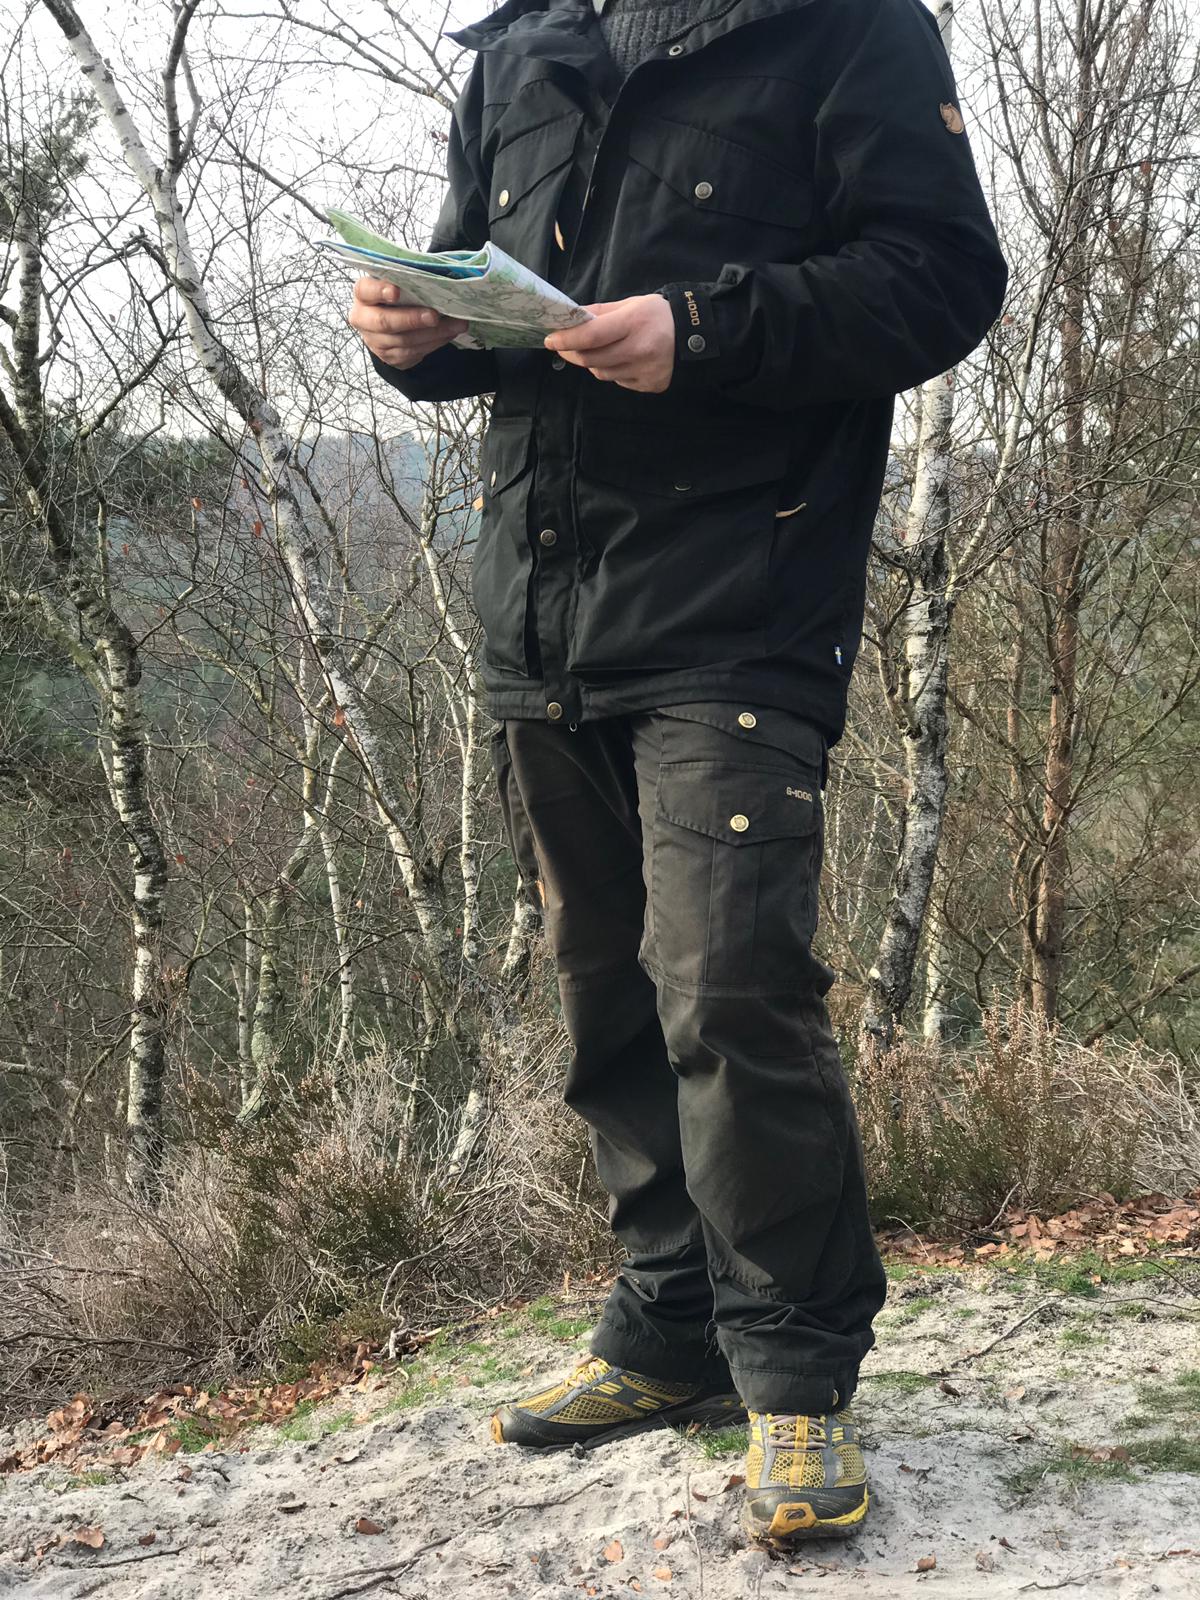
The Fjallraven Vidda pro jacket is a jacket tailored for all outdoor activities. Durable and practical, it will satisfy you in your outdoor activities in all weathers.
Conditions de test
The Vidda pro jacket has been mainly tested during forest outings. It was also worn in a more urban situation which made it possible to face all types of weather (good weather, wind, (heavy) rain) and to test it over long periods of time.
Regarding dimensions, the jacket tested is a size M, I am 1.70m for 77kg. She is very good at the shoulders and in length. We could find it a little wide at the bust but in my opinion it gives a certain comfort especially if you wear thick layers of clothing underneath like a big wool sweater for example.
Global informations
- Brand : Fjallraven
- Price : 284.00€
- Weight : 850g
- Material : G1000 ECO
- Colors : "Dark Olive", "Deep forest", "Dark grey/black", "Black" (tested color) et "Dark navy"
- Link
Feedback
Look
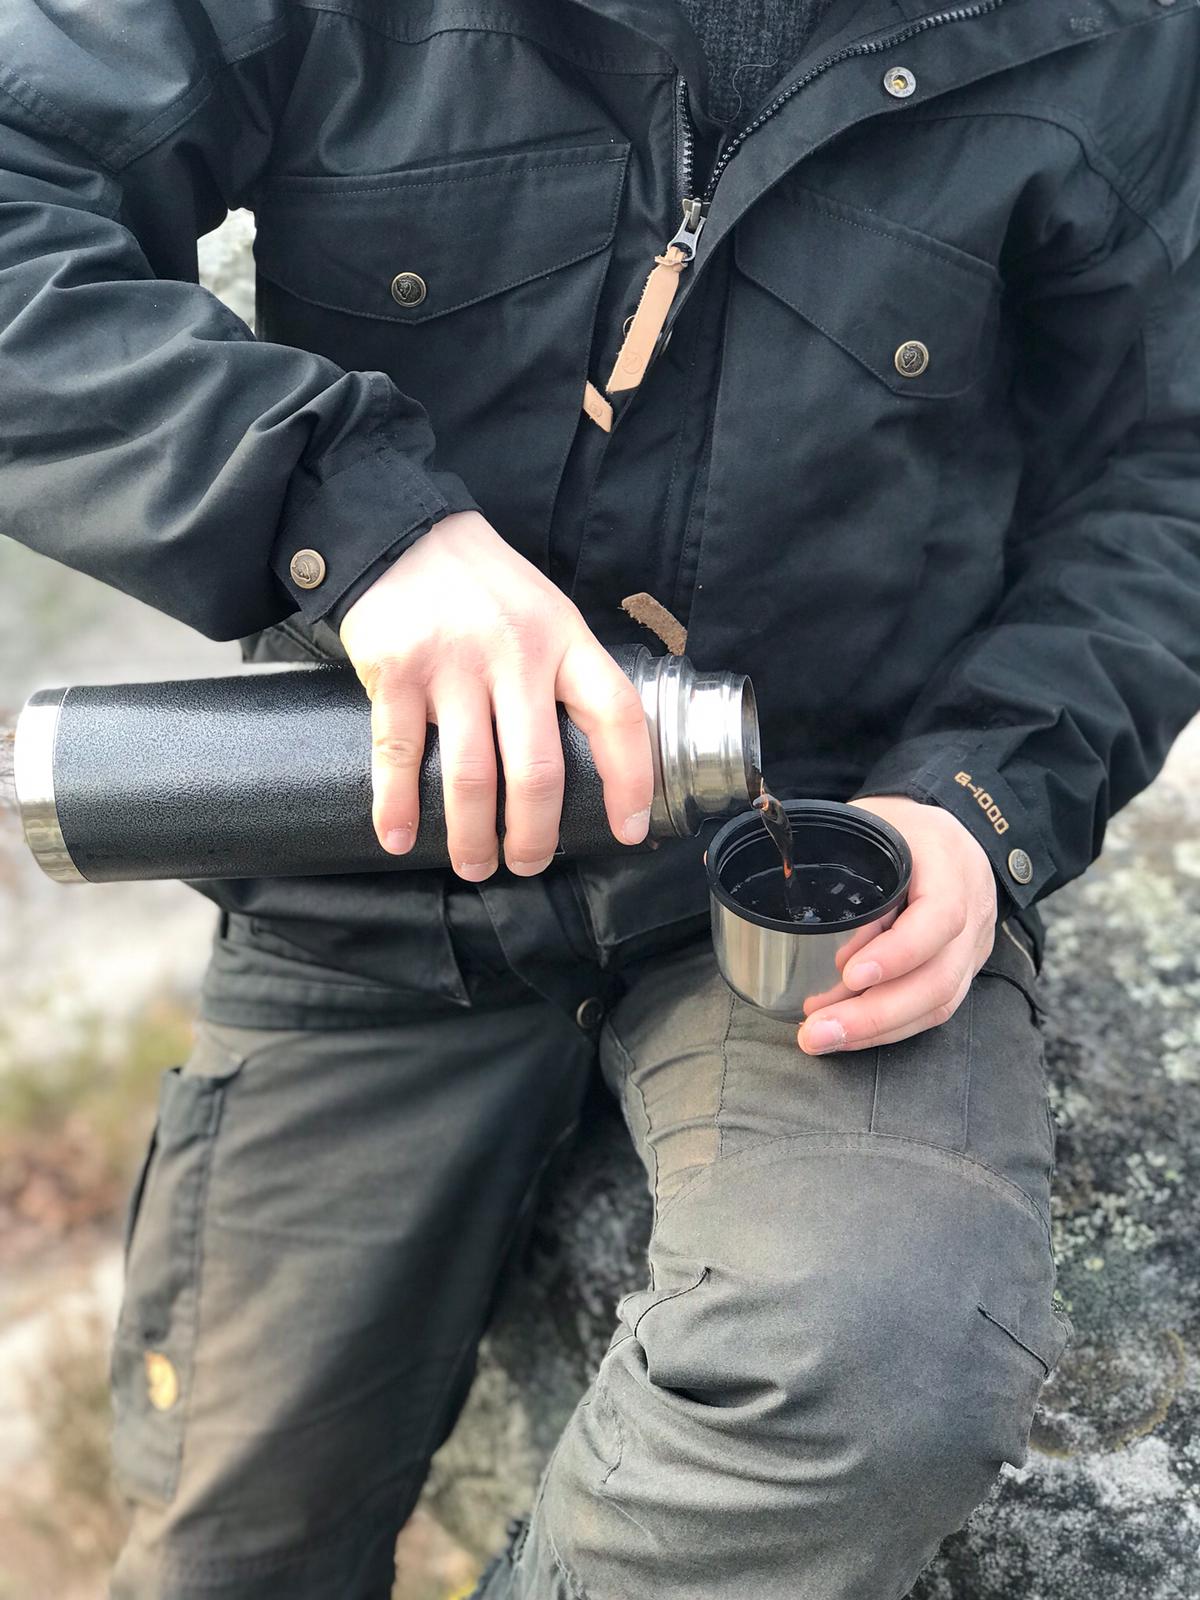
Very subjective point but which also has its importance. I find the jacket pretty. It is well cut and simple in the good sense of the word. There are many pockets present but they do not spoil the overall look. Note the well-worked details such as the leather tabs and the push buttons with the image of the brand logo.
Cut
The vidda pro is well cut. As I said before, the cut is a little wide at the bust but it does not interfere in any way and allows you to wear a second thick layer like a big wool sweater for example. The sleeves are long enough not to go up if the arms are extended. The jacket does not impose constraints on freedom of movement as long as these remain “normal” (it is not a mountaineering jacket for example).
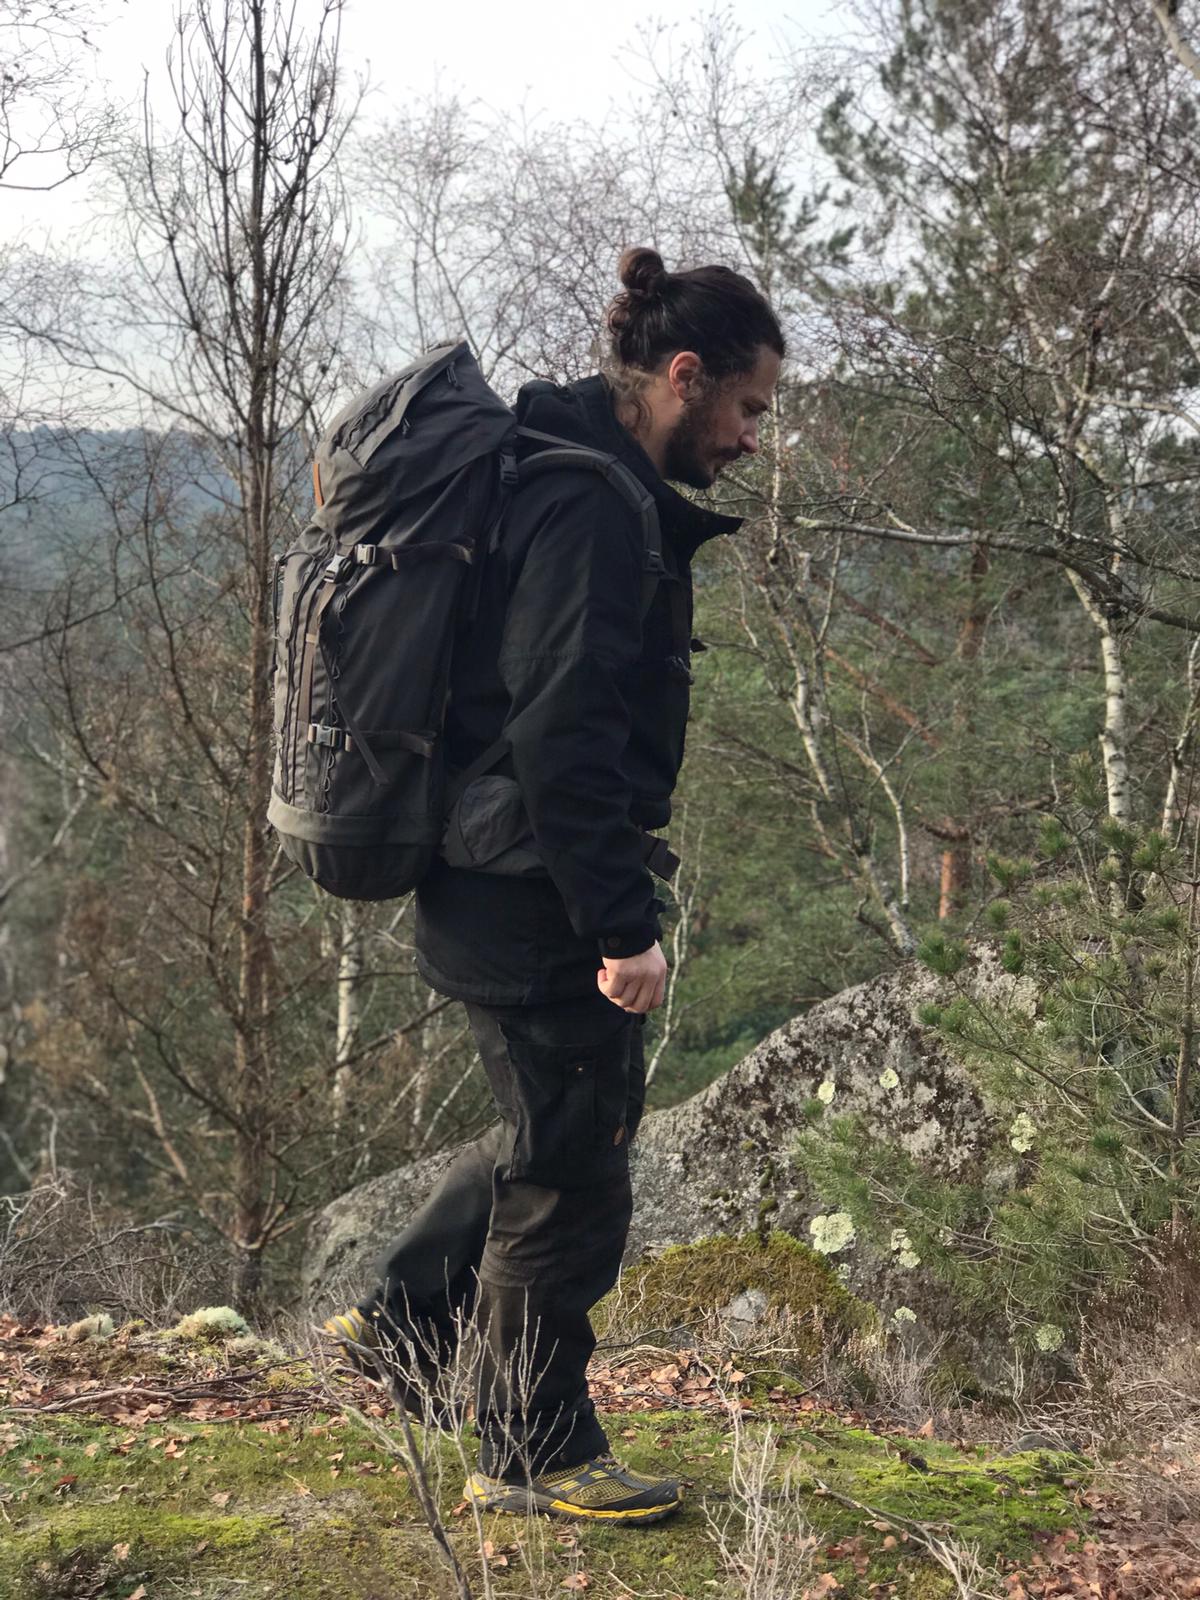
The length is very good, the jacket descends on the buttocks thus protecting well from the wind and friction of the bag.
Materials and Robustness
Like most Fjallraven products, the jacket is made of G1000 Eco, a solid and durable material. I use the jacket almost every day and not a point of wear in sight. If I compare to other products of the brand, I do not have any worries when it comes to keeping time.
Most of the “structural” seams are lined, guaranteeing additional durability. The shoulders seem doubled for more resistance.
The jacket in detail
The Vidda pro is a well finished jacket that offers a multitude of practical details
- The sleeves are wide enough to be worn over a pair of gloves. They are closed by a press button with two positions.
The jacket is not ventilated on the sides but given the objective of its design this is not surprising. We will rather use it in the intermediate season. - The central zipper is two-way which is always practical, it is also “doubled” by a flap with press studs ensuring a good seal. All zippers are YKK brand and have a tab for easy handling.
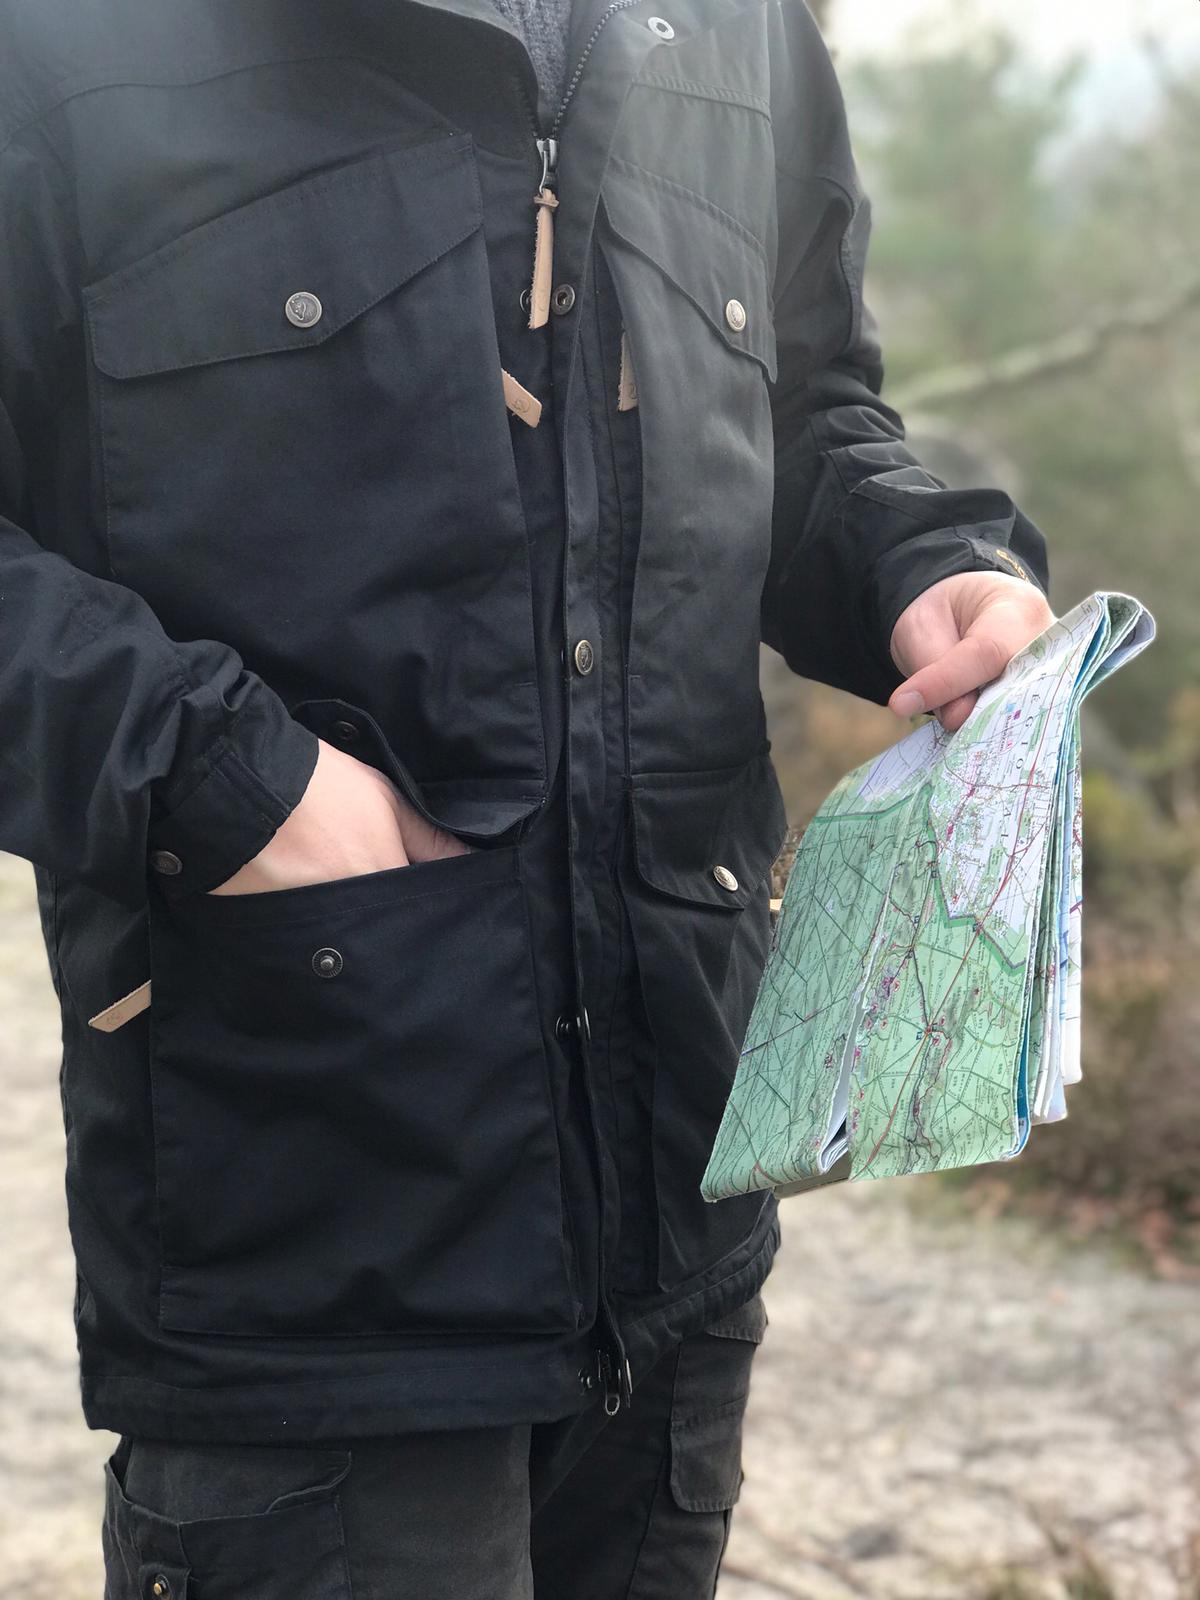
- The jacket has 8 pockets: 4 in the low position (two with vertical zipper and two horizontal opening with a press button) and 4 in the chest position (idem: two pockets with horizontal opening with a press button and two with vertical opening with zip.). The pockets are all protected by a flap that protects well from the rain. They are large and can store a large amount of material, including “horizontal opening” pockets. There is largely an IGN card (in height) or gloves or a hat. They also offer a clever system of loops for attaching equipment such as gloves or a knife. The only flaw, the position of the bottom pockets makes them unusable or uncomfortable when using a waist belt bag. This jacket is not cut for long-distance hiking at this level. Note: there is no inside pocket.
- The hood is effective but I have noticed several times that it does not ideally cover the face. I wear a bun that shifts it may be a little behind but I think a small ledge projecting more forward would have been welcome.
- To protect yourself from the wind, a drawstring tightens the bottom of the jacket.
Waterproofness and breathability
The jacket offers a good seal. I took a few good showers and I didn’t have any worries about leaks. Just a little water that came in through the opening of the hood at one time but I put it wrong.
I did not have the “pleasure” to test the jacket under the long showers but I think that it will defend itself well even if it will always end up crossing.
The seal can still be improved thanks to the brand’s Greenland Wax wax, but I haven’t found it useful to use it yet.
Regarding the wind resistance, there is not much to complain about. We are well protected at the bust and buttocks. We could however appreciate a slightly higher collar to prevent air from entering the neck when it blows from the front.
Price
The jacket is available at € 284 on the Fjallraven site. Even if this is a substantial sum, I do not find it excessive if we take into account the durability of the jacket and its finish.
Conclusions
We like :
- The style
- The cut a little wide to wear a good lining
- Accessories: pockets, accessory holders
- Sealing
- All the little practical details brought to the jacket
We dislike :
- The hood (not very covering on the face)
- No inside pocket
If you are looking for a nice jacket to walk in the forest, do bushcraft or any other outdoor activity then the Vidda pro is for you. The jacket has no major faults and performs its functions brilliantly.
Eating while hiking
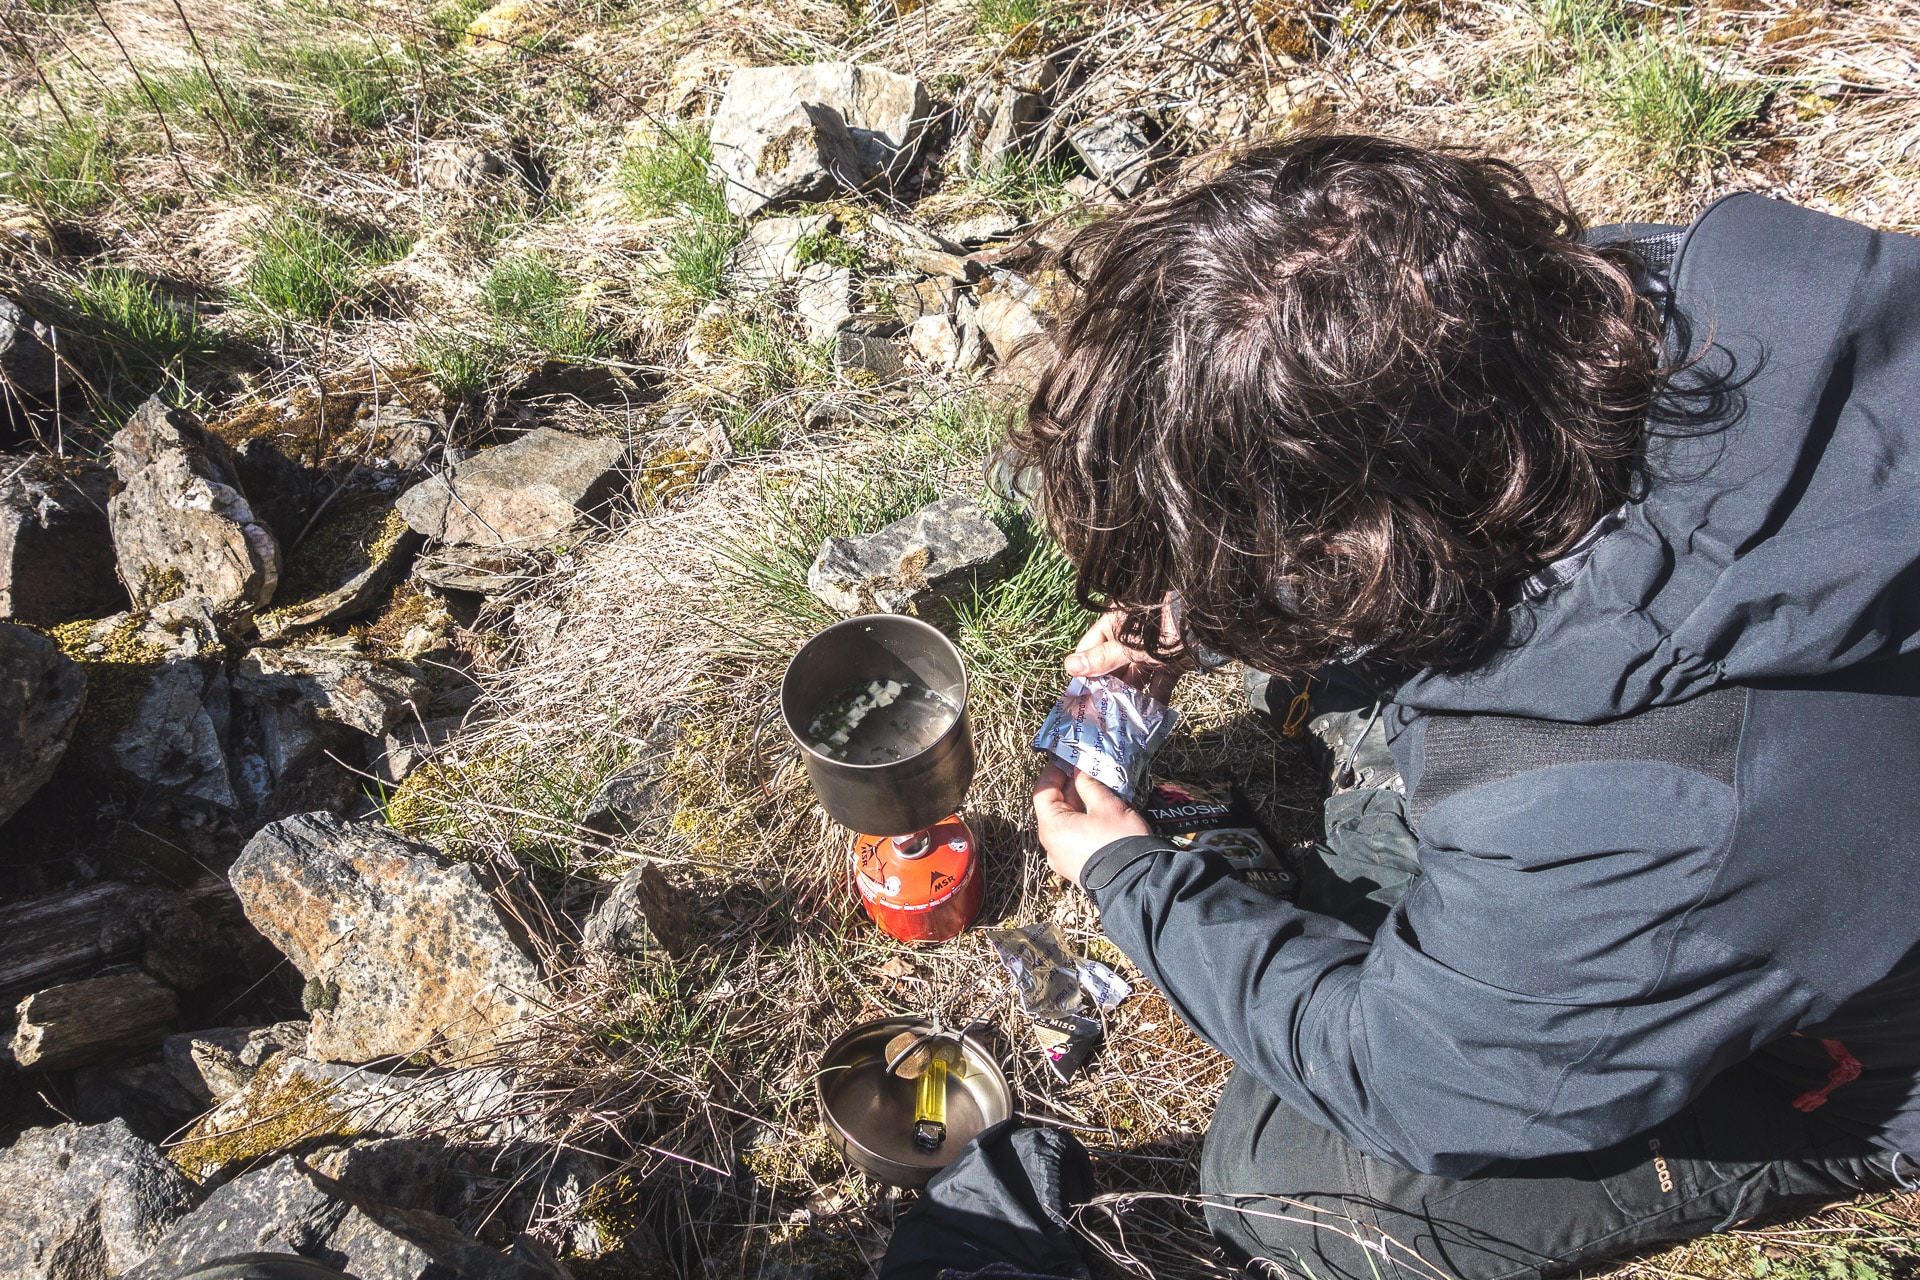
Eating is an essential and important component during a hike and even more during a trek. Indeed, it is easy to understand that without the calories of a good meal, we will have difficulty moving forward in the middle of the wilderness. Eating is also one of the main vectors of pleasure during a roaming: what could be better indeed than a good hot dish after a long day of walking in the rain …
The aim of this guide is therefore to provide you with the main keys to properly planning your provisioning for your next outing.
The calories ingested will be your fuel to advance. It is therefore necessary to plan their contribution to keep energy throughout the day and the journey.
In general we recommend an intake of 2000-2500kcal per day for an adult man and 1800-2000kcal for an adult woman but this applies to people who are not very active. During a hike you can consume a lot more calories, some websites allow you to estimate your calorie consumption based on your weight. In my case, for 78kg, I find values between 400 and 500kcal per hour of hiking. I find these values high, but they clearly show that it is necessary to count on a contribution far above the average.
Eat or not to eat? Some try the fasting trek. I have never tried it myself but the experience intrigues me. If you are curious I recommend reading this topo by Johanna and Olivier who did 6 days of fasting in Marjorque – Link to the topo
For my part I do not make a precise calculation of the calories that I take because I begin to know my needs with experience but I think to count on 3000 / 3500kcal per day in uneven and well-charged terrain. A Mike Horn turns rather at 10000kcal per day during his journey in the Far North …
Another concern with autonomy is the weight and volume of the food. For 9 days of trekking we quickly arrive at 5-7kg of food for a large volume of the bag (about half of my 65L bag for this duration). It is therefore necessary to prefer foods that concentrate calories well. As such, proteins, carbohydrates or lipids do not have the same contributions:
- Carbohydrates: 4kcal / gram
- Proteins: 4kcal / gram
- Fat: 9kcal / gram
- For info – Alcohol: 7kcal / gram
It is therefore necessary to juggle between these different intakes, their “energy efficiency” with respect to weight / volume and the ease of assimilating these calories (fast sugars vs slow sugars, …). For example, Mike Horn during his tour of the Arctic Circle and his 10,000kcal / day, ate dishes extremely rich in oil and fat … no choice if you do not want to take tons of food.
Let’s get to the heart of the matter! What to take when hiking?
Weight / volume
As we mentioned earlier, food weighs heavily and takes up a lot of space in the bag. So you have to choose the right foods with this little specification:
- Food should not weigh too heavy
- They should be small
- They should be stored easily
- They should preferably be easy to cook and prepare (low fuel consumption)
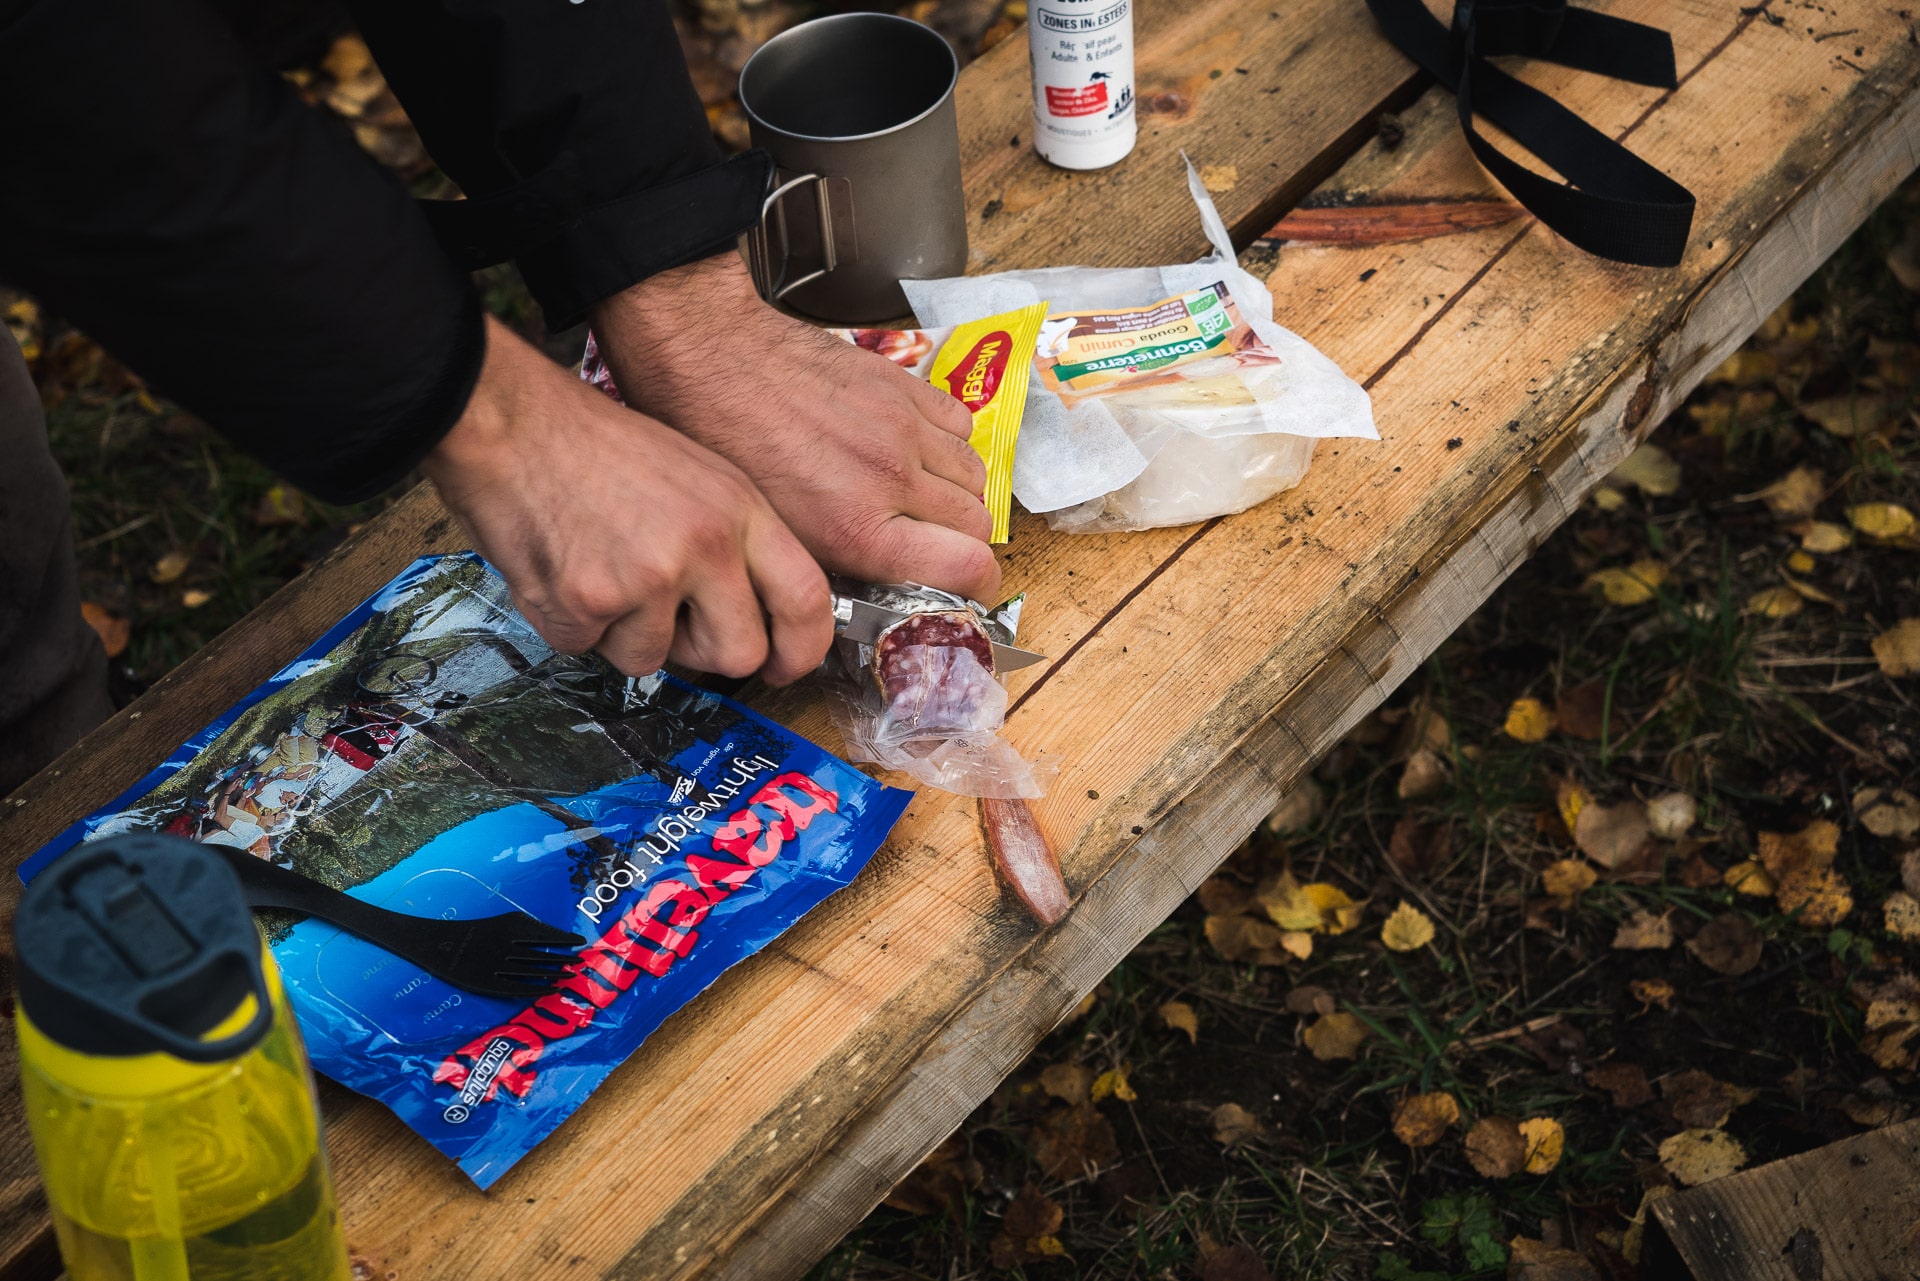
When it comes to weight, no secret, you have to aim for high-calorie foods. Starchy foods, such as pasta or rice are well indicated or mash as well as sausage or cheese for example. Seeds and nuts of all kinds are also very interesting (nuts = 600kcal / 100g !!)
For the volume, you have to aim right: 100g of semolina take up much less space than 100g of tortellini. Prefer therefore the dry ingredients because the water in addition to weighing heavy takes up space. Our modern society loves over-packaging! We therefore find ourselves carrying large volumes of voids and cardboard or plastic if we do not repackage. For my part I distribute what I take in resealable freezer bags (ziploc), it’s cheap, waterproof, relatively solid and you can easily see what’s inside.
Canning must be one of the worst things to take on a hike: it’s heavy (you only take water), it’s bulky and it also generates bulky waste.
Storage will be done at room temperature. So you have to choose well. Dry food lends itself well to play again. For cheese, for example, don’t go with a good flowing camembert, but rather with conté or old mimolette.
Preparation is also important. An ingredient that takes a long time to be cooked will require more gas to take away and therefore additional weight, this may be the case for rice for example. As such I find the semolina extremely effective: very small and rich in carbohydrates, it requires very little water to be cooked (no mess). Tip: use pasta water to make soup.
Obviously, the pleasure component must be taken into account and it is true that eating fresh food is always fun. But in the same way all fruits, for example, do not have the same advantages or disadvantages. An apple will keep better than strawberries or peaches, for example, but there is nothing to prevent the latter from being taken for the first few days.
Take away or on site?
We have so far only dealt with the case where we take all our food. Another possibility is to find locally. I am not talking here about what Carrefour can offer us, but what Mother Nature can provide us.
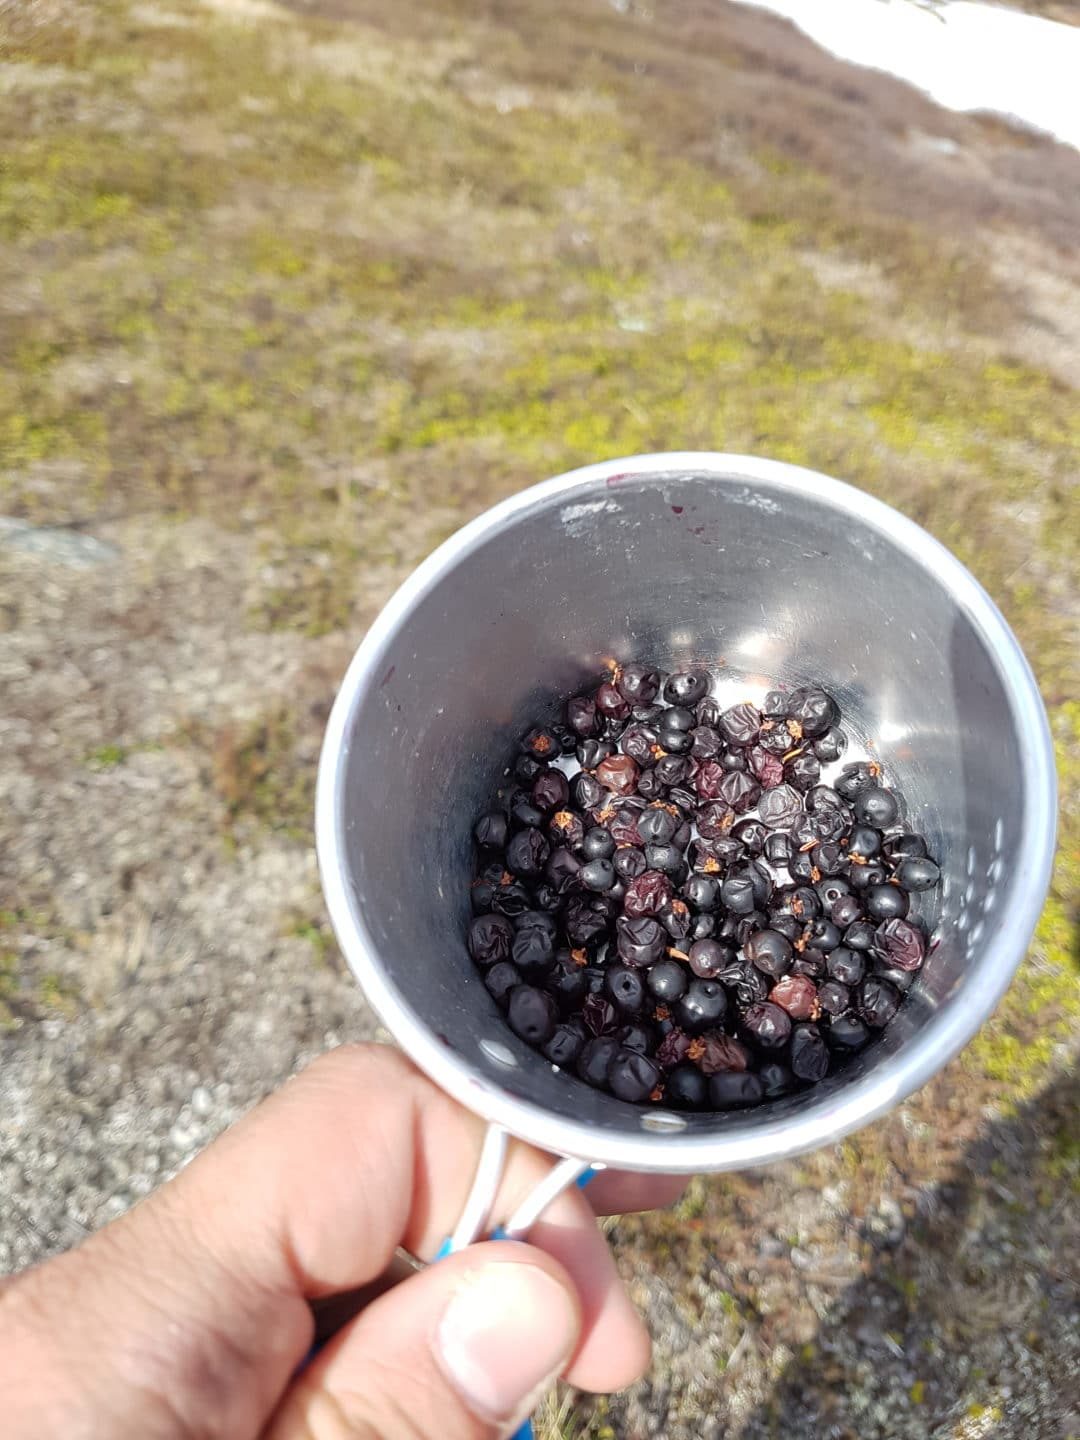
CAUTION: consume only what you are certain of edibility especially for berries and mushrooms!
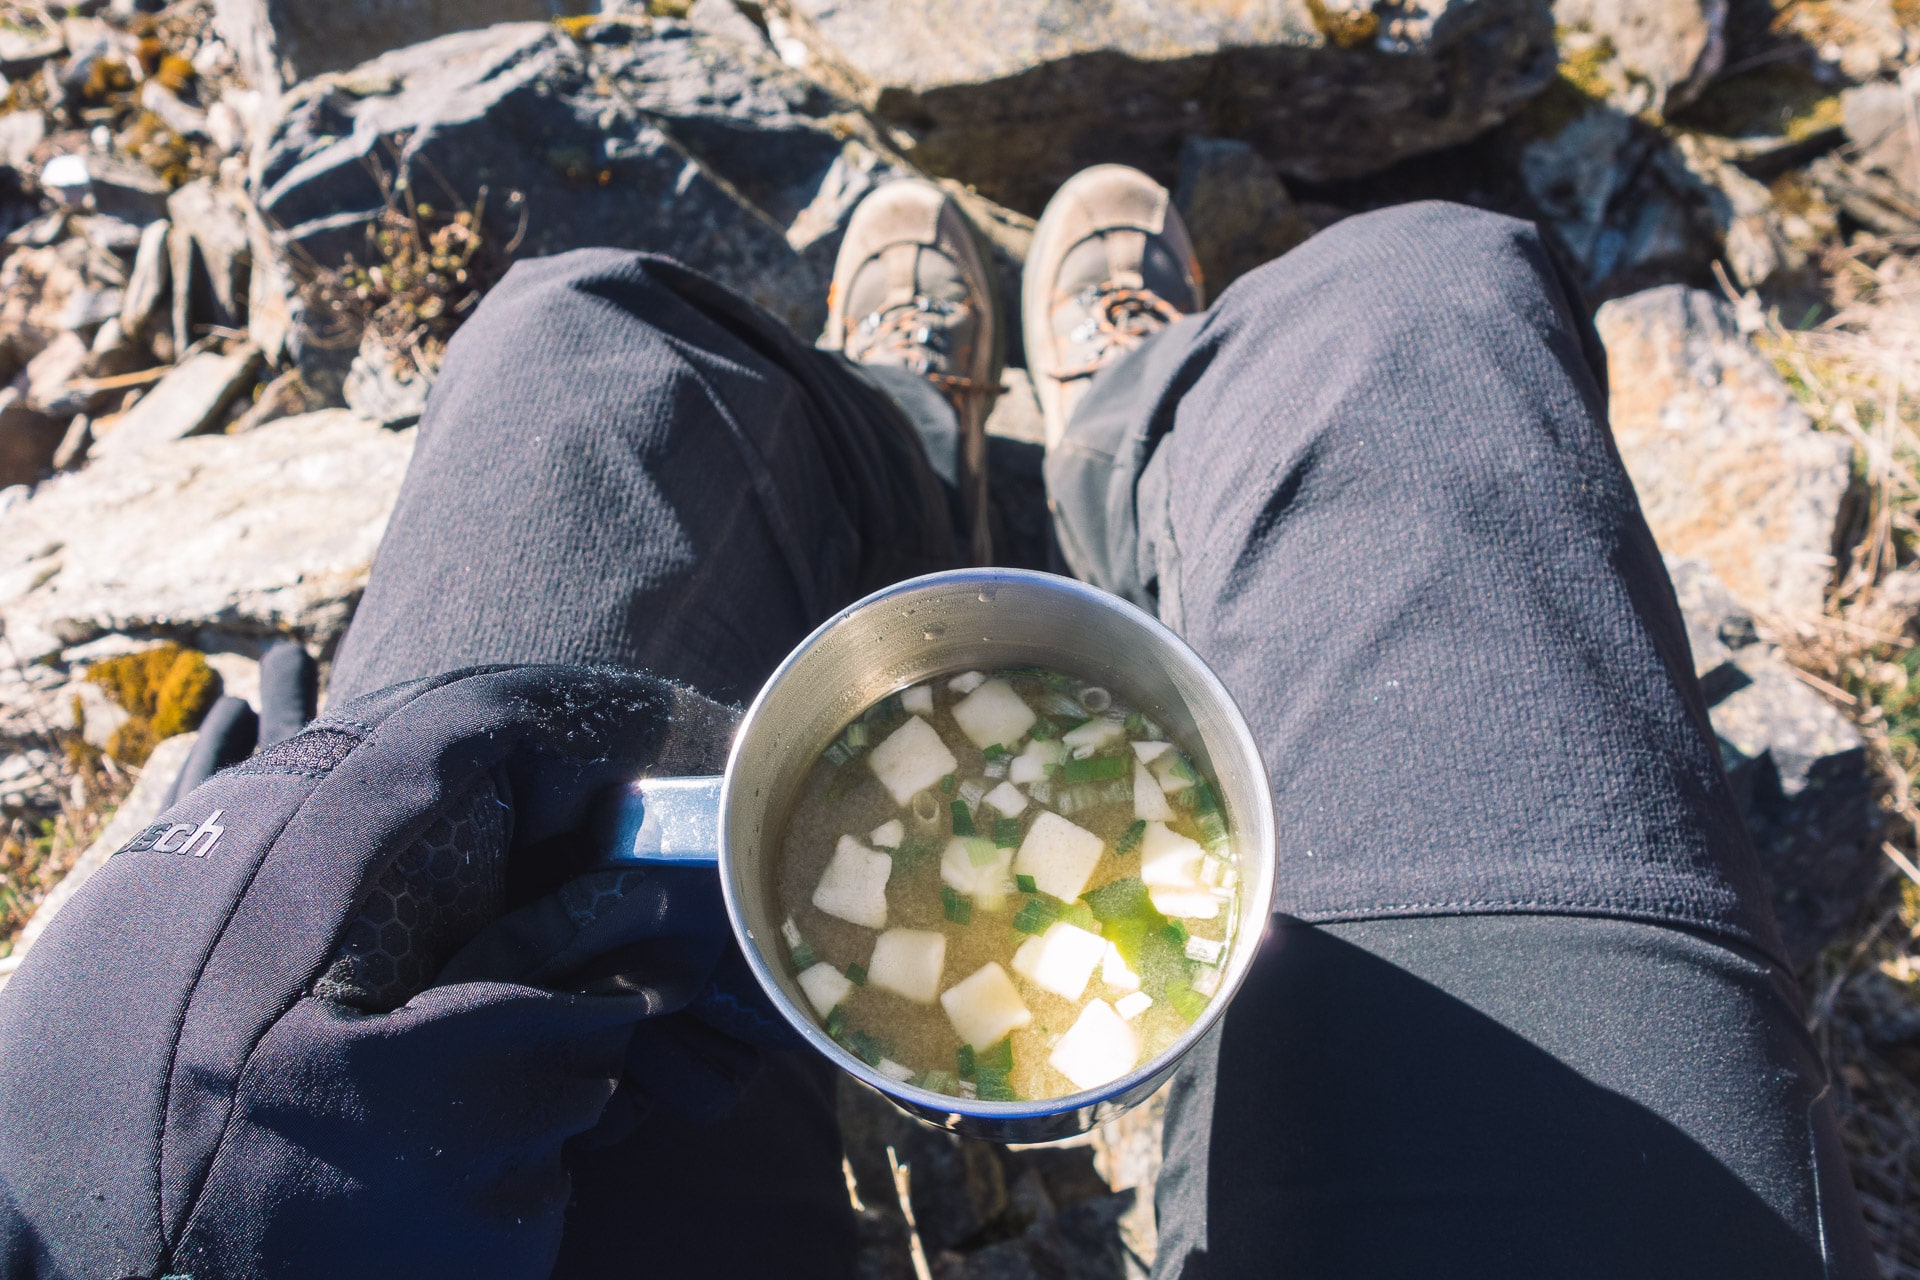
The easiest way is to get berries or fruit if you know them well. There are for example many edible berries in Lapland and it is a real plus at the end of a meal to be able to eat a few camarines, or fresh cranberries. Similarly, with the right knowledge, you can find some mushrooms in autumn.
For the more adventurous and respecting local regulations, you can also try fishing. I have never tested but I imagine that a trout fillet cooked over a wood fire in the depths of Lapland must have a real taste of happiness!
I will not discuss hunting because it is outside the scope of the article but this can be another source of contribution.
In all cases, ask before leaving, especially regarding edible plants. Without necessarily being a real source of food, it can be a pleasant contribution.
As an example, I had read the topo of a person who descended the Yukon with only half the food needed and supplementing the rest with fishing … You still have to be confident in your abilities.
Freeze-dried
Lyophilization is a process for preserving food by sublimation of water. Without going into technical detail, this process makes it possible to preserve the nutritive capacities of food (calories, vitamins, taste, …) while making the preparation long-lasting and this with a low weight / volume.
The big advantage of freeze-dried food is therefore to be very practical in terms of weight while offering the possibility of offering “real” prepared meals. They don’t produce too much waste (just the packaging) and just need a little boiling water to be prepared.
It also has serious drawbacks: the price first of all, we are not going to lie about freeze-dried foods are very expensive (€ 7 / € 10 per meal). The taste and aspects are not always at the top … Personally I prefer preparations based on mash, pasta or other foods that rehydrate well.
Examples
Here is a list of take-out foods that can inspire you for your next trek:
Breakfast
- Rich cereal bar (~ 200kcal)
- Sweetened condensed milk
- Honey (in flexible tube)
- Muesli with milk powder
- Oatmeal
- Coffee / tea
- Seeds
- Dry cakes
Snack
- Cereal bar
- Seeds / nuts: almond, macadamia, pistachio, nuts, hazelnuts, squash seeds .... (there is quite a ready-made mixture which can be practical to vary. Otherwise take in bulk)
- Cookies
- Jerk beef
Lunch
- Sausage / Dried Meat
- Cheese
- Pate / Rice / Semolina ...
- Freeze-dried
- Bread
- Wasa-style bread (keeps well)
Dinner
- Powdered soup
- Freeze-dried
- Dried vegetables
- Pasta / Rice / Semolina
- Sausage
- Dried meat
- Pemmican
- Cheese
- Dessert: freeze-dried, dried fruit, berries, ...
- Chocolate bar, toasted almonds, ...
Example of refueling for 10 days of hiking in total autonomy
- 10x freeze-dried "salted"
- 10x powdered soups
- Very dry sausage: 100g per day per person (about 6 sausages for 2 people for 10 days)
- Cheeses: storytelling / mimolette / Beaufort / ... 150g per day per person (6 slices for 2 people for 10 days)
- One or two sachets of jerk beef: about 50g
- Seeds and berries: pistachios, macadamia, cranberries, squash seeds, ... about 300g
- Rich cereal bars (~ 200kcal): one per morning + 1 in security - 11 in all.
- Cereal bars: 15
- Dried fruits: 100g
- Pleasure food: chocolate bar or toasted almonds for exampleI usually start the day off right with a rich cereal bar and a little sweetened condensed milk. Then I have a bar that I nibble on during the day. For the lunch break, I eat a little sausage and cheese with some seeds for example. In the evening, however, I absorb a lot of calories: soup, freeze-dried, sausage, cheese, seeds ... I am filling up on calories at this time.
Good food management is important, but water management is essential! Find out what there is to know on the subject thanks to the following article.
Fjällräven BERGTAGEN jacket
Fjallraven Bergtagen windproof jacket - Test
The Fjallraven Bergtagen jacket is advertised as an all-season windbreaker. You will find below my return after a few weeks of use in real conditions.
Testing conditions
The jacket has been tested on two trips:
- The first in the heart of the Dovrefjell National Park in Norway. A total of 100km of hikes covered in 10 days in June in a terrain alternating short tundra, snow and rockery. In terms of the weather we had great weather and heavy rain. The bag was initially loaded at 17-18kg
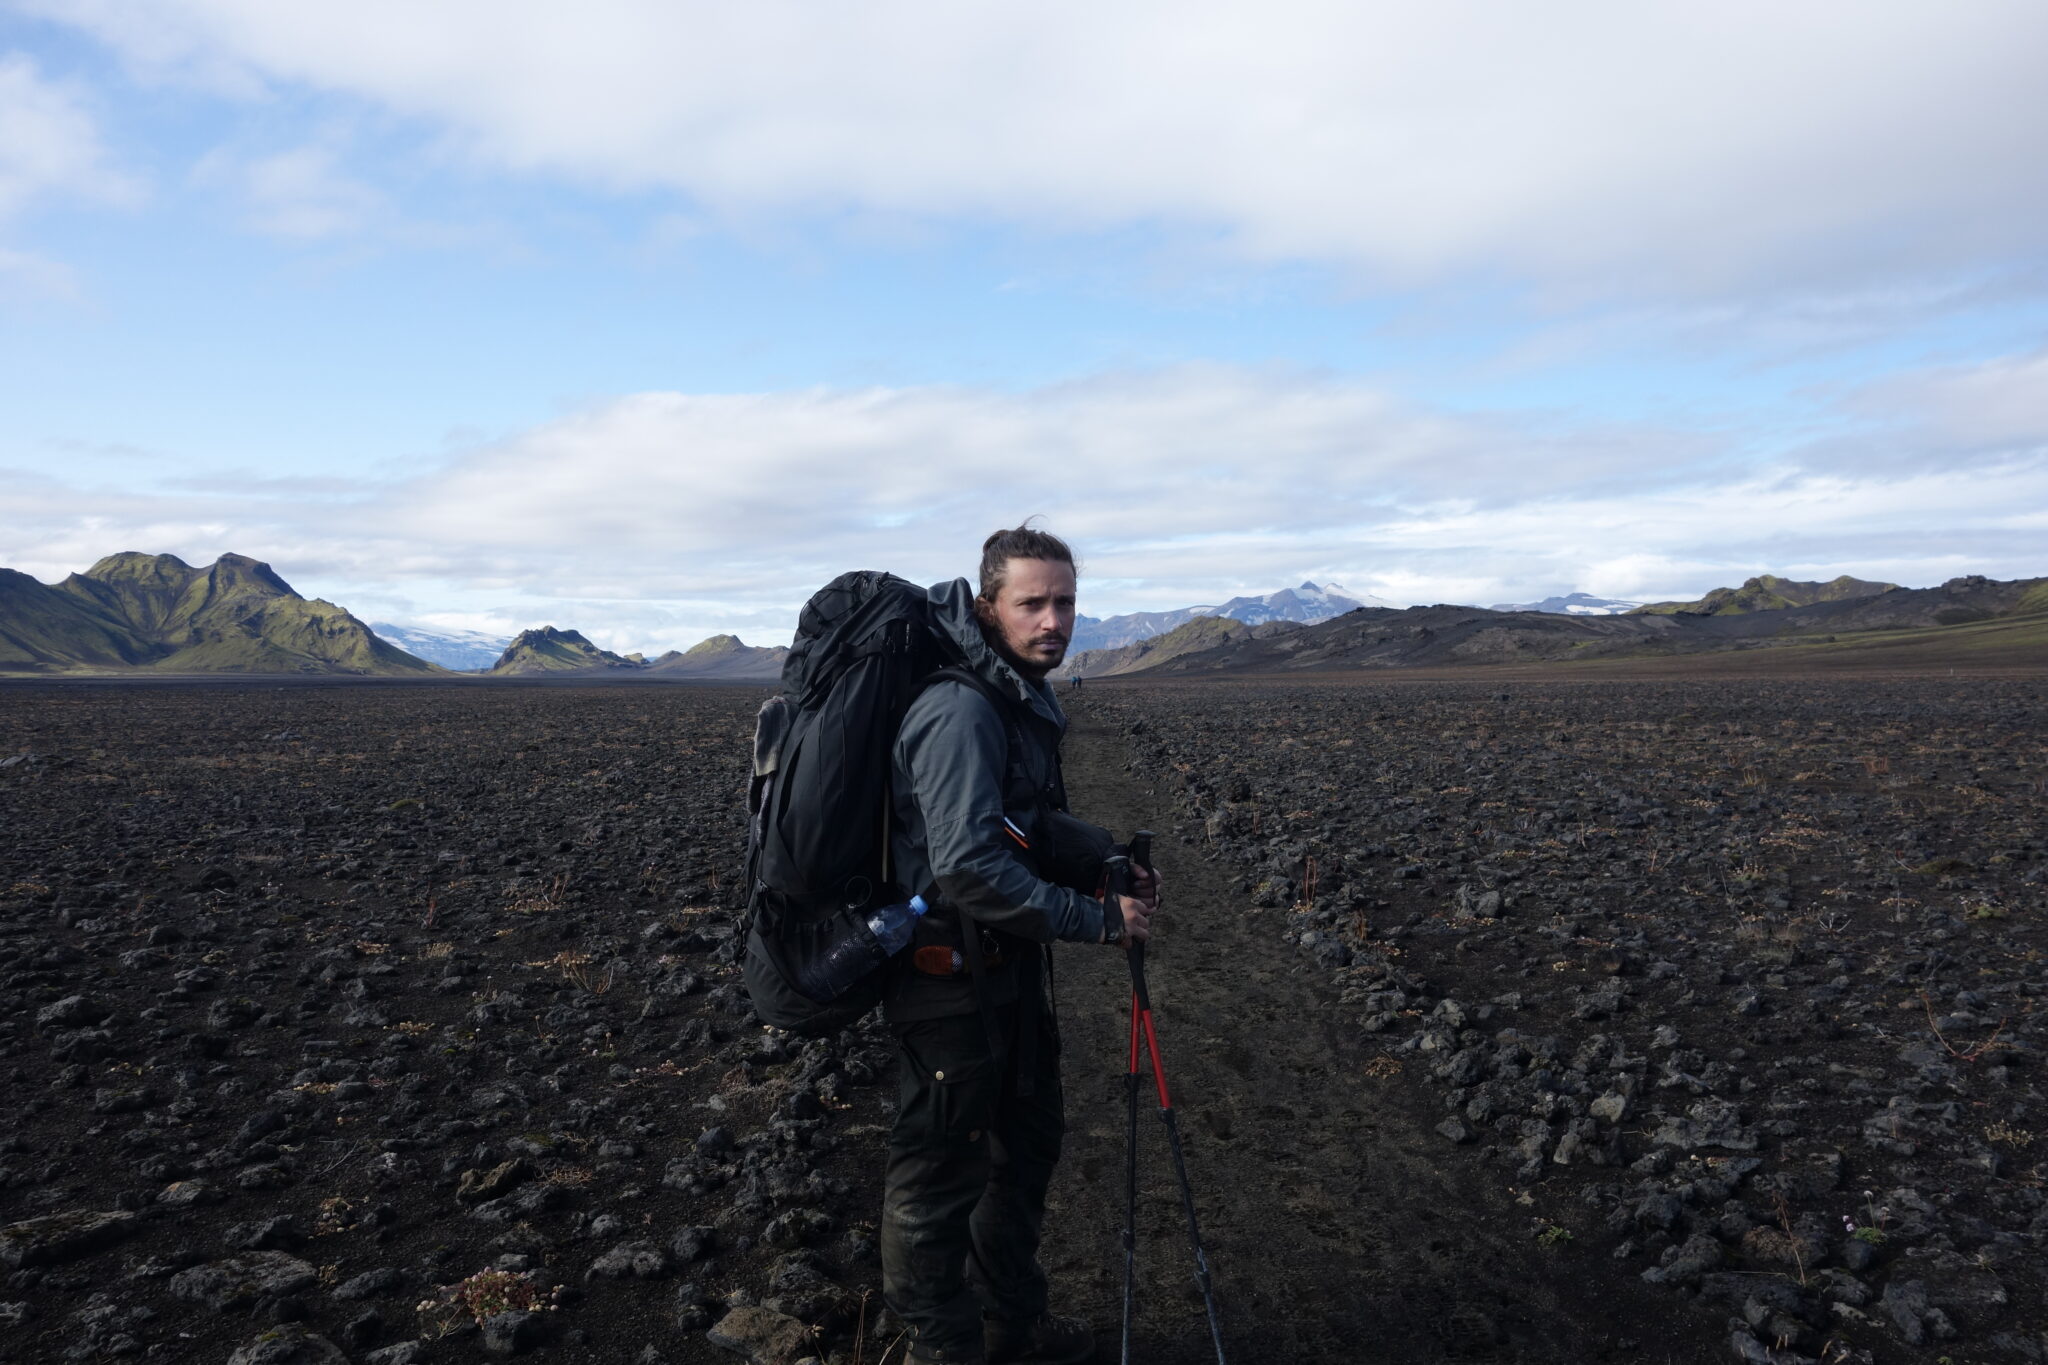
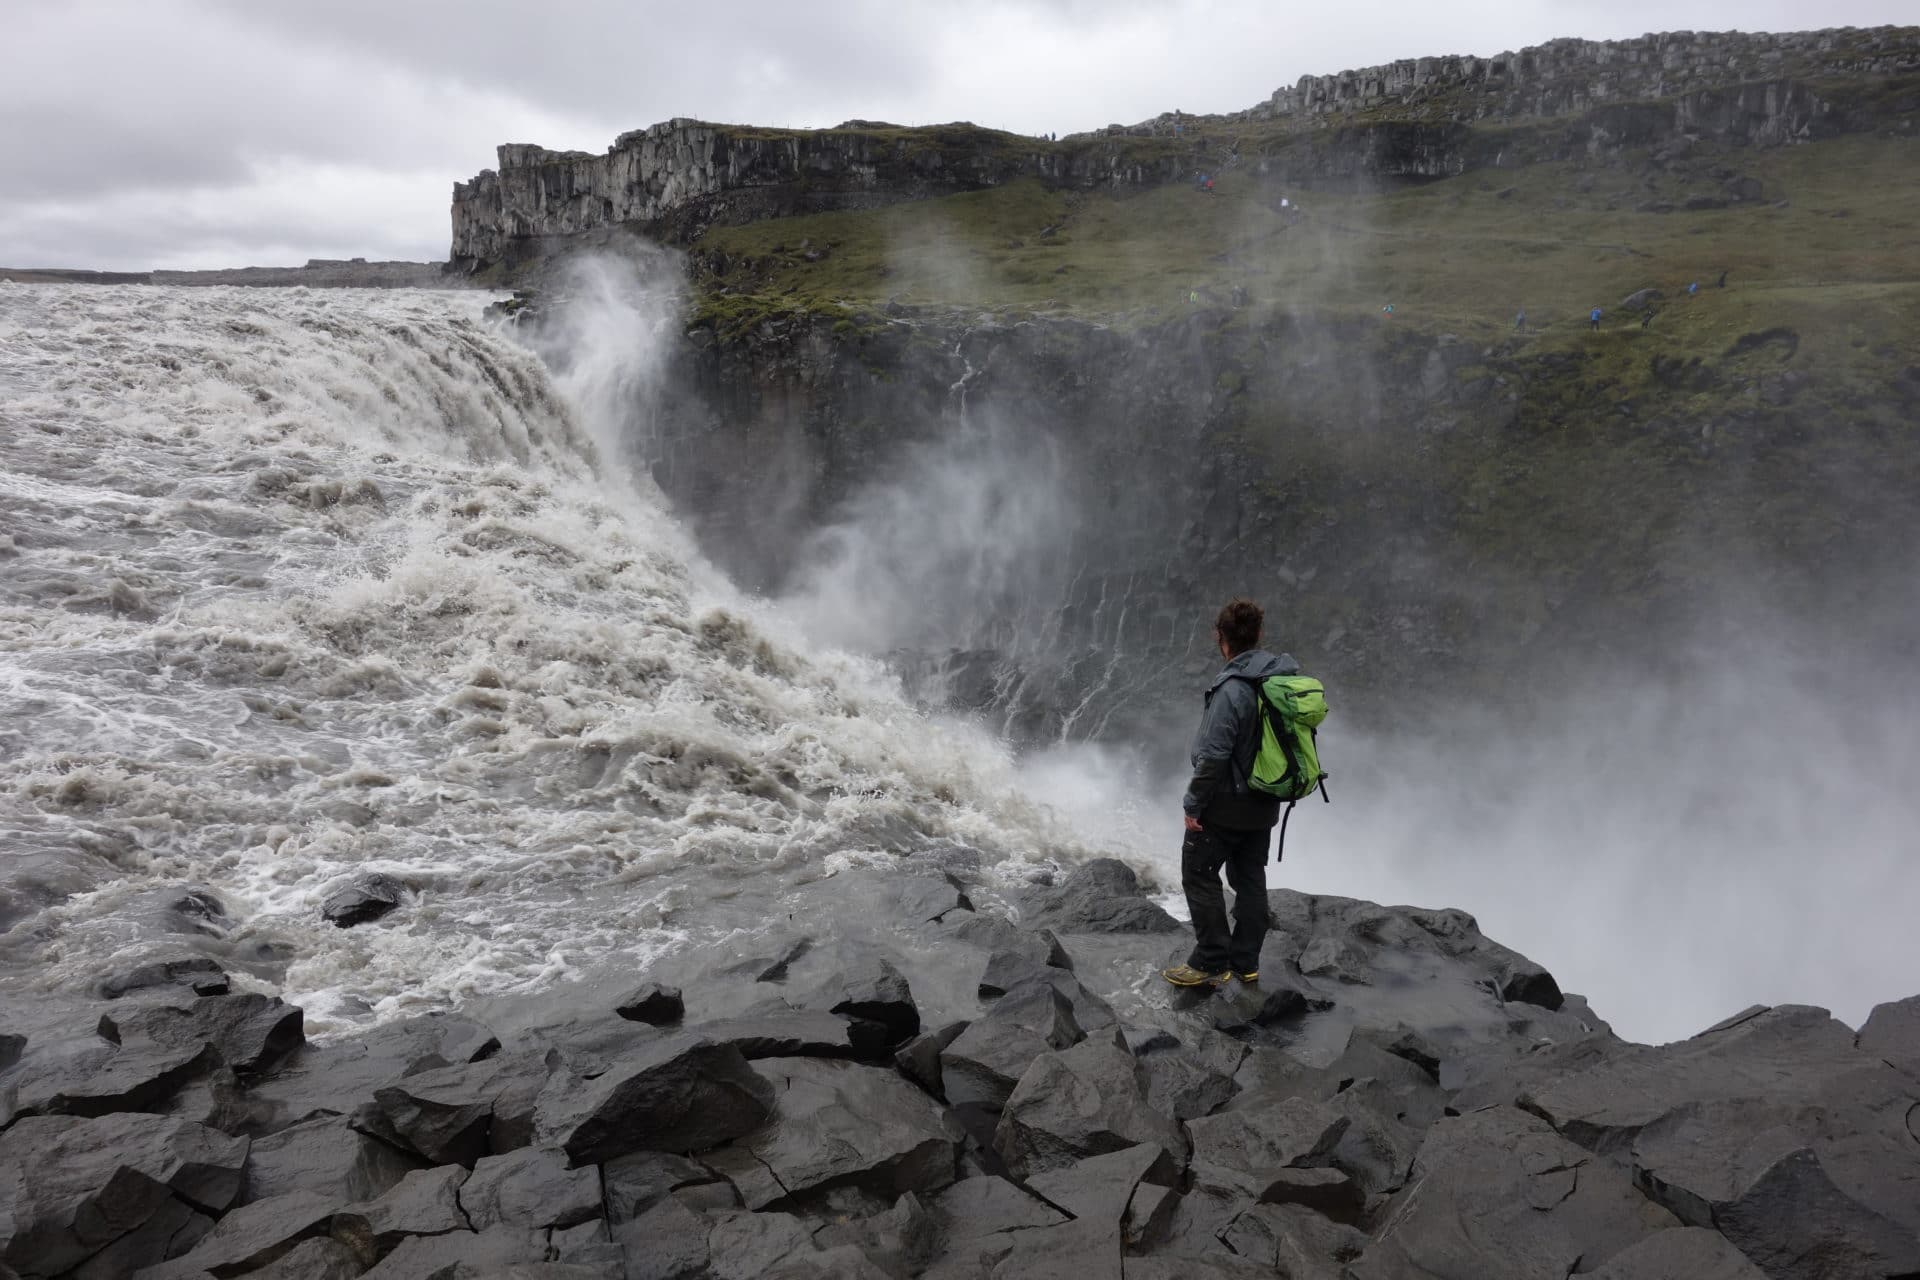
- Second trip: Iceland in two parts: Laugavegur, 4 days for 55km of trek on the Icelandic highlands. Lots of rain and wind! Bag initially loaded at around 16kg and then 2 weeks of “classic” travel with a few day hikes.
These two trips made it possible to test the jacket in all conditions and long enough to have a good feedback.
General information
- Brand : Fjallraven
- Advertised price : 459.00€
- Weight (measured) : 698g
- Material : G1000 ECO lite et G1000 ECO
- Available colors : Graphite grey, "hokkaido" orange et "UN" blue
- Manufacturer website
Field review
Look
Always difficult to judge this argument as it depend of each. However, we can be sure that the jacket is beautiful and fairly sober. There is no fuss and everything in it is useful. Personally, I find it aesthetically successful. The orange model throws in and you will not go unnoticed in the mountains!
Fit
The jacket offers a real mountain fit. That is to say that it descends low on the buttocks to protect the lower back and thus does not rise when walking with a bag. The sleeves are a little long which allows not to have the arm which is uncovered during movements of the arm in extension for example. In addition, the collar and the top of the jacket are well covering in order to protect the neck and the bottom of the face from bad weather.
The overall cut allows good freedom of movement and the jacket does not interfere. I have the model in M for a template of 1.70m and 75kg. It also leaves room for wearing a protective layer underneath.
Material and toughness
The jacket is mainly made of the flagship material from Fjallraven the G1000 which has the reputation of being resistant and durable.
We will mainly find G1000 Lite Eco as well as G1000 ECO, thicker, on areas with high friction such as the lower back and elbows. A pledge of additional durability.
The seams are not lined which could have been appreciable but they all have a sealing tape on the inner face.
The jacket looks solid and does not show any wear after 150km of walking and almost 1 month of non-stop use in bad conditions
The jacket in details
Fjallraven knows how to build jackets and we find all this know-how in the small details of the Bergtagen:
- The sleeves are wide enough to be worn over a pair of gloves. They can also be easily closed thanks to large scratch easy to use even with gloves.
- There are two ventilation zips on the blanks which have the function of circulating air. Their size and positioning are adapted and well thought out. They can be easily handled even when carrying a backpack.
- The sliders used on the zips and cords are particularly practical, especially if you wear gloves. We don’t look for them for 3 hours. The zippers are also of good quality and slide well without blocking (YKK brand).
- Note the presence of soft tissue at the areas that will rub on the skin, that is to say at the chin and nape of the neck. Significant detail!
- The jacket has two large front pockets in the high position. They do not interfere when carrying a bag and remain accessible and practical. The opening is done by a zip located towards sternum. They both offer a small net inside to store his laptop for example. From a volume point of view you can easily store a card and small equipment.
- The hood is a wonder! It covers the head perfectly and insulates you from wind and rain (even if the waterproofing is to be reviewed as we will describe later). It is easily adjustable by a system of cords that allow it to be securely attached to your head without disturbing you.
- The jacket is equipped with a RECCO reflector, a system that will facilitate your search by the emergency services if necessary.
- To protect yourself from the wind, a drawstring tightens the bottom of the jacket.
Waterproofness and breathability
We are dealing here with a windbreaker jacket. In other words, you shouldn’t count on it in the rain. I was able to experience it in Norway and Iceland and I confirm it. Even the addition of Fjallraven “greenland wax” does little to seal it, especially since the wax leaves relatively quickly. On the other hand, the jacket performs very well against the wind, in particular thanks to its well covering cut. It is therefore necessary to favor its use for mountain outings in good windy weather for example. A waterproof alternative from the same family exists at Fjallraven, the Bergtagen Eco Shell.
Price
The jacket is offered at € 459 on the Fjallraven site. It’s a huge amount for a jacket! The brand does, however, offer durable and repairable products, which aims to avoid buying clothing or equipment too often. We can therefore see Fjallraven products in the long term.
Conclusions
We like :
- Look
- Comfort and the well covering fit
- All the praticable details
We dislike :
- Price
- Waterproofness (even if it's a windbreaker we could have hoped for a little better)
The Bergtagen is a beautiful jacket, no doubt if you use it under the conditions for which it was made.
Backpack Fjällräven Kajka 85
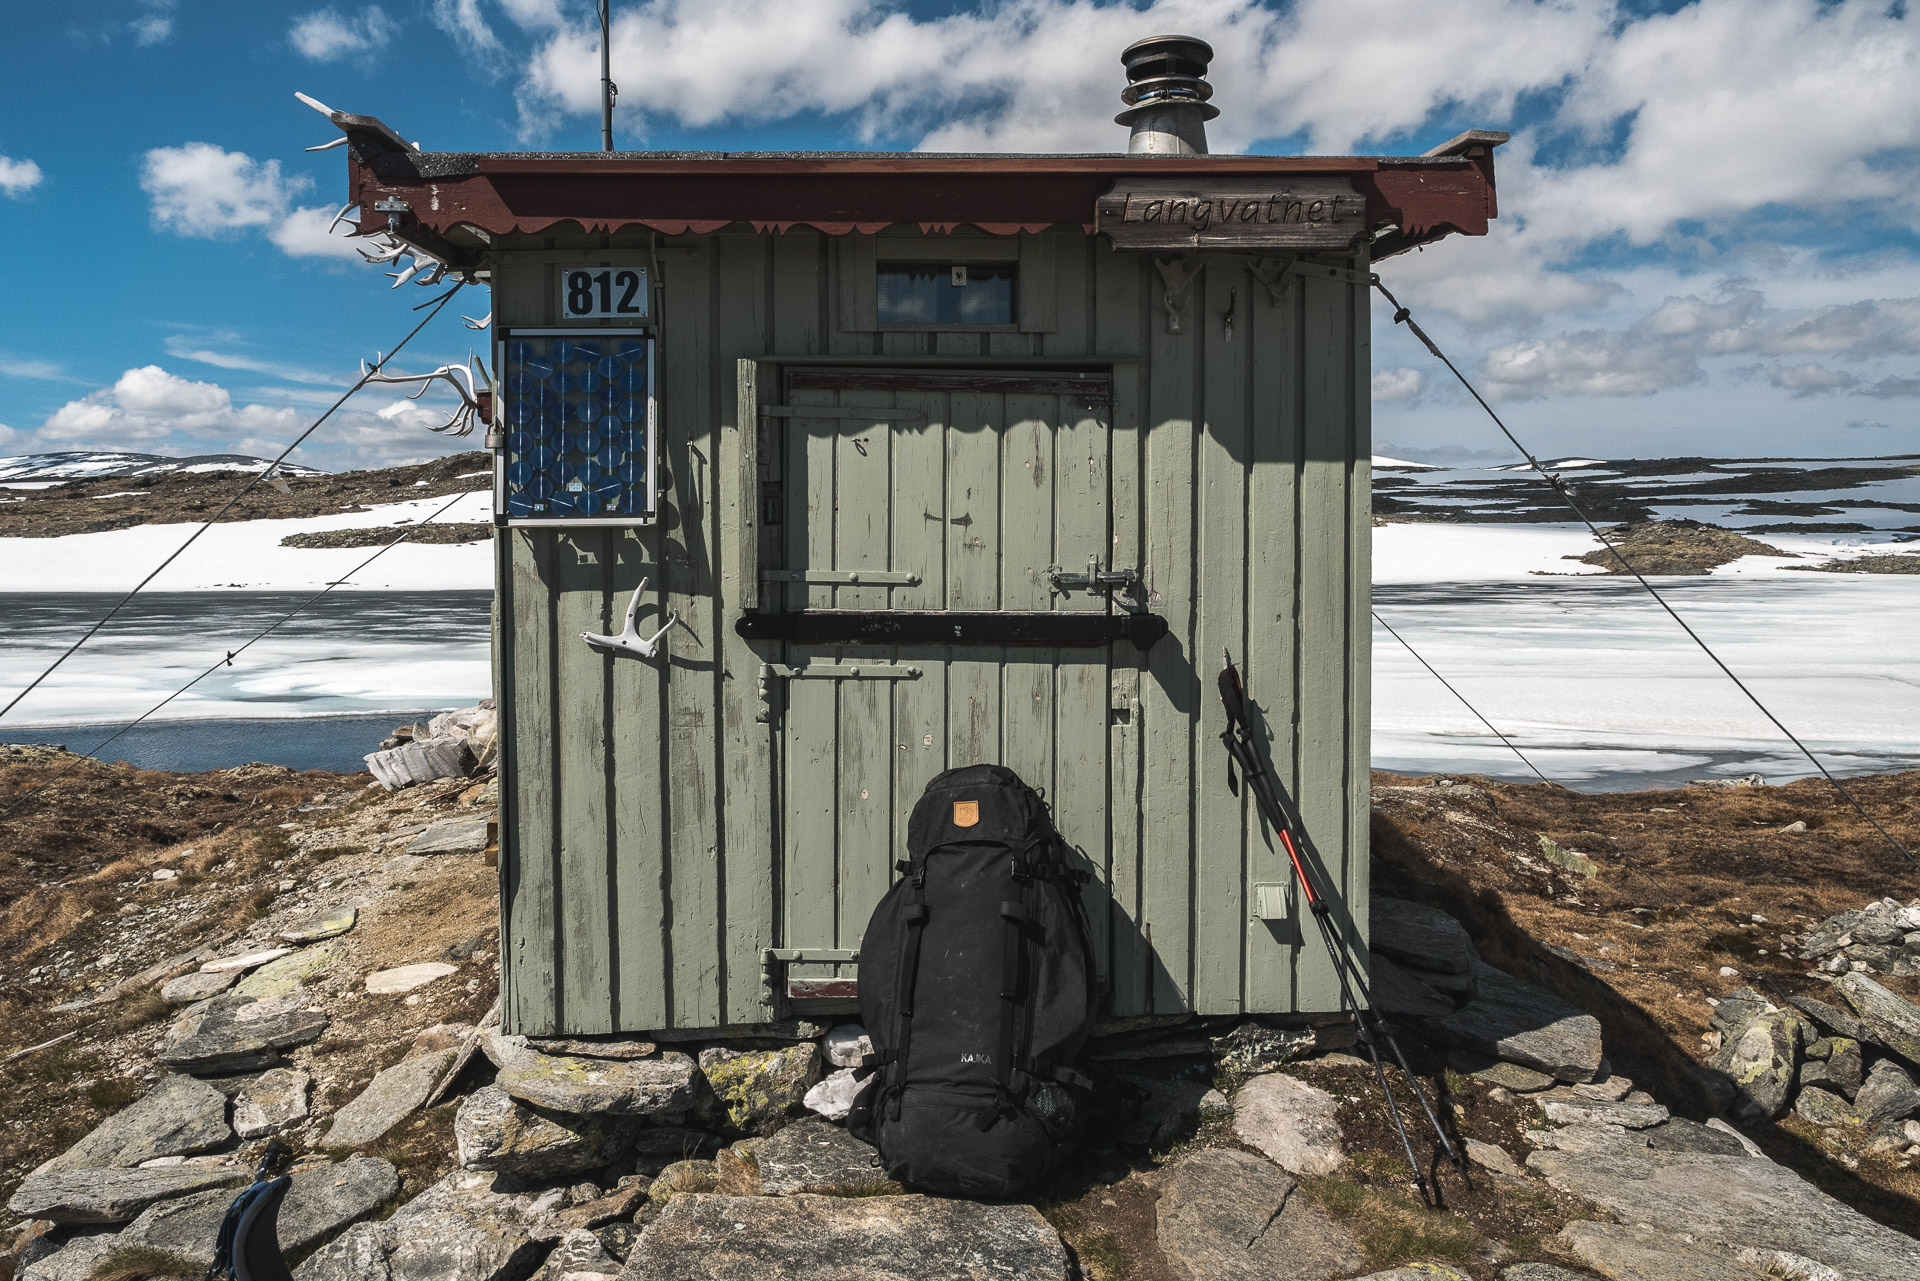
Backpack Fjällräven KAJKA 85 - Test
Test conditions
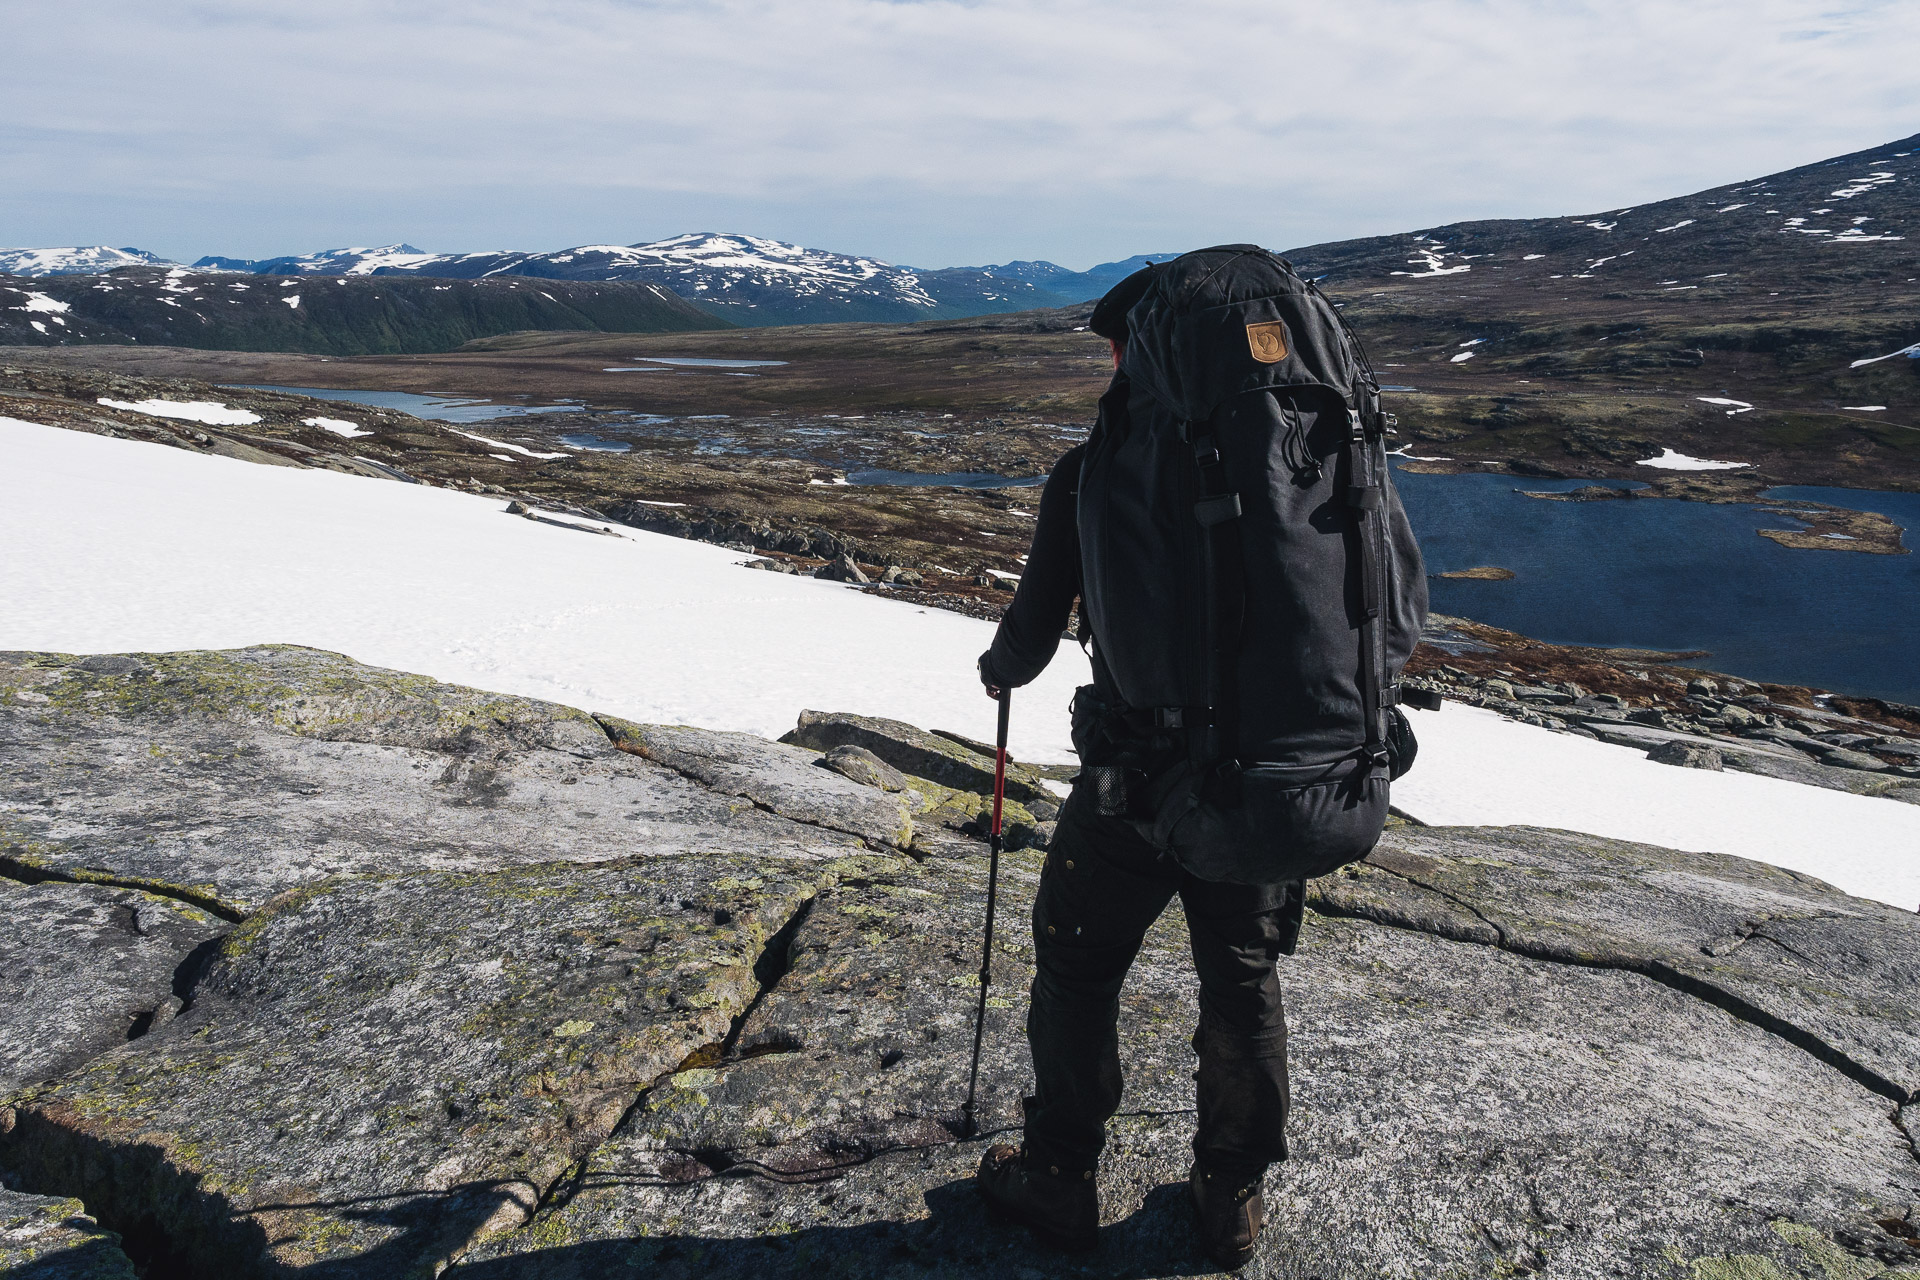
The bag was tested during two treks:
- The first in the heart of the Dovrefjell National Park in Norway. In total 100km covered in 10 days in June in a terrain alternating tundra, snow and rocks. We had sunny weather and heavy rain. The bag was initially loaded with 17-18kg.
- Second trek: Laugavegur in Iceland. 4 days for 55km trek on the Icelandic highlands. Lots of rain and wind! Bag initially loaded around 16kg.
These two treks made it possible to test the bag in all conditions and long enough to have a good feedback. However, I did not use the entire volume of the bag because you have to plan a lot (too much) of material to fill the 85L.
General informations
- Brand : Fjallraven
- Price : 399.95€
- Volume : 85L
- Weight : 3.45kg
- Size : H84cm x L39cm x P29cm
- Material : Vinylon
- Available colors : Black, Deep Green, Graphite and "UN" blue
- Manufacturer link
Retour d'expérience
I have long had a 65L bag from Gregory but this volume although consequent was sometimes limited especially for long treks in total autonomy and even more since I started to bring a lot of photo equipment. So I wanted to switch to a larger volume which will allow me to take more food but also not to have to play tetris every time I want to prepare my bag ; if I take off my sweater, for example, I want to be able to slip it quickly into the bag.
My preference therefore fell on the Fjallraven Kajka 85.
Look
This argument is purely subjective but I think this bag is very beautiful. It has a slightly retro look with simplicity and no frills. The finished wooden structure give it that characteristic touch. As often with Fjallraven, we note the concern for details with the leather logo for example.
Volume and weight
As the name suggests, this bag is 85L and as much to say it right away it’s huge! I no longer have any space concerns when I prepare my treks. However this immense volume combined with a very good robustness (point on which I will come back below) make it a really heavy bag when empty which is its biggest defect. With 3.45kg, this will certainly be a brake for some. However the Kajka being comfortable we do not feel this weight too much but it still makes as many calories to burn more each day.
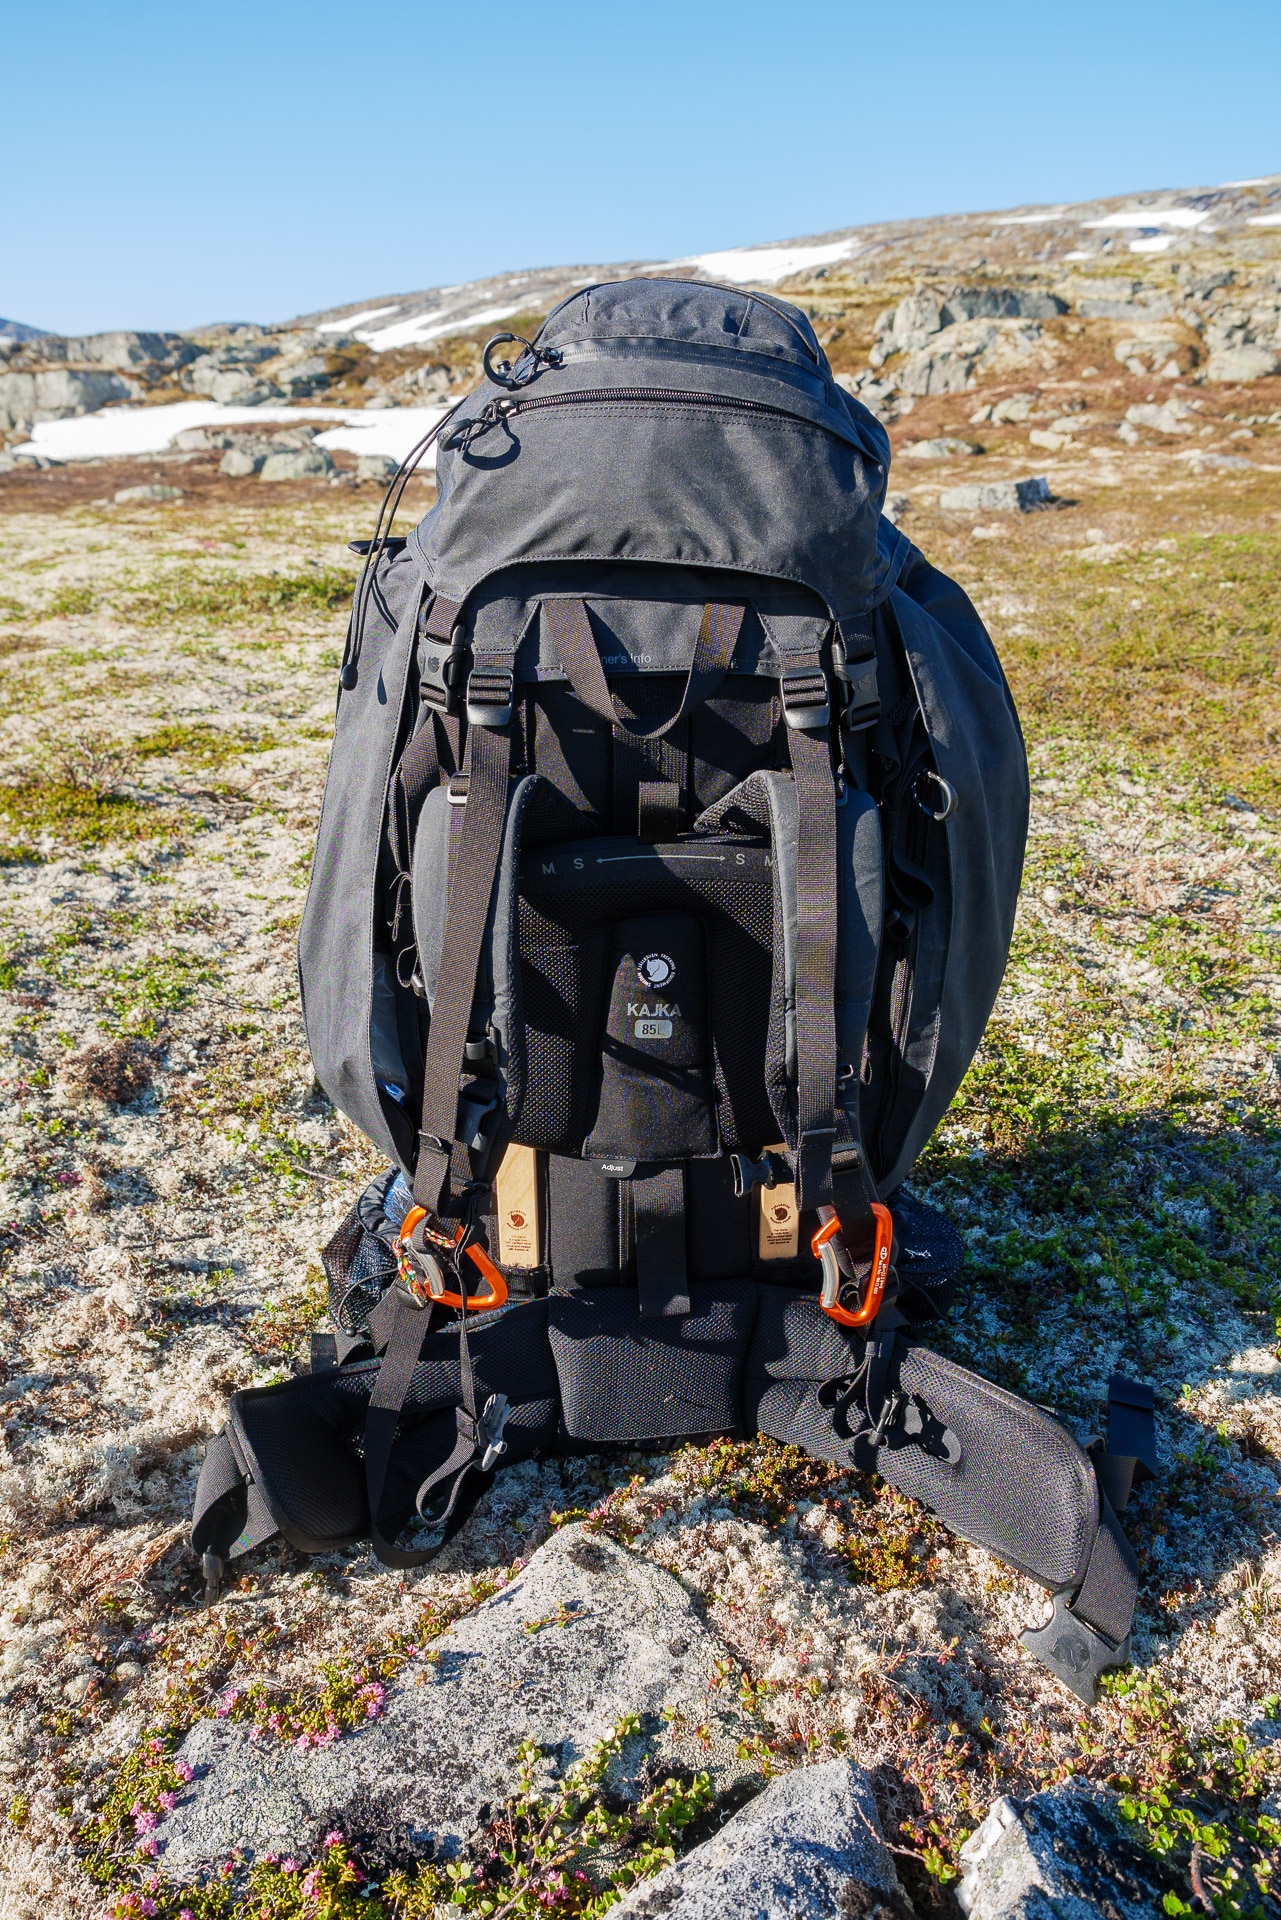
Confort
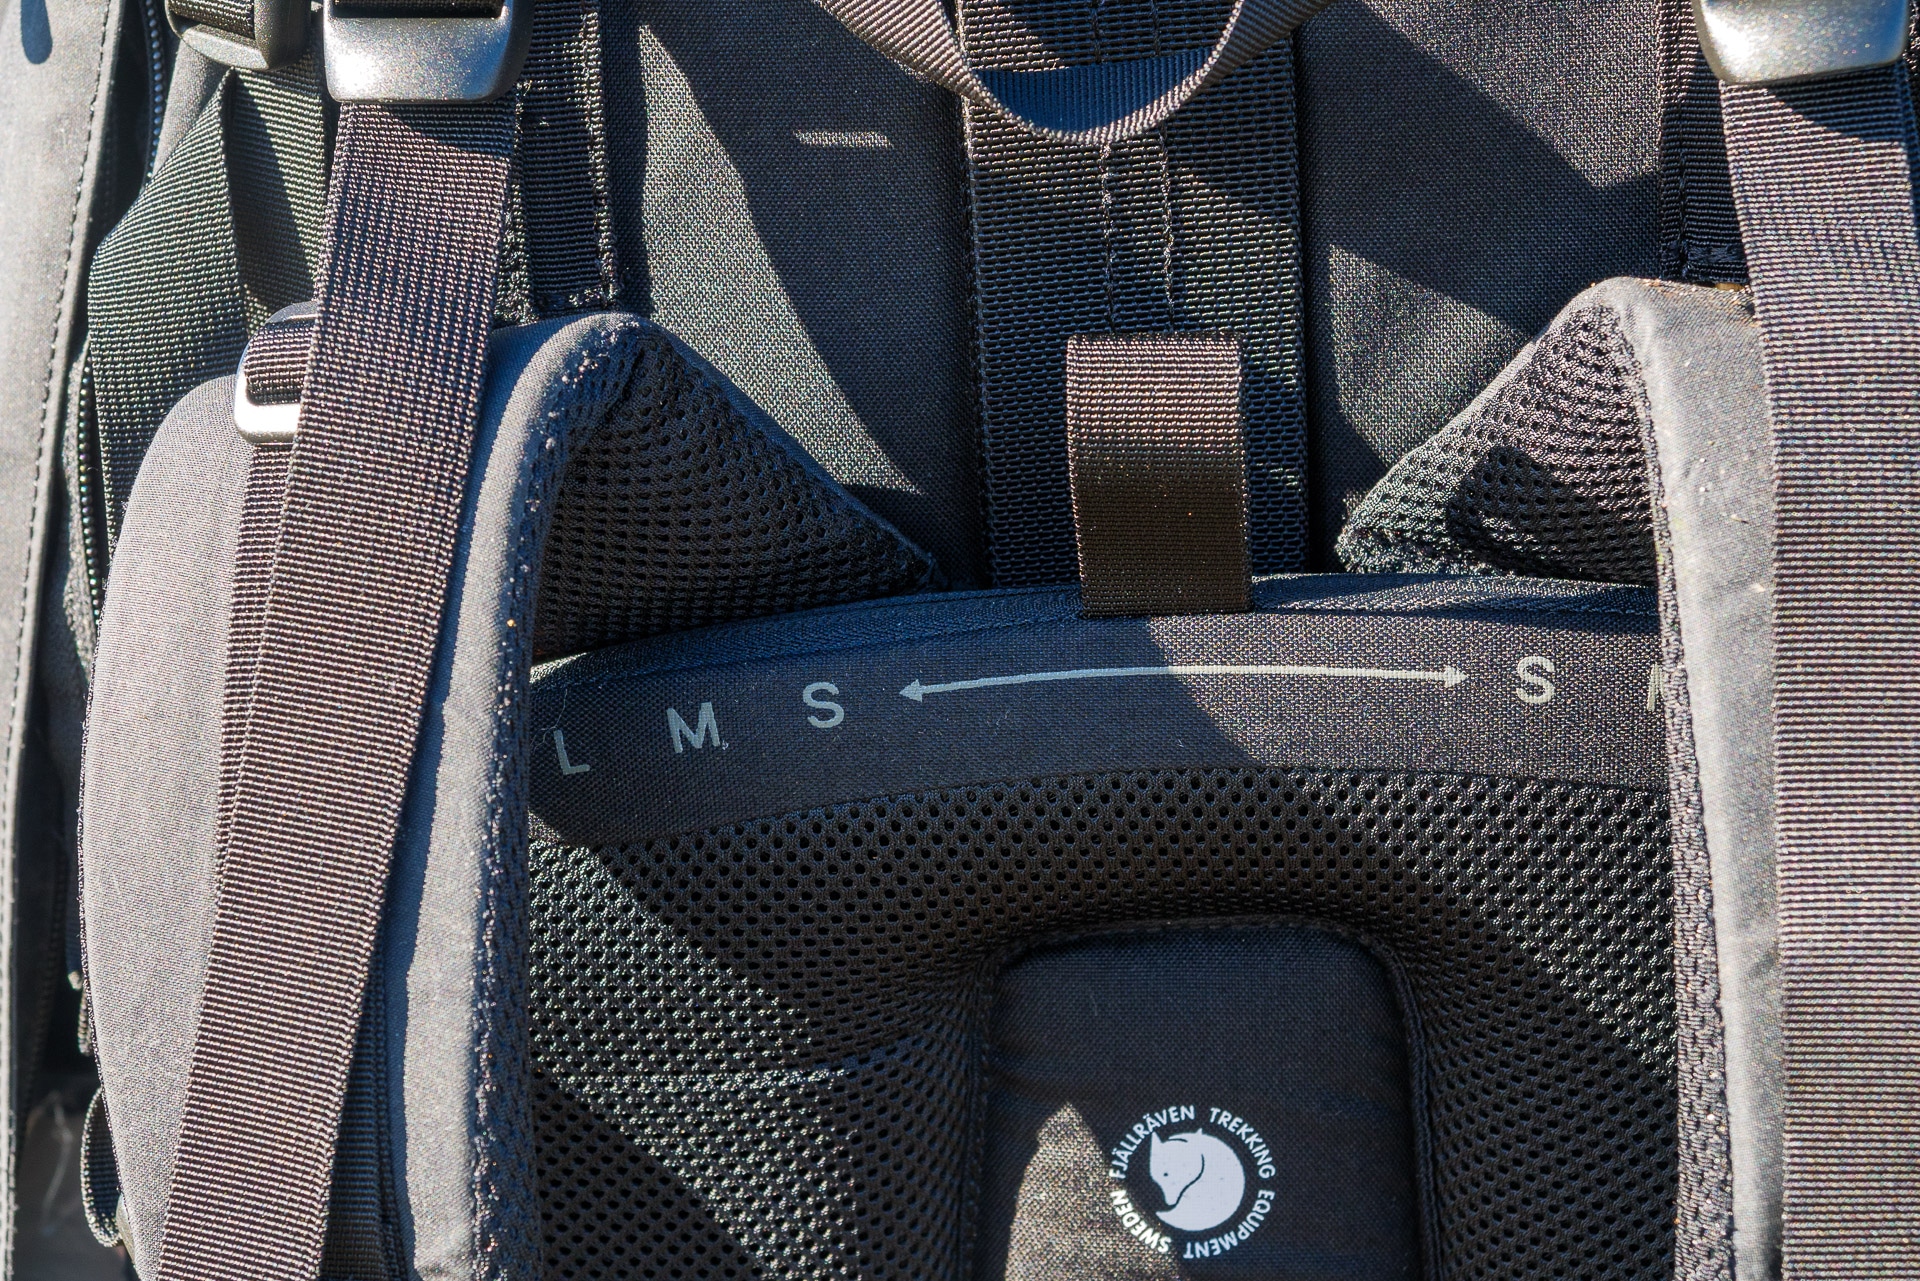
The Kajka is intended to be a heavy carrier. I have not found a recommended mass limit, but I think that we can easily go up to 25kg (is that reasonable …?). For my part, I use the bag in a 15-20kg range and comfort is there.
The belt and the back support foams fulfill their function wonderfully and even with a heavy load and elevation I have never had back pain. Ditto for the suspenders. In addition, the multiple possibilities of adjustments mean that you can really adapt the bag to your body type (in height and width).
However concerning the flexibility of the belt during certain movements it could be better. We might like to be more flexible in terms of pelvic rotation. However, this does not interfere with normal walking or on slopes.
Last important point, the external pockets all offer zips with a large buckle which is particularly practical if you wear gloves!
Toughness
You immediately have a feeling of robustness with this bag. The main canvas is thick and “rigid”. We feel that we will be able to rub trees or rocks without problem. After 15 days of use I did not notice any wear at this level, which is reassuring (the reverse would have really surprised me).
The zips present are well sized, especially those of the flap of the front face. We are not afraid to handle them even if they remain weak points (which is true for all zip). Likewise, the various quick-closing systems are robust and seem to want to last.
Obviously this robustness is paid for in terms of weight as we have been able to evoke but to choose I prefer with blind confidence in the resistance of my bag rather than fear the slightest branch. Obviously, this bag is not however a tank and will remain sensitive to piercing or cuts.
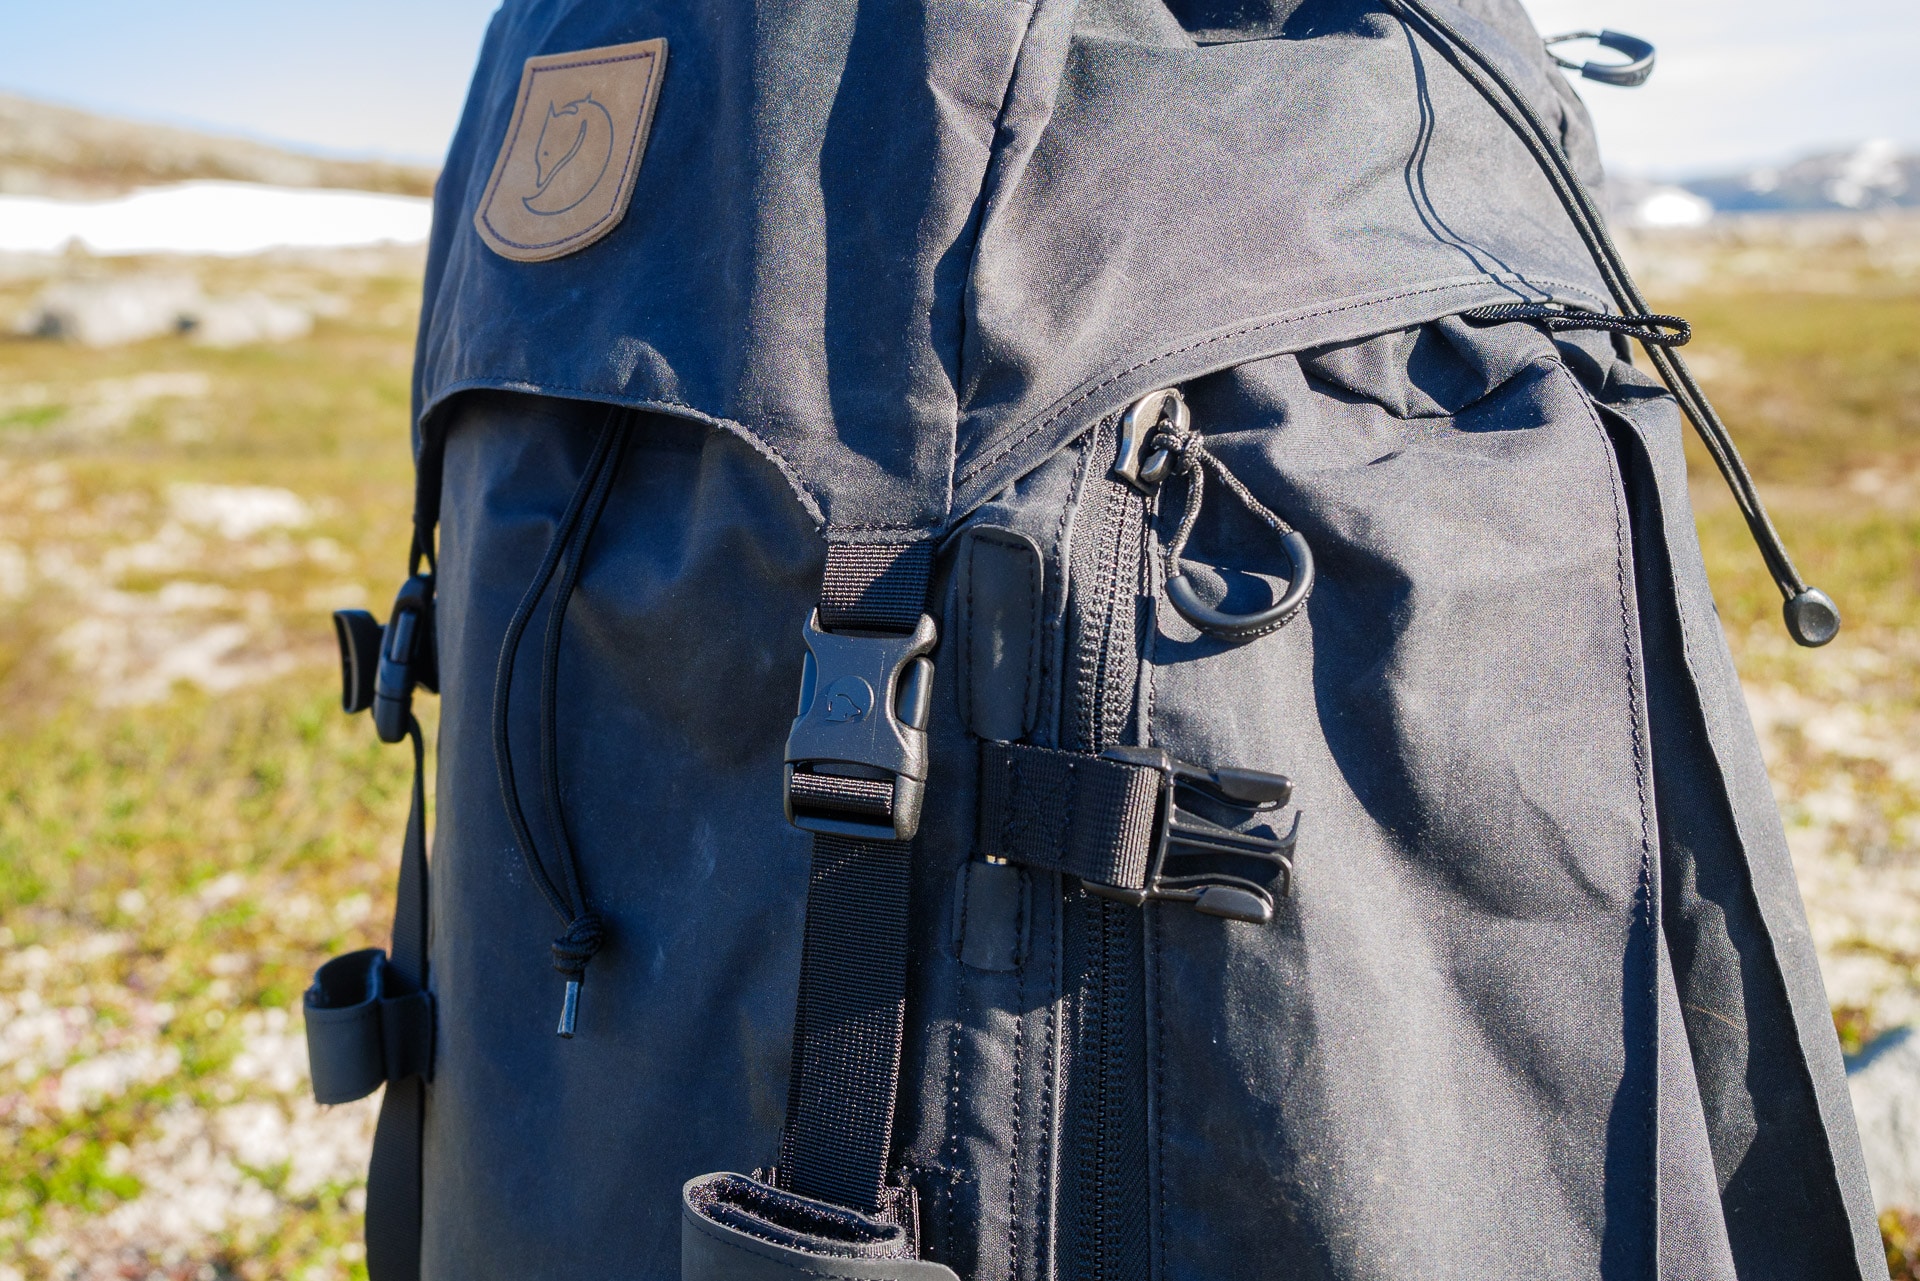
Details
We find, as on most backpacks, different possibilities to access the main pocket:
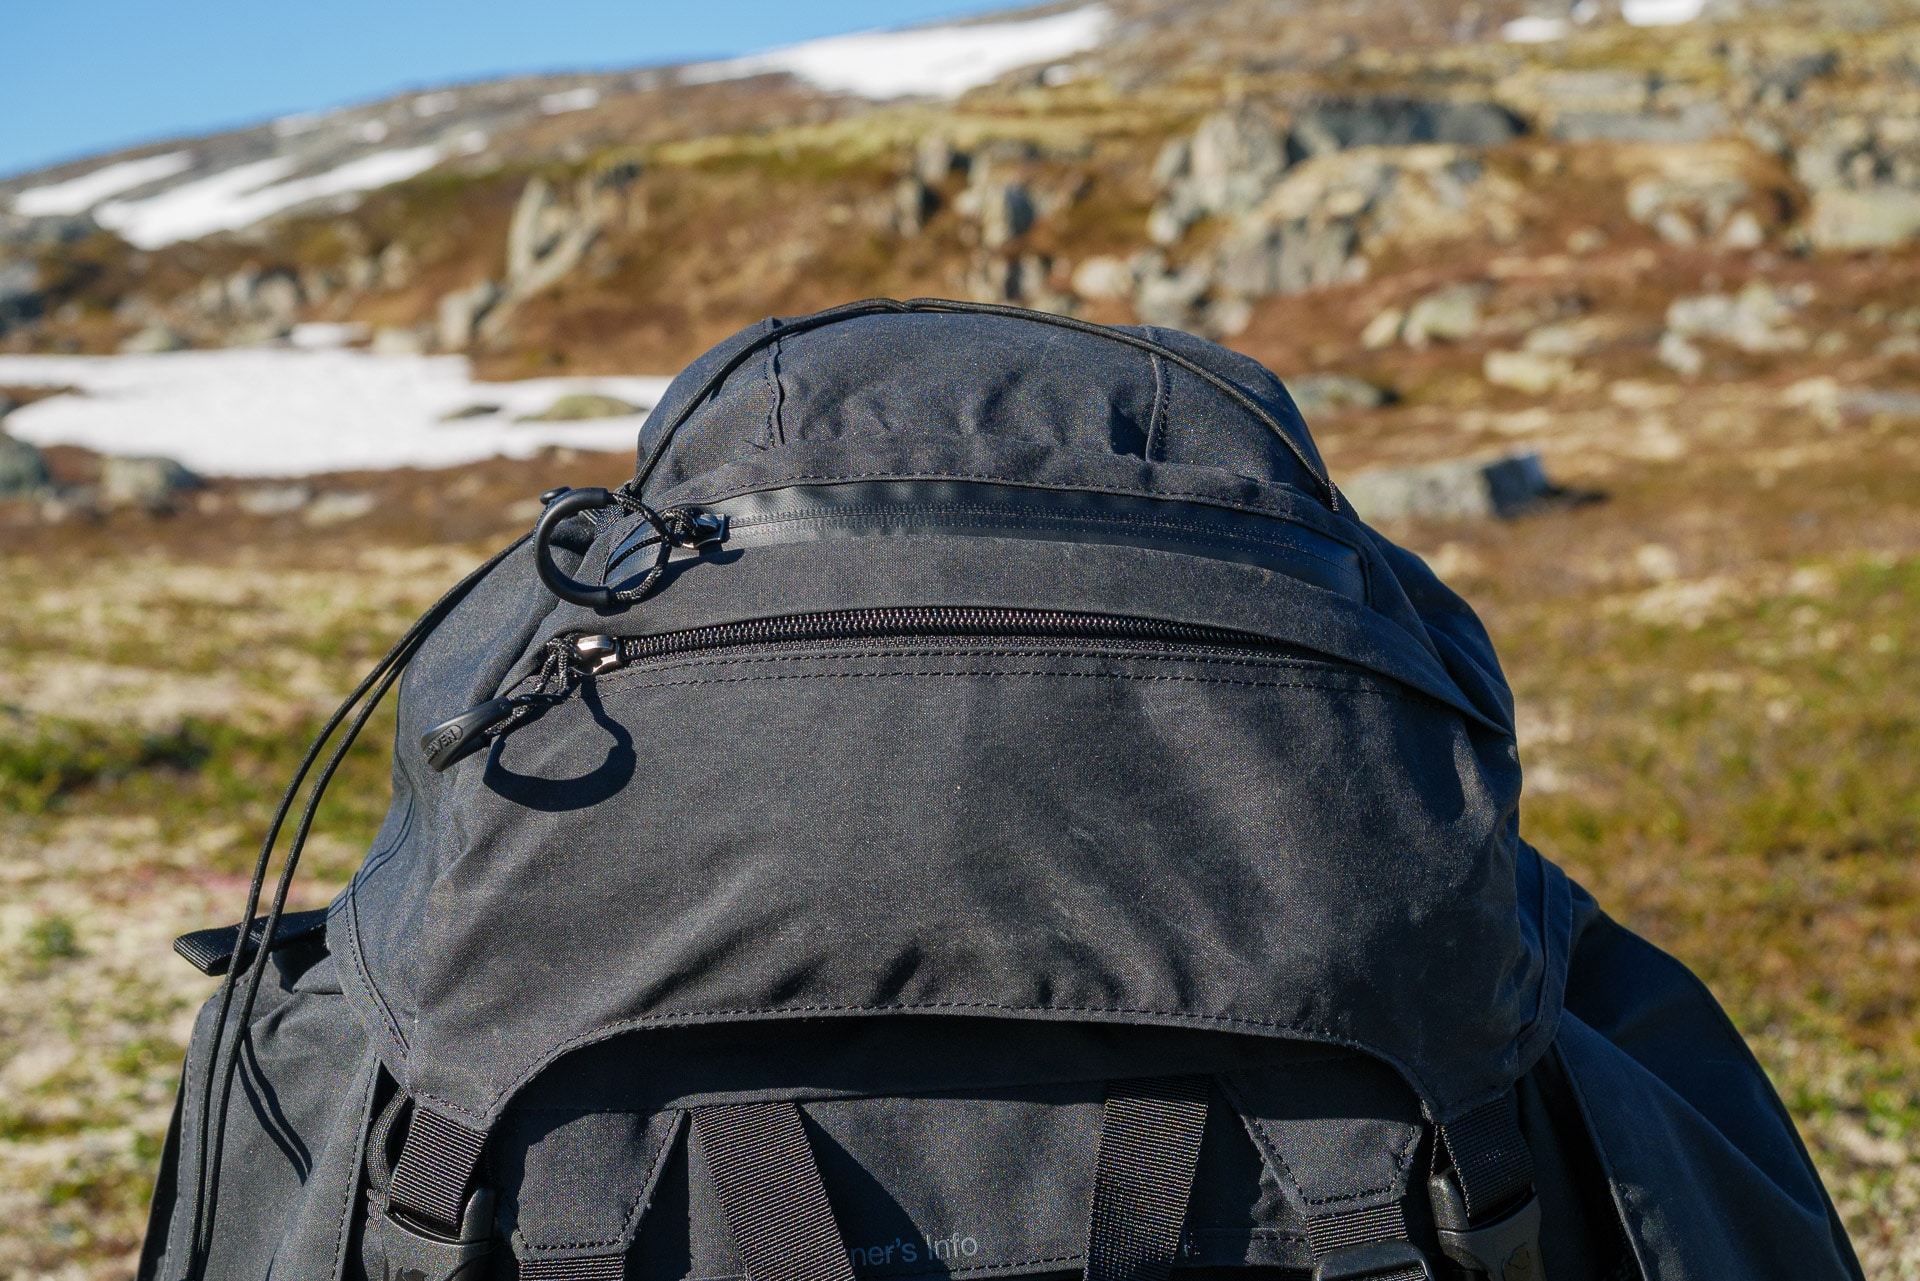
- The first is the top opening. It closes with a practical cord system which could be improved.
- The second is located at the first third of the height of the bag. It is a zipper that allows access to the bottom of the main volume.
- The third, finally, is a large flap on the front part of the bag which allows access to almost the entire volume. Very practical, the only downside is that you have to systematically undo the compression straps to open this flap, which can be painful if you want to quickly access the interior.
The main volume can be divided into two sections thanks to an internal zip. The lower section is intended for wet items and the classic closing flap can be replaced by an integrated net. I did not use this function yet but it’s clever. A compartment for a water pocket is located on the back of the bag. I think it is suitable for volumes of 1.5 / 2L.
The Kajka also offers two side pockets. For once these pockets are not only there to look pretty !! They offer a real volume of storage and its very practical to use. I would say that we can put two 1.5L bottles per pocket at first sight. This is a real plus because I had many bags whose pockets were almost useless.
The upper hood on the other hand is not very practical. Fjallraven has chosen to put two pockets on the external part but ultimately if one is filled the other is almost more usable … I would have preferred a large volume (why not with an internal net) rather than two. There is also an interior volume that can be used for small equipment but nothing more. Note that the hood can be easily removed (practical when preparing the bag) and used as an auxiliary bag thanks to an integrated strap. You can also choose to fix it like a belly bag with two clips provided for this purpose.
On the basis of the Kajka, you will find two very practical nets also. They can be used to store equipment or a gourd / bottle thanks to an access on the side. However, you have to be careful because the bottle may tend to slip if you lean forward.
Finally you will find two small pockets on the belt, one “waterproof” the other in mesh. Both are large enough to contain small items to have on hand like cereal bars, a lip stick, … I like the idea of differentiating them.
Aesthetically I like this bag because it is stripped on the front but there are however enough to fix sticks with Velcro. Likewise, the underside of the bag has loops for attaching a tent, for example using a strap. I would nevertheless appreciate a system to easily fix a tent on the front side for example or on the sides. I find that the systems in place its means for this purpose.
Finally to finish, the rain cover provided does its job very well and will ensure you keep your equipment dry inside. It is however a little big because I think it is the same for the 100L model. It is not bothersome in itself but we could gain in volume and weight.
Price
The Kajka 85 is advertised at € 399.95 on the Fjallraven website. We will not hide that it is a sum more than substantial for a backpack. However, I acquired this bag with the idea of keeping it as long as possible without ever having to ask myself the question of its solidity and its durability over time. So I see it as an investment, normally with this bag I don’t have to buy any more. Another point to highlight is the particular attention that Fjallraven pays to the environmental impact of its products which is very good and which should be encouraged but which is also felt on the note I think.
Conclusions
We like :
- Toughness
- Style
- Volume
- Accessories, especially side pockets
We dislike :
- Weight
- Price
- Upper part (zip pocket too small)
Fjallraven demonstrates its expertise with this Kajka 85L. If we omit the weight it is almost a faultless. I bought this bag for a simple need: take enough food to go long and far and it’s mission accomplished.
Water management while hiking
Let’s start with the obvious: water is vital when hiking. We generally consume a lot, especially in summer, it is also your main fuel. However, water has two big faults: it takes up space and weighs heavily! We can therefore consider taking the necessary volume for a day in his bag but if you are going for a trek without a “civilized” water point you will have to restock yourself.
This article therefore deals with this point: how to manage water well during a trek or a hike?
Water consumption
Before starting, I wanted to make a quick preamble on hydration during a hike. Although variable depending on the temperature, the terrain or you, your consumption will be much higher than in normal times. For example when I traveled the GR54, the temperatures were such that, on certain days, I drank up to 7L. So it’s impossible to take everything in my bag.
What is important to keep in mind is that you must not limit yourself (except in cases of force majeure) because in the event of dehydration your body will no longer function properly and you will very quickly tire yourself out potentially losing consciousness in advanced dehydration. Exit also all that will be soda or drink of this type, it is not suitable for the practice of hiking. There are substitutes that allow a rapid supply of carbohydrates and minerals like ISOSTAR for example but, personally, I am not a fan of these solutions …
Don’t wait until you’re thirsty to drink. Hydrate gradually as small regular “portions”. If you are hiking as a family, watch out for children who will get dehydrated faster.
We can last 3 weeks without eating but only 3 days without drinking! In case of a big problem, water must be a priority: save there or look for a supply point. Even in the event of a very large problem NEVER DRINK seawater as this will block the kidneys. Also avoid untreated standing water if you don’t want to get dysentery. Consumption of unmelted snow is also prohibited, it could cause “burning” in the mouth and diarrhea – if you have the choice melt the snow in a bottle under your clothes but not in direct contact with your skin.
Water stock
Several cases arise for you in terms of supplies and the quantity to take:
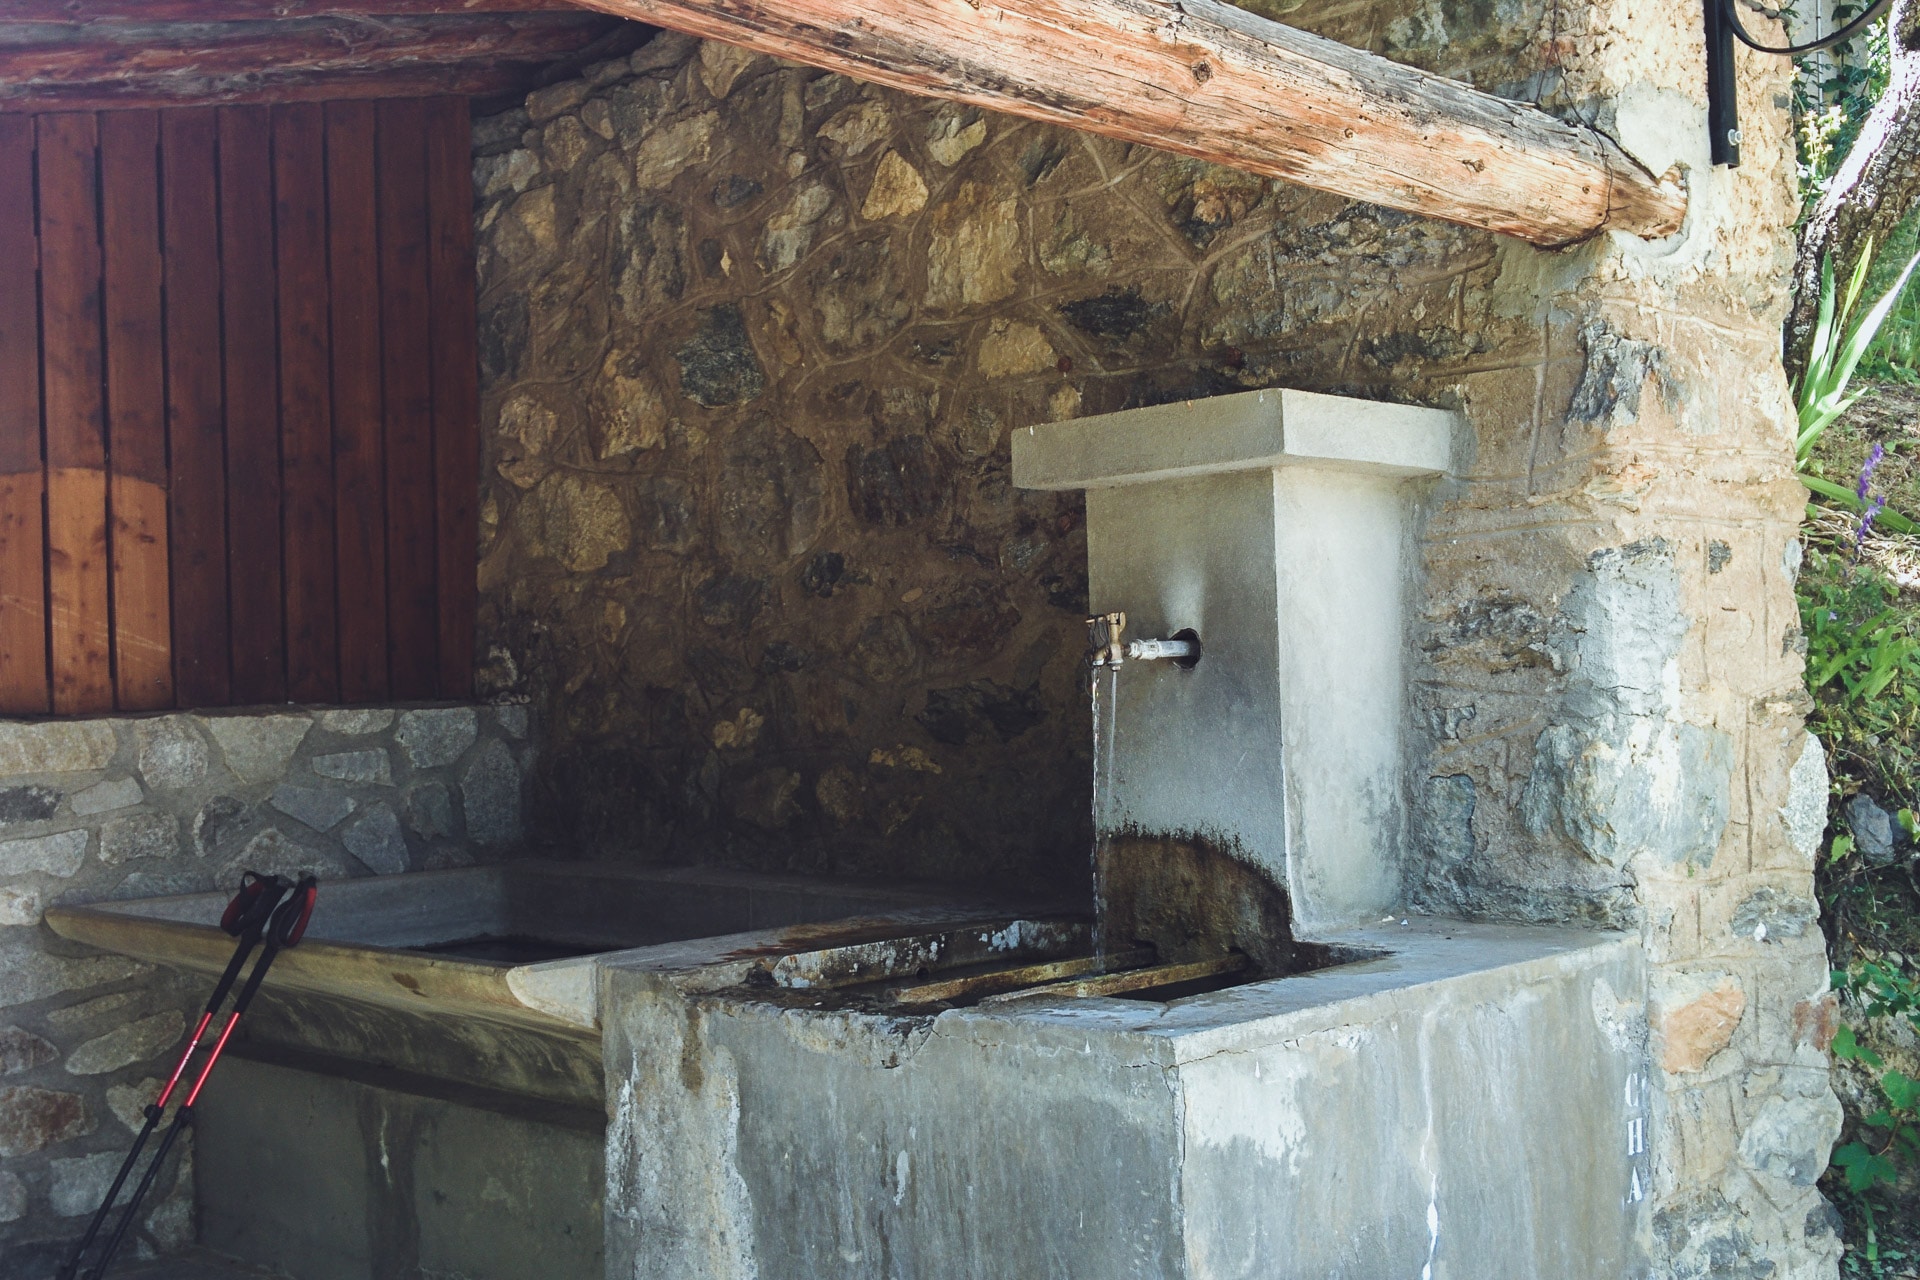
- Abundant sources of drinking water : in the case of a hike during which you will pass by many supply points (villages, refuges, fountains, …) you can limit the amount of water to take in the bag. A 1.5L bottle may suffice.
- Abundant sources of non-potable water : in the case of a long trek, you may not pass a lot of villages, but there are good chances of crossing rivers, lakes or even springs. However, this water is to be considered doubtful. It is then necessary to have a “clean” water stock (1.5L for example) and another stock being cleaned. So with 2 bottles you can rotate between clean water and water during cleaning.
- Few sources : some areas, even in France, are poor in water sources. Take as an example the Vercors in which there are only a few sources that do not always have a high flow. It is therefore necessary to plan your water management well and take more than usual. During my Crossing of the Vercors, we each had 4L of water permanently with us and this in order to be able to meet our water needs in the evening at the bivouac. It’s heavy but we had no choice. Again, proper preparation will help you avoid running out of water too quickly
As for the container there are today a multitude of solutions. I will discuss the main ones here. The advice I give is completely personal and I think there is no quick fix, it’s up to you to define what suits you best:
- The metallic gourd : the good old metallic gourd. Relatively solid, it has the defect of being fairly heavy. Some give a taste to water but this is less true for recent gourds. Attention in very cold environment the metal being a good conductor of heat, the water will freeze there faster and you risk sticking your fingers on it.
- The plastic bottle : “Nalgene” bottles are popular at the moment. Their wide neck is practical, plastic is not supposed to give taste to water. However, I find these gourds a little heavy and cumbersome when they are empty.
- The water bag : these plastic food bags are practical: light and easily foldable once empty, they slip into the bag during the day and allow you to drink thanks to a tube that is always close at hand. It is very effective for hydrating continuously. I see two faults with this solution: we do not follow what is left in stock and these pockets have a tendency to give a taste to water. Favor “good brands” to avoid this last point. In addition, prefer a pocket with a large opening for filling that will make your life easier.
- The plastic water bottle : this is my favorite solution. The good old water bottle is solid, light, it does not taste water and is easily foldable and very economical. Only qualities! I usually take them from 1L so I know exactly what is left and the water treatment is easier (see below). If you don’t want to spend money on any of the above solutions, the bottle will be perfect.
- Bonus: during a bivouac you may need “large” amounts of water. There are kinds of collapsible fools or large water bags to create a good stock. It can be practical. However, the most comfortable is to bivouac not far from a water source.
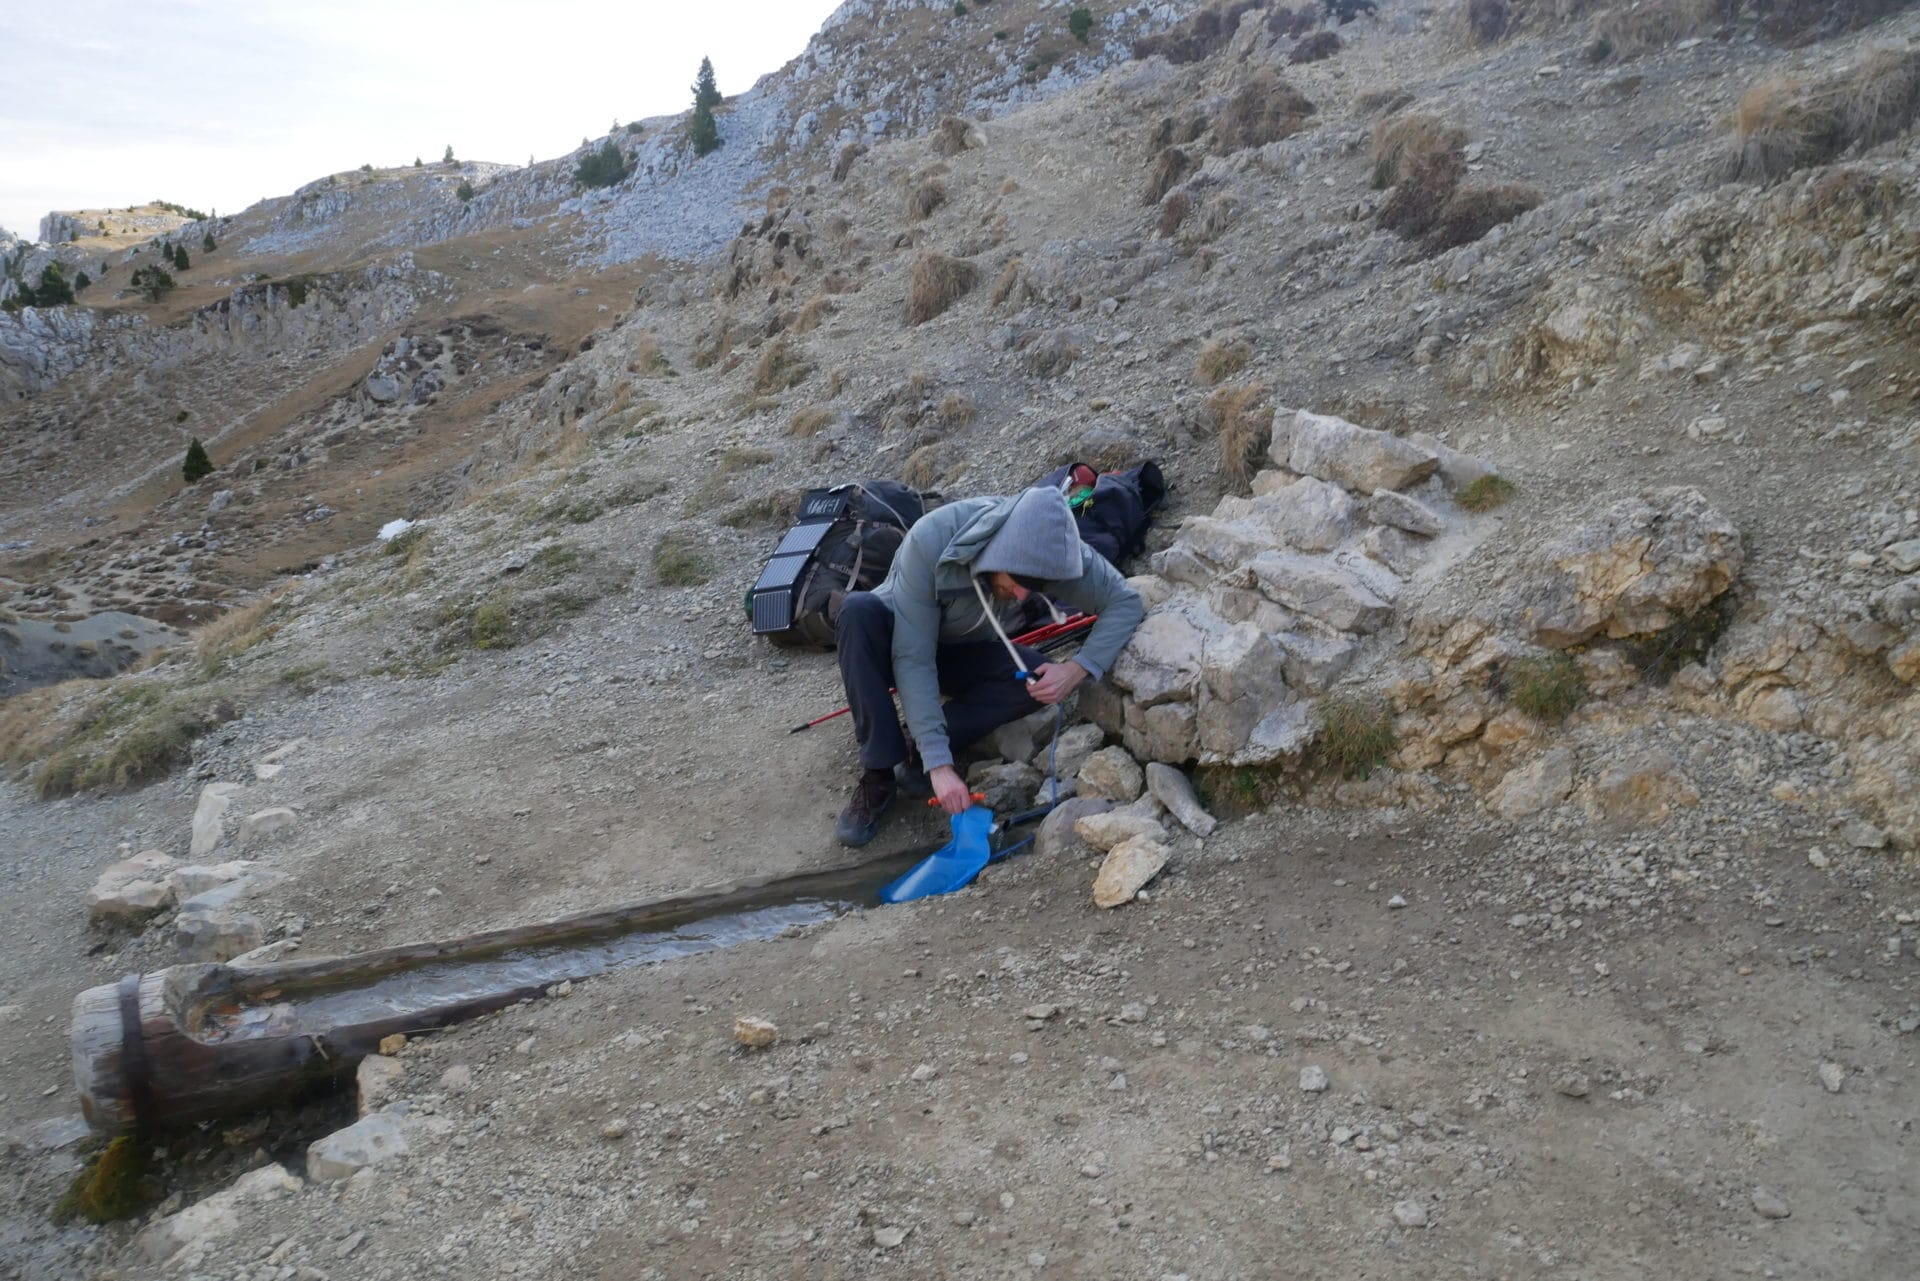
Replenishment and sanitation
The bottles are empty, it’s time to fill up. But it is a matter of being careful, indeed our bodies are used to perfectly clean water, so we are particularly fragile at this level. It is therefore a matter of choosing your water well and treating it if necessary.
In all cases and if possible, favor sources of drinking water. In the mountains you come across refuges, villages or small fountains. Abroad tap water is not always drinkable for us, in case of doubt, assume that it will be necessary to treat the water or buy bottled water.
In the middle of the wilderness, there are many sources of water: rivers, torrents, lakes, springs, … Here are some tips for choosing the right water:
- Always take clear water: the suspensions carry pathogens or pollutants
- Draw non-stagnant water: the more flow, the better. This prevents bacteria from growing and the water is well brewed.
- Do not draw water downstream of a village or a human settlement or a concentration of livestock: these waters are generally soiled because there is a quantity of organic waste or not.
- Quickly check that there are no dead animals upstream: a dead animal in the river will get dirty and can be dangerous.
With these few rules you should get good quality basic water. But we cannot take the risk of having gastric problems or catching a parasite while hiking, we will treat the water. There are several techniques for this:
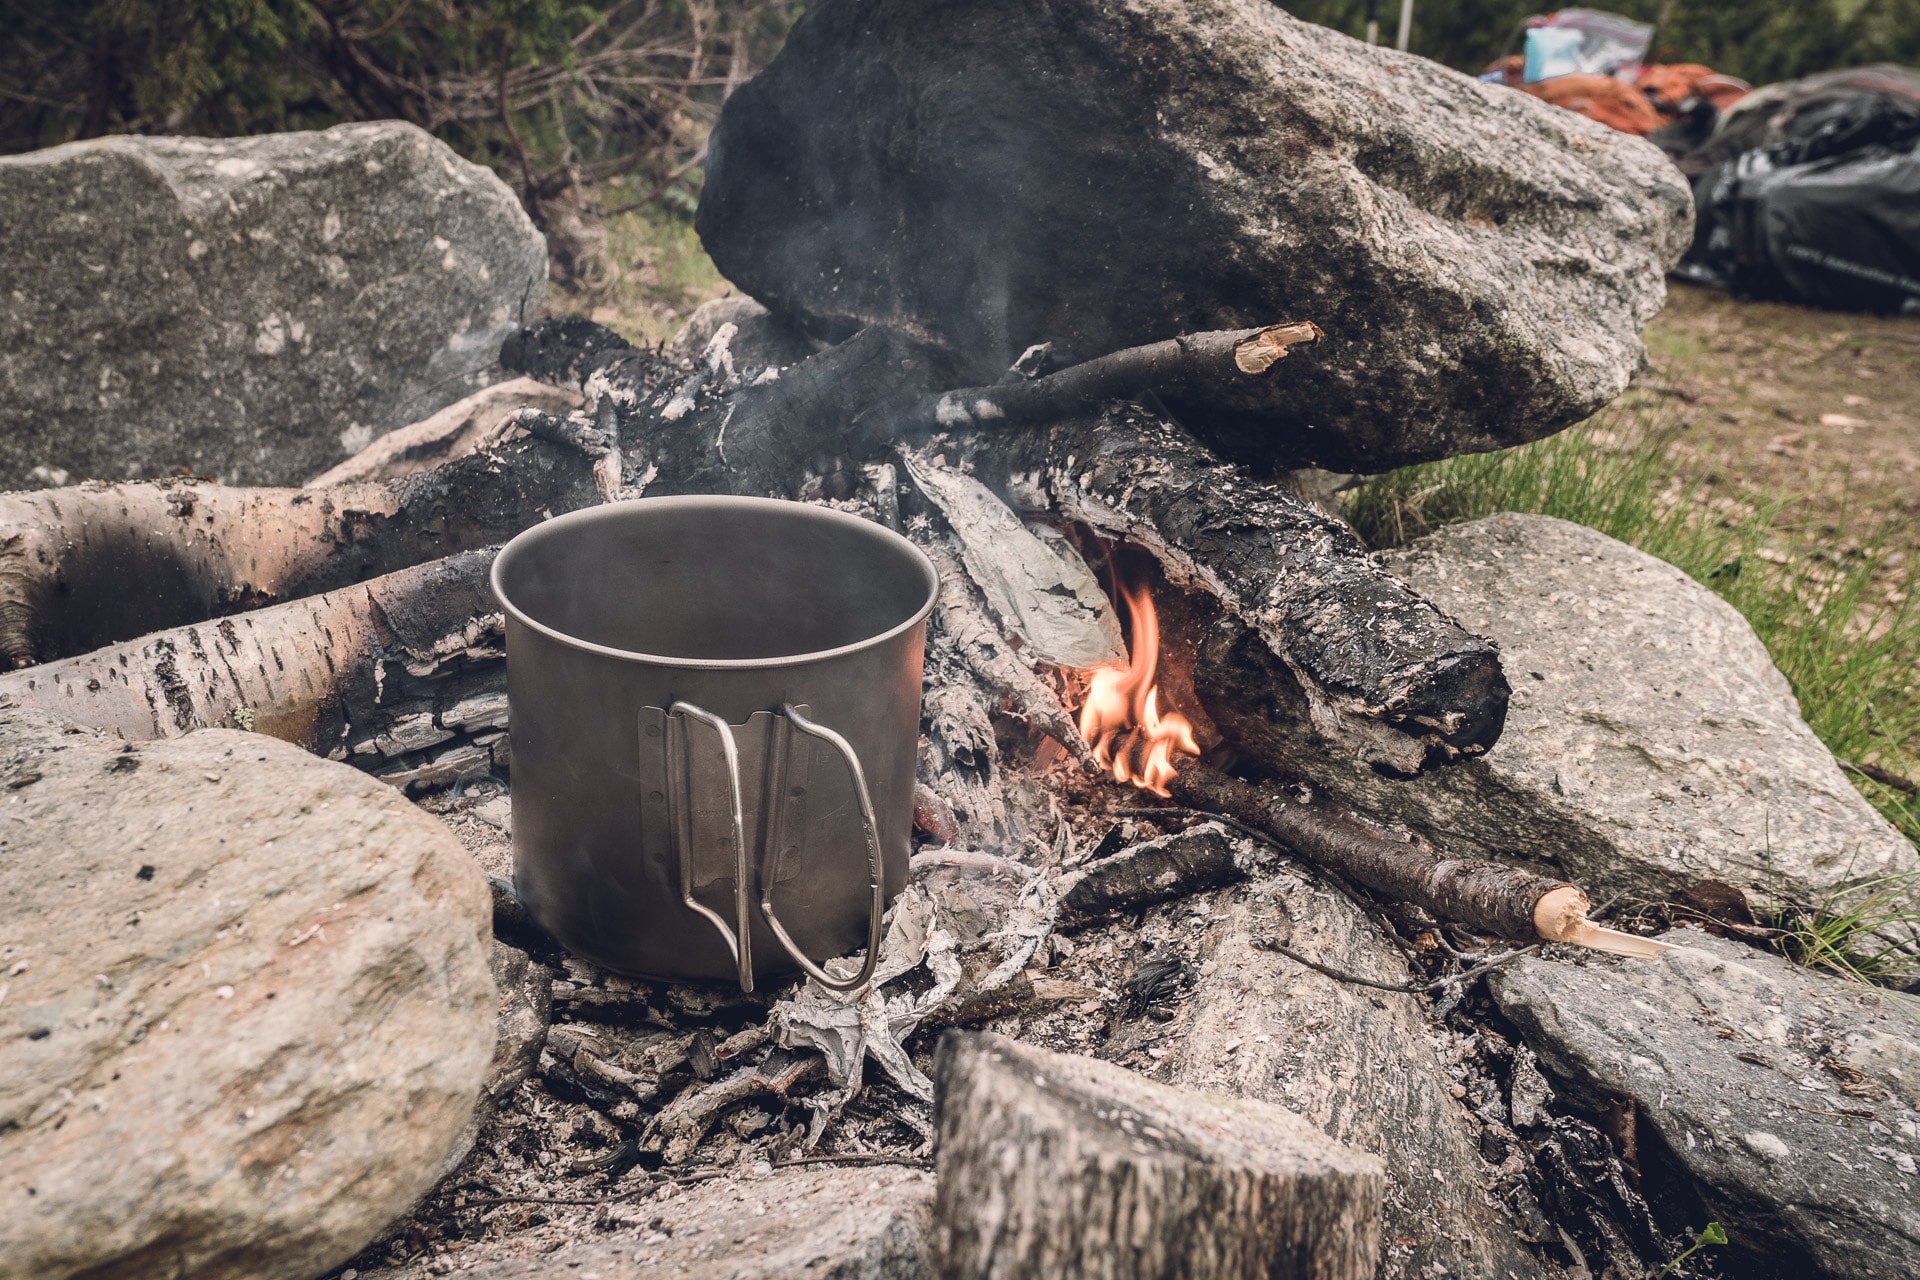
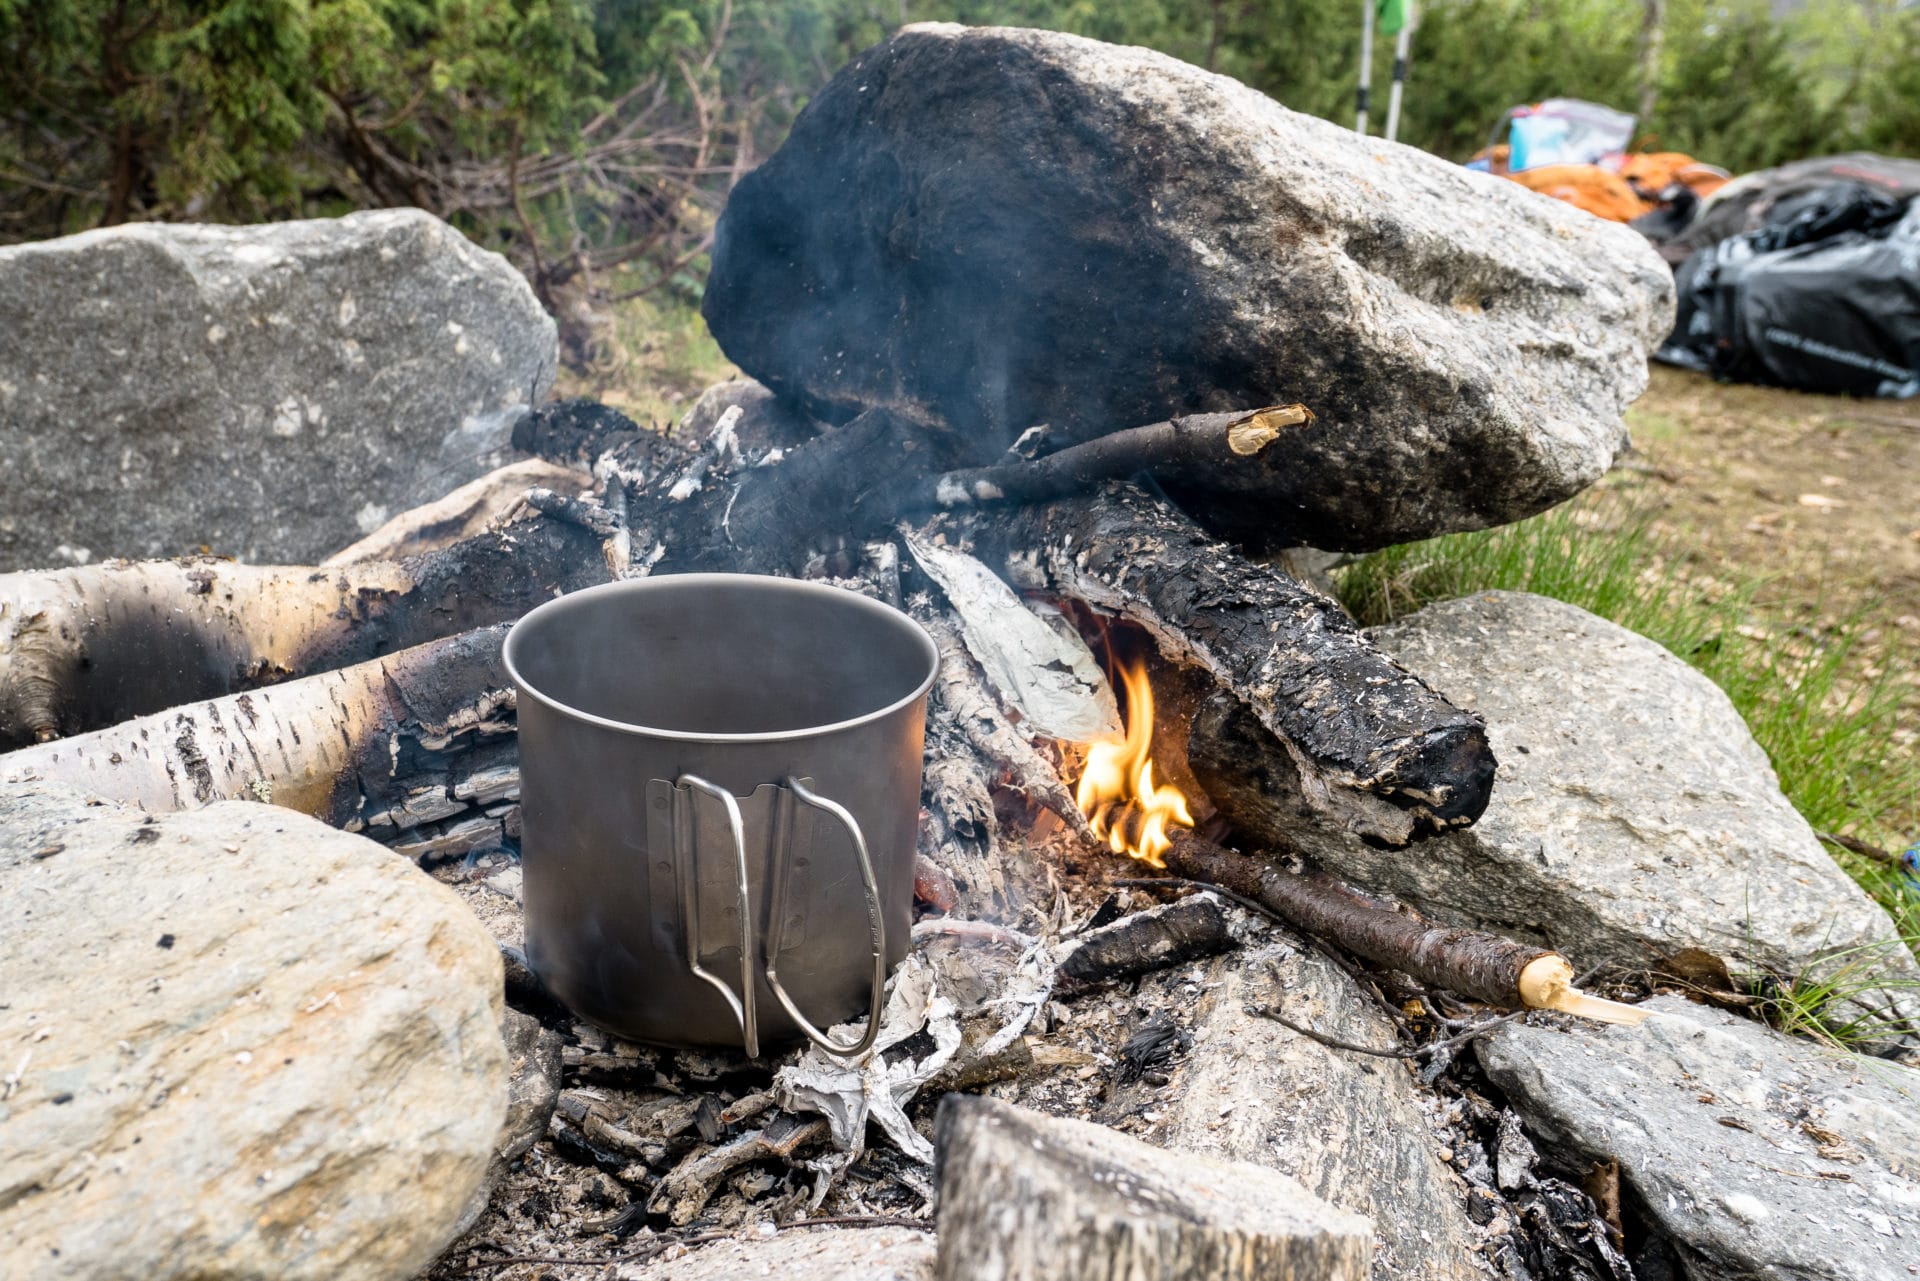
- Boiling: this is the simplest and oldest technique for sanitizing water. Boil for at least 5 min. However, this technique has several shortcomings: it takes a little time, you need equipment (meals, stove, …) and it consumes fuel. For my part I use this technique at the bivouac for cooking water.
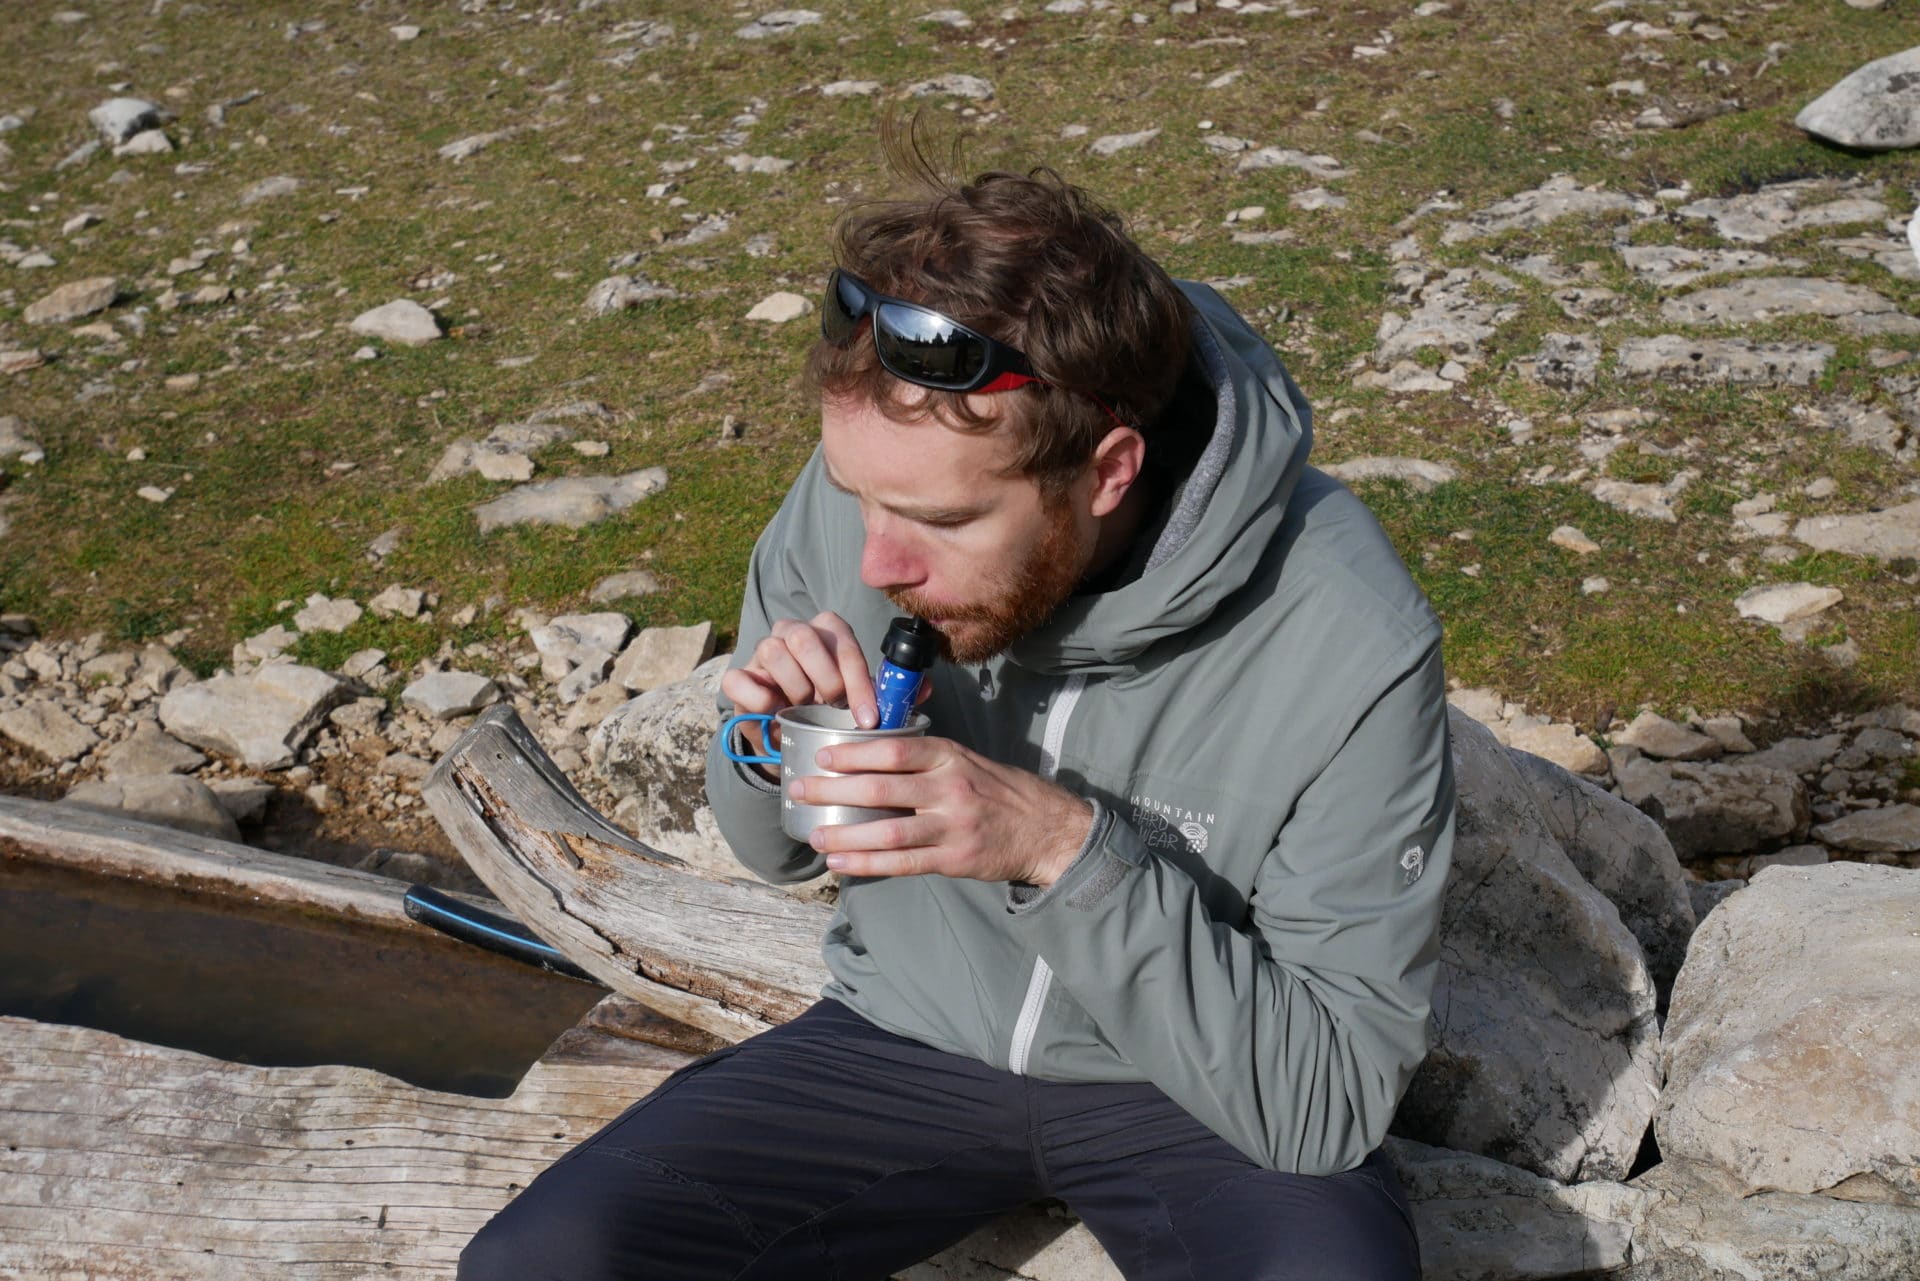
- Chemical treatment: There are many chemical treatment solutions for hiking water today. The best known is Micropur tablets. There are different types but generally they are tablets based on chlorine (or derivatives) or silver that will kill bacteria and amoebas and help keep the water clean over time. The action on viruses is longer and less effective. It is a safe and effective solution if the base water is clear and the product has plenty of time to act (1 to 2 hours). It is my preferred solution during long treks. I always have a bottle of water being treated and an already clean one. Apart from the necessary duration of treatment, the other defect is that it can give a little chlorinated taste to the water but it was never annoying for my part (especially with cold water).
- Filters: there are many filters or water treatment straws on the market. These solutions are effective against bacteria and amoebas but less against viruses that are too small to be filtered. The filters are generally based on activated carbon cartridges (with a limited lifespan) or on fiberglass meshes for example. These items are very convenient for drinking clean water immediately. They can even be adapted to the water bags or the necks of certain bottles. It is generally more expensive than lozenges but more water can be treated over time.
In Sweden during our trek along the Kungsleden, a guard told us that the water was generally drinkable everywhere as soon as there was a strong flow or that there was more than 1m deep. The Sami do not take bottles with them and drink directly from the river with a small cup. I think it can be applied to all the really remote regions, where man imposes his footprint less.
Winter polar expeditions pose other problems. In this environment water is present absolutely everywhere but in the form of snow. It must therefore be melted before consumption. This requires a lot of fuel, so we must provide this additional consumption in our supply (count 15-20g of fuel to heat 1L of water). Once this water has melted, continue to heat it and store it in thermos otherwise it will freeze and you will have no water during the day.

Conclusions
These few tips will allow you to better manage your water and above all to treat it well. Once these techniques are acquired, we can easily apply them which gives us a great autonomy in trekking because we can find our water anywhere and thus always go further, always longer.
French National and Regional Parks
The current ten French National Parks cover 54 409km² of unspoiled nature. On ground or at sea, these places are protecting the environment, biodiversity but also the local culture. In addition to this parks, you will also find regional protected areas, the Parcs Naturels Régionaux. This parks covers 15% of the french territory and are absolutely beautiful to.
I wish to present you a sum up of this wonderful places and I hope, giving you the envy to visit them.
- Creation : 23 March 1973
- Area : 92 000ha
- Environment : Mountains
- Wildlife : Wolf, Mountain Goats, Marmot, Vulture, Eagle ...
- Bivouac : Allowes from 7pm to 9am if you are 1h far from the limits of the park
- Main hikes : GR54, Tour Muzelle-Lauvitel, Tour du Vieux Chaillol, a lot of small hike and a paradise for Mountaineering
- Link : http://www.ecrins-parcnational.fr/
Amazing jewel of the Alps, the Ecrins Nat. Park hosts some of the most beautiful landscapes of France. Nature is rich as the human culture. The choice among hiking paths, mountaineering routes or any other outdoor sport are almost infinite.
I strongly advice you to discover the GR54 hiking path which make you discovering most of the landscapes and places of the park along its 10 days of wild trekking.
- Creation : 18 August 1979
- Area : 68 000ha
- Environment : Mountain
- Wildlife : Wolf, Mountain Goats, Marmot, birdlife,...
- Bivouac : Allowed from 7pm to 9am if you are a 1h far from the park boundaries
- Main hikes : GR5, Grande Traversée du Mercantour, Vallée de Merveilles
- Link : http://www.mercantour.eu/
Mercantour is the kingdom of the Wolves in France. It is also well know for its prehistoric engraving in “La Vallée des Merveilles”. At the Italian border, the park offers a lot of hiking paths. The biodiversity is rich with 58 species of mammals and 2000 species of plant. Mercantour is a beautiful place to discover.
- Creation : 6 July 1963
- Area : 53 300ha
- Environment : Mountains
- Wildlife : Mountain Goats, marmot, birdlife, ...
- Bivouac : forbidden in the park except close to the refuges of la Dent Parrachée, du Carro, de la Glière, du Col du Palet, de la Valette, des Lacs Merlets, de l'Arpont, du Fond des Fours
- Main hiking path : GR®5, Via Alpina, Tour de la Grande Casse, Tour des Glaciers de la Vanoise
- Link : http://www.vanoise-parcnational.fr/fr
If you want to see wildlife you must go to la Vanoise. The Via Alpina and the GR5 offers very beautiful path to long hike. If you wish to day hike you will also find plenty of possibilities. This park is a heaven to walk and all the refuge it owns will allow you to hike lightly.
- Creation : 2 September 1970
- Area : 93 500ha
- Environment : Mediterranean pastoralism
- Wildlife : Otter, beavern, stag, eagle, ...
- Bivouac : Allowed from 7pm to 9am an hour far from the park's boundaries
- Main hikes : Chemin de Stevenson, le Chemin Urbain V, Chemin de Guilhem,...
- Link : http://www.cevennes-parcnational.fr
Biggest park of metropolitan France, Cévennes offers beautiful landscapes. The well-known “Chemin e Stevenson” will bring you toward forests, plains and lonely tableland.
- Creation : 23 March 1967
- Area : 45 700ha
- Environment : Mountains
- Wildlife :Mountain goats, Marmot, Brown bear, Vulture, Eagle, ...
- Bivouac : Allow from 7pm to 9am an hour away from the park boundaries
- Main hikes : GR10, HRP, Traversée Cauteret Gavarnie...
- Link : http://www.pyrenees-parcnational.fr/
The Pyrenean mountain range and its 450km offers a wonderful playground if you like hiking and trekking. The most courageous will leave for 40 days from the Atlantic ocean to the Mediterranean sea along the GR10 or the Pyrenean High Route. The National Park is located at the heart of the range, this is a perfect place to watch wildlife.
- Creation : 18 Avril 2012
- Area : 43500ha
- Environment : Sea and littoral
- Wildlife : Seabirds, Aquatic wildlife as dolphins, whales,...
- Bivouac : Forbidden
- Main hikes : GR51
- Link : http://www.calanques-parcnational.fr/
The Calanques National Park is an awesome place close to Marseille. It takes 30min to reach it by bus from the city center and here you are on absolutely magnificent coves with unreal blue water. There are many hikes to do there. If you like climbing it will be paradise for you as there are many many routes accessible almost all year.
- Creation : 14 Décembre 1963
- Area : 2950ha seaside + 1671ha on ground
- Environment : Sea and Littoral
- Wildlife : Dolphin, Whales, Sperm-whales, ...
- Bivouac : Forbidden
- Main activities : hiking, diving, snorkeling
- Link : http://www.portcros-parcnational.fr/fr
A foot on water, the other one on ground, the National Park of Port-Cros is sitting on the south of France sunlight. You can discover this park on foot or on water the both offering wonderful beauty.
- Creation : 5 March 2007
- Area : 105 447ha
- Environment : Plains, Mountains, Volcanism
- Wildlife : Mainly local birds
- Bivouac : Tolerated
- Main hikes : GR-R1, GR-R2, GR-R3, Climbinf of the Piton des Neiges, Hiking in the Piton de la Fournaire caldera, a LOT of short hikes.
- Link : http://www.reunion-parcnational.fr
Réunion Island is an amazing playground ! Just speaking about hiking, there are kilometers and kilometers of path, enough to hike during a lifespan. The GR-R2 hiking path is one of the most beautiful because it crosses most of the Reunion’s landscapes and climates. The visit of Mafate “Circus” is amazing. You can also easily climb on top of the Indian Ocean with the ascension on the Piton des Neiges and its 3070m. In addition to hiking, you can practice almost all the outdoor sports there and La Réunion has also a very rich culture. If you don’t know this island you really should visit it you will be enchanted.
- Creation : 27 February 2007
- Area : 2 millions d'ha !
- Environment : Tropical forest
- Wildlife : Jaguar, Giant otter, snakes...
- Bivouac : Forbidden
- Link : http://www.parc-amazonien-guyane.fr/
With its 2 millions hectares of area, the Amazonian Park of French Guyana is the biggest park in France. Proctecting a huge area with an amazing biodiversity, the park is only accessible by plan or by boat. One of the main mission of this place is to fight against illegal gold extraction. The park is also protecting human cultures as the Teko, the Wayapi or the Apalaï.
- Creation : 20 February 1989
- Area : 3300ha seaside et 18800 ha on ground
- Environment : marine and tropical forest
- Wildlife : mongoose, dolphins, sperm-whale, turtles,...
- Bivouac : Allow an hour far from the park boudaries
- Main hikes : GR G1, Climbing of the Soufrière Volcano, ...
- Link : http://www.guadeloupe-parcnational.fr
The National Park of Guadeloupe is a marine park and a ground one. It has a strong endemic population on both sides. Hiking in this park will make you discovering volcanism but also tropical forest.
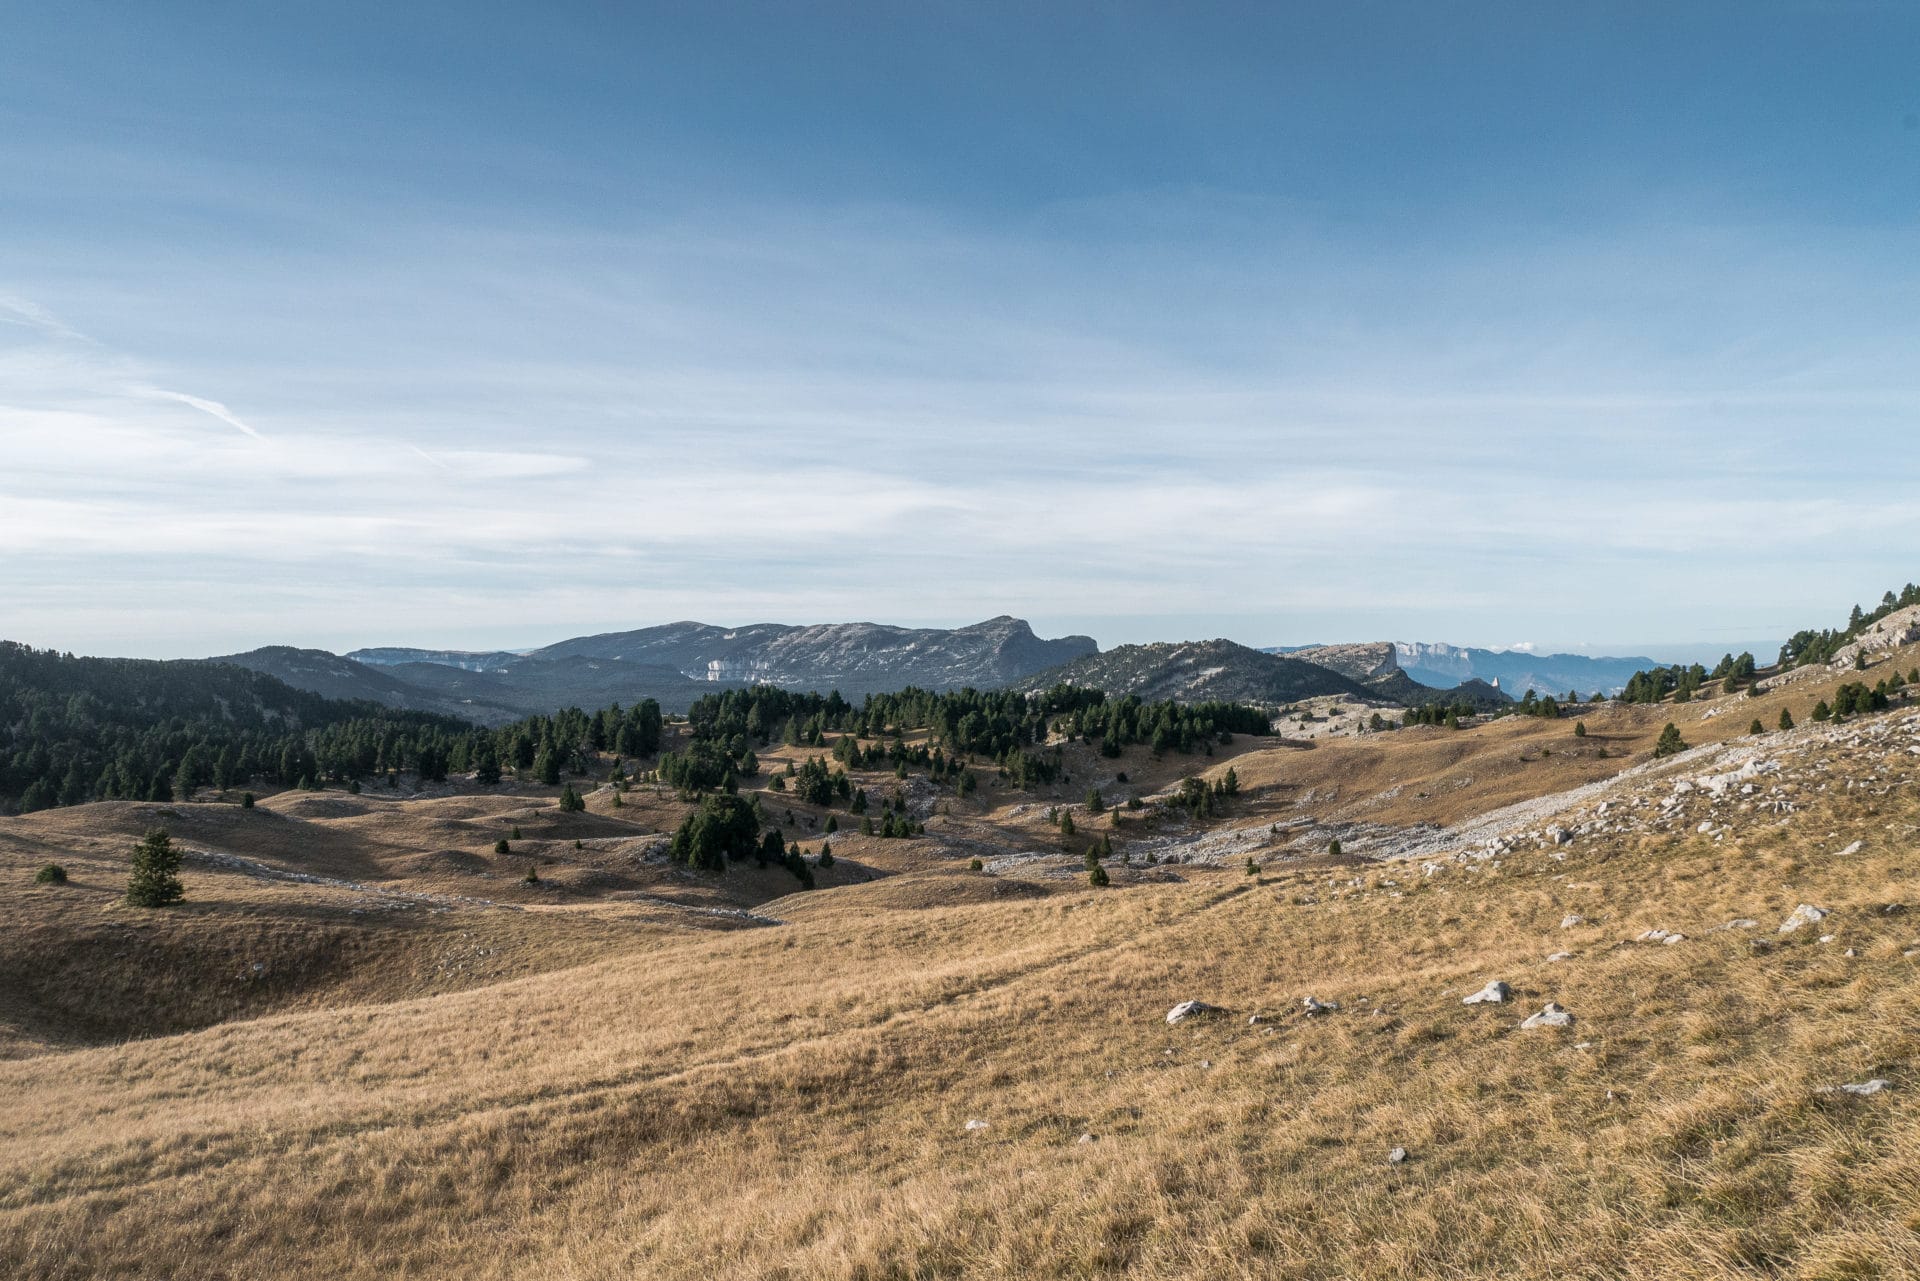
- Creation : 16 october 1970
- Area : 206 208ha
- Environement : Tableland, forest, pastoralism
- Wildlife : Mountain goats, wolf, stag,...
- Bivouac : Allowed from 5pm to 9pm
- Main hikes : Grande Traversée du Vercors (été ou hiver)
- Link : http://parc-du-vercors.fr
The Hauts Plateaux du Vercors are an exceptional place. I had the chance to discover them on the occasion of my Traversée du Vercors. The isolation and the beauty of the landscapes accompany the walker. Water is a rare commodity that needs to be learned to manage and save. Place of French resistance during WWII you will find some traces of this sad past. The small towns of Corrençon-en-Vercors and Villard de Lans are quite nice in any case and represent a good base camp if you want to hike in summer and winter.
- Creation : 31 January 1977
- Area : 61474ha
- Environment : Mountains
- Wildlife : Mountain goat, ibex, wolf, Marmot, raptors...
- Bivouac : allowed from sunset to dawn
- Main hike : Tour du Queyras GR58
- Link : http://www.pnr-queyras.fr/
The Queyras is a beautiful park on the Italian border. Its location makes it less popular than others and that’s good! Few people are met on the paths and one can enjoy the surrounding nature. The GR58 will take you around the massif and you will discover the main landscapes that can be found there.
- Creation : 12 May 1972
- Area : 375 000ha
- Environment : Mountains and littoral
- Wildlife: Ibex, wild pig, Donkey, fox,...
- Bivouac : Allow from sunset to sunrise expect along the GR20 (allowed close to some refuges - not free)
- Main hikes : GR20, Mare a mare, Mare è Monti,...
- Link : http://www.pnr.corsica/
The Island of beauty is aptly named! The mountains feet in the water, an exceptional place for hiking. The legendary GR20 is the most worthy representative, but in high season it’s a bit of a highway. There are, of course, many other paths to explore in order to discover this beautiful country with rich culture and heritage.
- Creation : 16 October 1970
- Area : 290 000ha
- Environment : Plains, Forests, lakes
- Wildlife : Cervidae, Fox, Wild boar, Hermine, Otter, ...
- Bivouac : allowed (to be confirmed)
- Main hikes : GR13, GRP
- Link : http://www.parcdumorvan.org/
The Morvan is an area rich but fragile. This granite massif is covered with groves, forests but also with a vast aquatic system. Hiking can discover this beautiful region through the crossing of the Morvan (GR13) from Vézelay to Autun. A region to discover just 2h30 from Paris.
- Creation : 3 March 1997
- Area : 188 000ha
- Environment: Pastoral, Agricultural, Foresters, Canyon
- Wildlife : Chamois, Vulture, Deer, Wild boar
- Bivouac : Wild camping prohibited in the Canyons - no details on the bivouac (inquire with the park house)
- Main hikes : Sentier de l'Imbut, GR4
- Link : http://parcduverdon.fr/
The Verdon is well known for its canyon. High place for kayaking and climbing, summer attendance is sometimes difficult to reconcile with the preservation of the environment. Still, these canyons, the highest in Europe, are beautiful and are worth visiting. But the Verdon is also the Plateau du Valensole, the Artuby, the hills of Haut Var, … as many diverse landscapes to discover and explore on foot.
- Creation : 28 March 2012
- Area : 88 900ha
- Environment : Buttress of the Alps, Provençal
- Wildlife : Chamois, Marmot, ...
- Bivouac : Bivouac tolerated from sunset to sunrise (with agreement of the landlord)
- Main hikes : GR4, GR51, GR510
- Link : http://www.pnr-prealpesdazur.fr/
Halfway between sea and mountains, the Regional Natural Park of the Alps is located in the foothills of the Alps. We will find in the landscapes and wildlife, mountain and Mediterranean influences. The flora is of an extreme diversity so that one finds on this territory a third of the French flora. You will be able to discover the Park thanks to beautiful GR like the GR4. Speleology enthusiasts will not be left out because the Prealps hide 140km of accessible underground galleries.
- Creation : 30 September 1969
- Area : 125 000ha
- Environment:Littoral, Islands, plains
- Wildlife : a lot of birds
- Bivouac : Forbidden almost everywhere
- Main hikes : Tour des Monts d'Arrée, Sentier des Douaniers
- Link : http://www.pnr-prealpesdazur.fr/
Second Natural Park to have been created in France, the Regional Natural Park of Armorique offers a surprising diversity of landscapes. Indeed the park covers the islands of the Iroise Sea (Ouessant, Molène, …), the Crozon Peninsula and the Arrée Mountains. You will discover coastal environments typical of Bretagne but also the remains of an old mountain chain so the summit culminates at 385m nowadays with Roc’h Ruz. The “Customs Route” – le Chemin des Douaniers (GR34) will take you to the nearest coastal strip. For my part I have a particular affection for the surroundings of Camaret and its superb cliffs.
For more informations, you will find below the link to the excellent website of the French National Parks. There you can have more details about the places, the missions of the parks, … : http://www.parcsnationaux.fr/fr
The National Parks are environmental and cutural jewels to protect. Please be extremly careful to take care of these places. Here, some basic rules to apply in most of them :
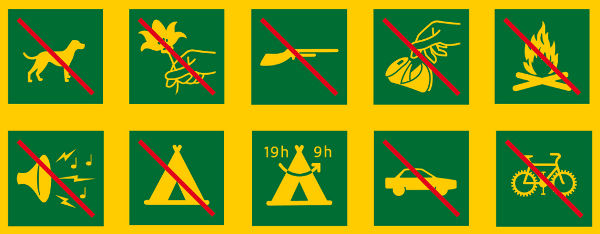
Map of the French National Parks and a selection of Regional Parks
Equipment lists
One of the biggest questions to ask is: what should I take in my backpack? This will obviously depend on the season, the “commitment” of the hike, its duration. I therefore suggest here lists depending on the hike to help you in this choice. Again these lists will not necessarily reflect everyone’s opinion, some will take more, others less. The idea is above all to give a basis with which you will get away.
I do not give advice on the number of items to take with you, especially for clothes. Just keep in mind that clothes require a lot of space especially in autonomy so you must not be too greedy. For my part, my philosophy is to have a set that I wear and another in reserve (except the pants). I wash my clothes as soon as I can.
Try to travel as lightly as possible, you will gain comfort, speed, but also the ability to take more food and therefore leave longer, farther.
Do not hesitate to share your opinion, tips and advice!
Clothing - Plus d'infos
- Water and wind proof jacket : even in summer it can rain a lot or one can experience a thunderstorm. A rain protection is therefore mandatory. The jacket can be Gore-tex or just a K-way. Ponchos are a good solution to.
- Breathable top: It gets warm in summer and no one like to hike in a sweaty top. So choose breathable textile, it will also dry faster.
- Option - warm top: especially if you sleep in a shelter, it can get cold by night. Choose something light.
- Pants or short : of course it depend on your habits. For my part I chose a pant with removable legs. Choose breathable textile once again.
- Underwear : choose what you like but it should be soft and none irritating.
- Sock : Your socks are one of the main elements to pay special attention to because having blisters on both feet after 15min of walk spoils a little the day. In summer you need breathable socks that sweat away quickly. Wool (merino) is the best material for this in my opinion.
- Hat : Be careful with the sun! Wearing a cap or hat is more than advised in the summer.
- Shoes: The most important choice. Your feet are your way to move so you have to take care of them and therefore choose suitable shoes. Whether they are high or low (according to the tastes of each one) they must breathe.
Equipment
- Backpack : For a day do not exceed 35L (and still it is already a lot). Privileged bags with abdominal belt to relax your shoulders.
- Sunglasses : Very important especially in the mountains because UV are "more aggressive". Choose categories 3 or 4.
- Walking sticks : I am quite adept of the sticks even for a day hike but it really depends on everyone.
- Water supply : Take enough water for the day (or plan for refueling points). The water pocket (camel bags) allows to drink regularly without having to open its bag. For the gourd, I usually take a plastic bottle, it is light and solid.
- Liner : mandatory if you sleep in a shelter
- Orientation : Depending on your itinerary and your orientation skills, do not forget the map and the compass (even GPS but not necessarily useful for the day). However, it is only useful if you know how to use it. Fortunately the trails are very well indicated in general in France.
- Knife : a small knife is always convenient if only to cut the sausage from the lunch break.
- Headlamp : The headlamp does not take up space and can save you in case of serious delay on the schedule. It is also very useful at the shelter. The phone lamp can be handy too but you will have a busy hand and the battery holds less well ...
- Food : Do not forget the lunch snack and what to nibble during the hike.
Clothing
- Water and wind proof jacket : even in summer it can rain a lot or one can experience a thunderstorm. A rain protection is therefore mandatory. The jacket can be Gore-tex or just a K-way. Ponchos are a good solution to.
- Breathable top: It gets warm in summer and no one like to hike in a sweaty top. So choose breathable textile, it will also dry faster.
- Option - warm top: especially if you sleep in a shelter, it can get cold by night. Choose something light.
- Pants or short : of course it depend on your habits. For my part I chose a pant with removable legs. Choose breathable textile once again.
- Underwear : choose what you like but it should be soft and none irritating.
- Sock : Your socks are one of the main elements to pay special attention to because having blisters on both feet after 15min of walk spoils a little the day. In summer you need breathable socks that sweat away quickly. Wool (merino) is the best material for this in my opinion.
- Hat : Be careful with the sun! Wearing a cap or hat is more than advised in the summer.
- Shoes: The most important choice. Your feet are your way to move so you have to take care of them and therefore choose suitable shoes. Whether they are high or low (according to the tastes of each one) they must breathe.
- Gloves and cap : For certain treks especially in the mountains or in regions like Scandinavia, I systematically take gloves and caps for the evening or in case of sudden drop in temperatures; even in summer.
- Option - gaiters : The use of gaiters can be advised in wet and / or muddy terrain to protect the pants and to avoid the infiltration of water into the shoe.
Equipment
- Backpack : Its volume will depend on the duration of the trek and the "civilized" points encountered. In any case avoid large volumes to avoid filling them with useless items. I have a 65L which allows me to stand full autonomy 7 days alone (food included).
- Shelter : An extremely important element because it will be your "Home" for the duration of your trek. You have the choice between the tent, the tarp or even the over-bag for a beautiful starry night.
- Sleeping bag : Take with you the "good" bag, neither too hot nor too cold. In general I put my bag in a waterproof bag to have it always dry for the evening.
- Mattress: You have the choice between foam mattress, self-inflating or inflatable. The R-value is important to estimate the thermicity of the mattress (a R-value of 2.5 corresponds to a suitable mattress up to 0 ° C, the higher the R-value the more the mattress can be taken in the cold) .
- Option - Liner : Useful for not dirtying down too much.
- Stove: Gas, gasoline, alcohol or wood, there are different types, sizes and weights. Try it before leaving to not have bad surprises.
- Cooking stuffs: Depending on the number of people. Do not carry unnecessary utensils that will weigh heavily.
- Combustible : Suitable for your stove. Boil 1L of water at home before you leave and weigh the lost mass of the gas cartridge (for example) to estimate your need. For my part I go on 16g / L (with my stove and my cooking).
- Water supply : Allow about 2L of continuous water. The water pocket allows to drink regularly without having to open its bag. For the gourd, I usually take a plastic bottle all stupid, it is light and solid.
- Option - Micropur or filter : Provide pellets to decontaminate water or a filter. So you can drink water from virtually any stream. Just make sure the water you are drawing is clear and free of suspended particles.
- Orientation : Depending on your itinerary and orientation skills, do not forget the map and the compass to even see the GPS if you are traveling along an unmarked route. However, it is only useful if you know how to use it. Fortunately the trails are very well indicated in France, in general.
- Knife: A knife can be useful in many circumstances but a "Rambo" model is useless.
- Headlight : always useful on the evening or if you walk by night
- Sunglasses : Very important especially in the mountains because UV is "more aggressive". Choose categories 3 see 4.
- Walking Sticks : I am quite adept of the sticks especially if the bag is a bit heavy and there is a lot of uneven.
- Option - Solar Panel : If you leave away from any source of electricity for a long time, a small flexible solar panel can be useful to recharge phone, GPS or camera.
- Survival blanket : Very useful in case of problems but also to isolate the bottom of the tent (used as floor mats). Always have it in your bag.
- Kit "Bag end" : I often take a few small items such as a string (clothes rack or emergency laces), a sewing set (such as those found in hotels - very practical in case of tearing clothes), notebook, pen , ... little things that must be really useful and weigh nothing.
- Health kit : Go to the most useful : pills for headache or stomach. If there is an emergency : call the rescue !
- Towel : Small microfibre towel, for the bath, the toilet or to mop the tent for example.
- Food : To adapt according to the duration, the effort, ..
Clothing
- Waterproof jacket : Essential to protect oneself from external elements. The gore-tex is a good solution not to be soaked with sweat.
- Breathable top : It is necessary to avoid being wet in order not to be cold. A warm and breathable top is essential.
- Warm top : Privilege the polar during the effort and the down jacket in the evening if the temperatures are not too extreme otherwise to take down jackets adapted to the temperature.
- Pants : Choose a waterproof pant, preferably not to be wet by snow. I am not fan of polar lined pants, I prefer to add a tight underneath;
- Underwear : this will depend on you ... Especially favor the materials that do not irritate!
- Socks : Your socks are one of the main items to pay special attention to because a lot of the heat is lost by the feet and you have to keep them healthy. Choose merino socks adapted to the temperatures encountered.
- Cap or chapka: The majority of heat loss occurs through the head. It is therefore necessary to protect oneself effectively especially in the evening at the camp. So choose a warm hat or even a down filled chapka in extreme cold.
- Shoes : The most important choice. Your feet are your way to move so take care and keep them warm. Whatever they are they must breathe.
- Gloves : The centerpiece of the winter wardrobe if you do not want to lose finger tips. Take waterproof and windproof gloves appropriate to the temperature conditions encountered.
- Balaclava : In case of extreme cold or strong wind the use of a neck strap or even better a hood really helps to protect the face. The nose and cheeks tend to freeze, be careful!
Equipment
- Snow shoes or ski : To choose according to your preferences or your ability. Prefer the robust one and easy to repair.
- Backpack: Its volume will depend on the duration of the trek and the meeting points encountered. In any case avoid large volumes because they will quickly fill them with useless things. For my part I have a 65L which allows me to stand full autonomy 7 days alone (food included). However in winter the necessary material may need to use a:
- Pulka : On snow and in case of large volume transported, the pulka can be interesting because it allows to release the back of a heavy load.
- Shelter : This is an extremely important element because it will be your "Home" for the duration of your roaming especially in winter in case of a snow storm. Prefer a 4 seasons tent provided for this purpose. Do not hesitate to take one size bigger and a large apse for comfort.
- Sleeping bag : Take with you the "good" bag, that is to say adapted to the winter temperatures. In general I put my bag in a waterproof bag to have it always dry for the evening.
- Mattress : You have the choice between foam mattress, self-inflating or inflatable. The R-value is important to estimate the thermicity of the mattress (a R-value of 2.5 corresponds to a suitable mattress up to 0 ° C, the higher the R-value the more the mattress can be taken in the cold) .
- Option - Liner : Useful for not dirtying down too much.
- Stove: Gas, gasoline, alcohol or wood, there are different types, sizes and weights. Try it before leaving to not have bad surprises.
- Cooking stuffs: Depending on the number of people. Do not carry unnecessary utensils that will weigh heavily.
- Combustible : Suitable for your stove. Boil 1L of water at home before you leave and weigh the lost mass of the gas cartridge (for example) to estimate your need. For my part I go on 16g / L (with my stove and my cooking).
- Water supply : Allow about 2L of continuous water. The water pocket allows to drink regularly without having to open its bag. For the gourd, I usually take a plastic bottle all stupid, it is light and solid.
- Option - Micropur or filter : Provide pellets to decontaminate water or a filter. So you can drink water from virtually any stream. Just make sure the water you are drawing is clear and free of suspended particles.
- Orientation : Depending on your itinerary and orientation skills, do not forget the map and the compass to even see the GPS if you are traveling along an unmarked route. However, it is only useful if you know how to use it. Fortunately the trails are very well indicated in France, in general.
- Knife: A knife can be useful in many circumstances but a "Rambo" model is useless.
- Snow Shovel : Always practical. Do not choose a plastic but metal shovel.
- Headlight : Good in the evening in camp or if you walk sooner or later especially that the nights are long and the short days in winter.
- Sunglasses : Very important when everything is in snow. Choose categories 3 see 4.
- Ski Mask : More suitable than glasses in case of wind or storm. Choose one that breathes well.
- Option - Solar Panel : If you leave away from any source of electricity for a long time, a small flexible solar panel can be useful to recharge phone, GPS or camera. The advantage of this solution, however, is that of taking out replacement batteries or batteries.
- Survival blanket : Very useful in case of problems but also to isolate the bottom of the tent (used as floor mats). Always have it in your bag.
- Kit "Bag end" : I often take a few small items such as a string (clothes rack or emergency laces), a sewing set (such as those found in hotels - very practical in case of tearing clothes), notebook, pen , ... little things that must be really useful and weigh nothing.
- Health kit : Go to the most useful : pills for headache or stomach. If there is an emergency : call the rescue !
- Towel : Small microfibre towel, for the bath, the toilet or to mop the tent for example.
- Food : To adapt according to the duration, the effort, ...